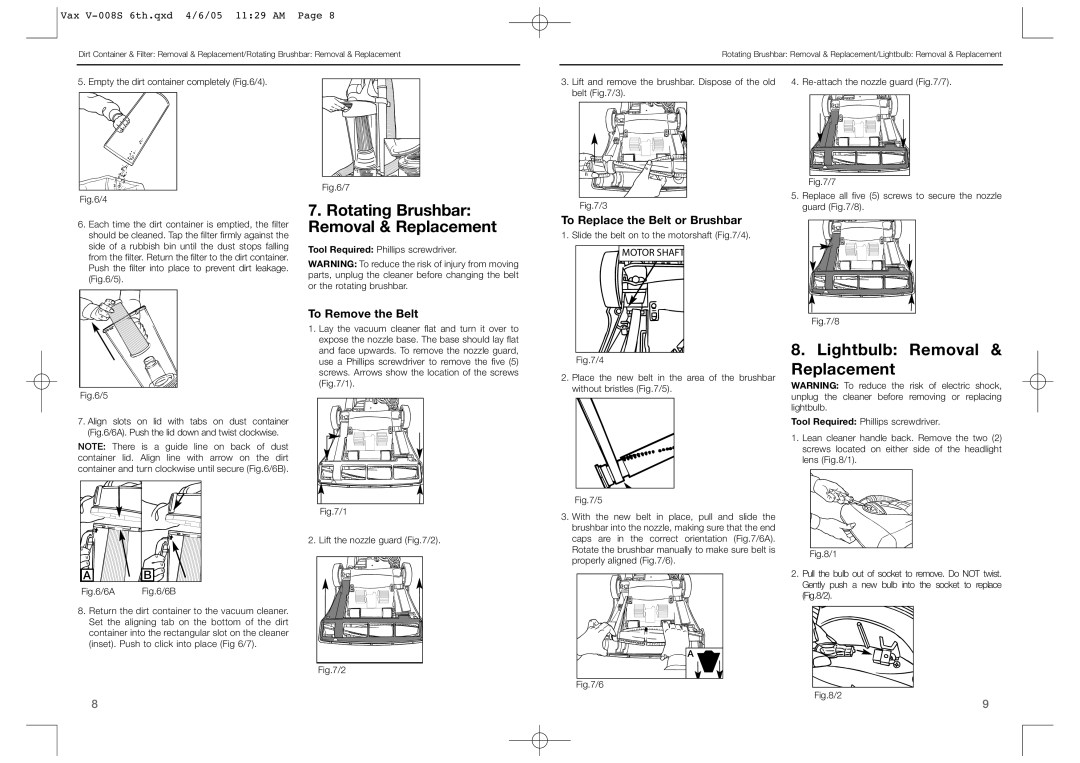
V-008 specifications
The Vax V-008 is an innovative vacuum cleaner that combines cutting-edge technology with user-friendly design, making it a top choice for households seeking efficiency and ease of use. One of its standout features is the powerful suction capability, driven by a high-performance motor that delivers consistent cleaning power across various surfaces. This makes the V-008 effective not only on carpets and rugs but also on hard floors, ensuring a thorough clean.Another key characteristic of the Vax V-008 is its lightweight and ergonomic design, enabling users to maneuver it effortlessly throughout the home. Weighing in at a manageable size, it allows for easy transport between rooms and makes stair cleaning a breeze. The vacuum's compact design also facilitates convenient storage, fitting seamlessly into closets or small spaces.
Innovation continues with the Vax V-008's advanced filtration system, which includes a HEPA filter that captures 99.97% of dust particles and allergens as small as 0.3 microns. This feature is especially beneficial for allergy sufferers or pet owners, as it helps to improve indoor air quality by reducing allergens and ensuring clean air is circulated back into the home.
The Vax V-008 is equipped with a variety of attachments and tools that enhance its versatility. With a crevice tool for tight spaces, an upholstery nozzle for furniture, and a dusting brush for delicate surfaces, it caters to all cleaning needs. The easy-to-change brush roll also allows for a switch between cleaning modes, making it suitable for different floor types.
For added convenience, the Vax V-008 features a large-capacity dust container that minimizes the frequency of emptying, thus maximizing cleaning time. This container is easy to remove and clean, promoting better hygiene as users can quickly dispose of collected dirt and debris.
Additionally, the Vax V-008 incorporates a user-friendly interface with intuitive controls, allowing for straightforward operation. Energy-efficient design elements contribute to reduced energy consumption, making it an eco-friendly choice for consumers.
In summary, the Vax V-008 sets itself apart with its powerful suction, lightweight design, advanced filtration, versatility in attachments, and convenient features. This vacuum cleaner is an excellent addition to any home, making cleaning a more efficient and enjoyable task.

