VEC012B specifications
The Vector VEC012B is a robust and versatile jump starter designed to provide reliable emergency power for a wide range of vehicles. This compact device stands out in the market with its impressive features, making it a favored choice for both casual users and automotive enthusiasts.One of the key features of the VEC012B is its powerful Lithium-Ion battery. This advanced battery technology ensures a high energy density, enabling the jump starter to deliver a substantial amount of power while maintaining a lightweight profile. With a peak current of 1,500 amps, the VEC012B can easily jump-start vehicles with larger engines, including trucks and SUVs, making it suitable for various applications.
In addition to its jump-starting capabilities, the Vector VEC012B is equipped with multiple USB ports, allowing users to charge mobile devices, tablets, and other electronics on the go. This versatility is perfect for outdoor adventures, ensuring that users remain connected while on the road.
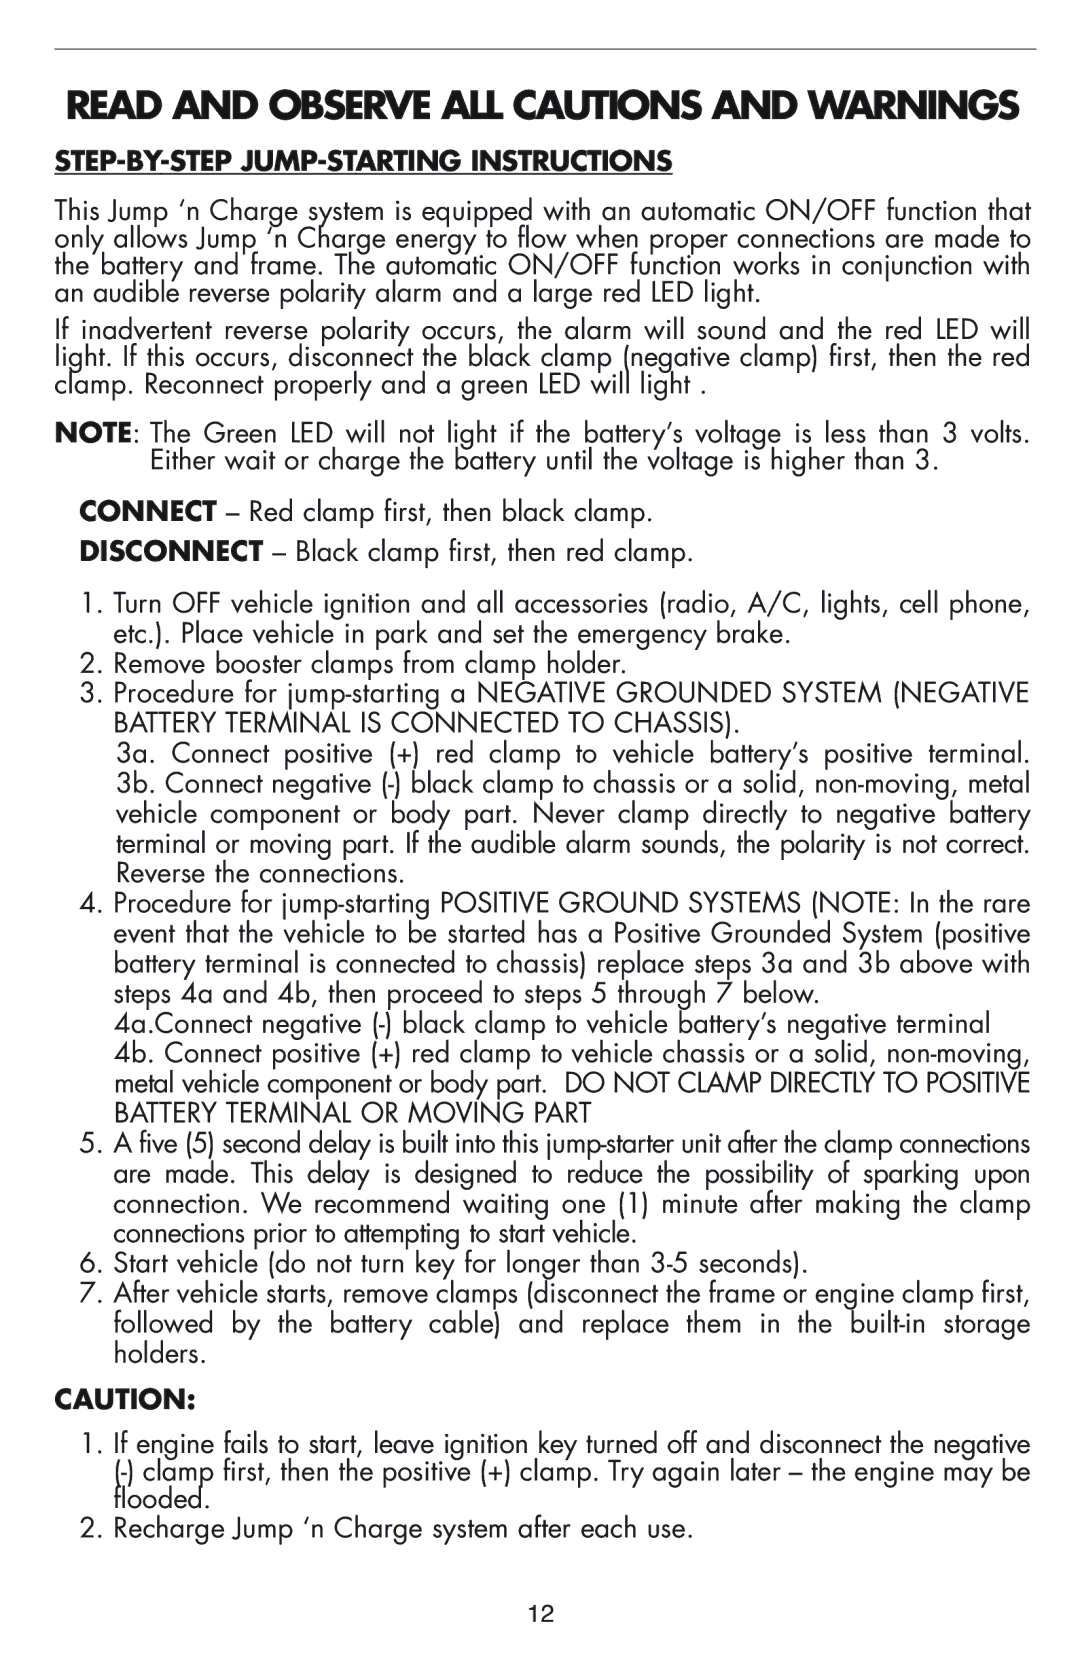
Safety is a top priority for the VEC012B, which comes with built-in protection features that prevent short circuits, overcharging, and reverse polarity connections. The clamp design is optimized for secure attachment to vehicle batteries, ensuring a safe and efficient jump-start experience.
The VEC012B also includes an integrated LED flashlight, providing added convenience during nighttime emergencies or in poorly lit conditions. The flashlight offers multiple modes, including a strobe function, which can be useful for signaling for assistance.
Durability is another strong point of the Vector VEC012B. Its rugged design is built to withstand harsh conditions, making it an ideal companion for off-road adventures or emergency situations. The compact size and included carry case enable easy transportation and storage, allowing users to keep the device handy in their vehicles without taking up much space.
Overall, the Vector VEC012B is an essential tool for anyone looking for a reliable jump starter. Its combination of high power output, multiple charging options, safety features, and portability makes it a standout product in the jump starter market, providing peace of mind for drivers everywhere. Whether for everyday use or emergency situations, the VEC012B is a must-have device for vehicle owners.