Instructions, OperationCAREand&DirectionsCLEANINGfor Use — continued
Replacing the Treatment Head
Note: The device monitors each treatment cycle to ensure that the Treatment Head is delivering a complete and effective dose. Once the LEDs have passed their guaranteed 100% output life where a complete treatment dose cannot be assured, the Treatment Head will expire and the device will cease to function until the Treatment Head is replaced. To purchase new Treatment Heads, contact Verilux Customer Service at
The number of treatment cycles remaining on a Treatment Head is displayed by both the device’s Information Display and on the Treatment Head Life Indicator (See page 19 for additional information.)
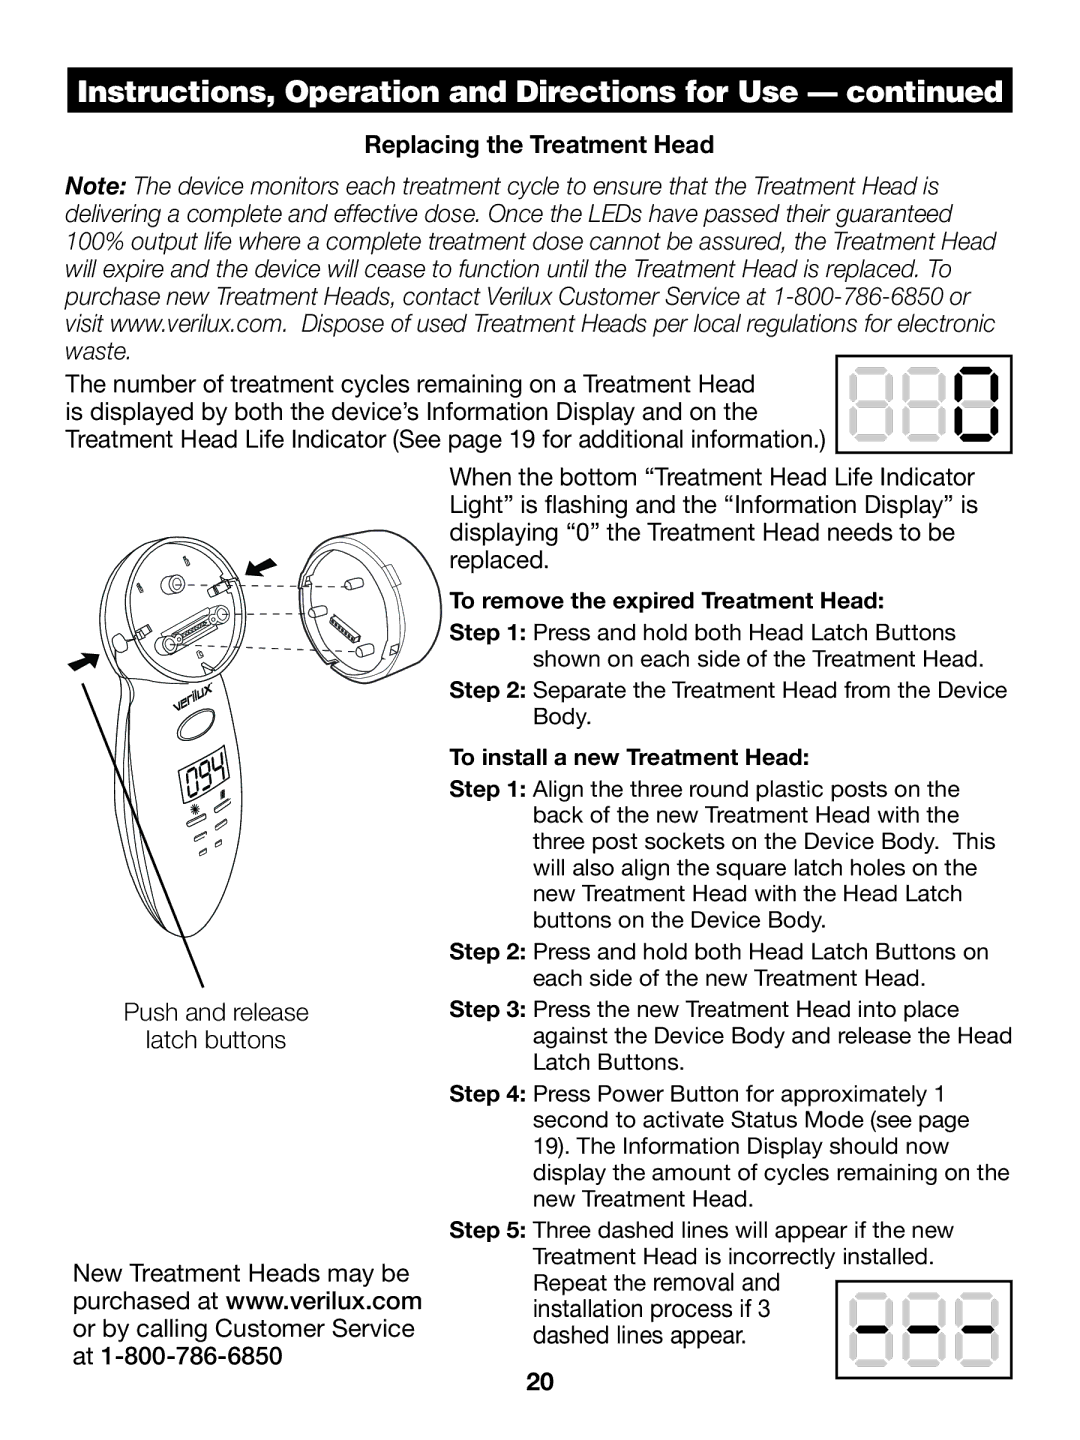
Push and release
latch buttons
New Treatment Heads may be purchased at www.verilux.com or by calling Customer Service at
When the bottom “Treatment Head Life Indicator Light” is flashing and the “Information Display” is displaying “0” the Treatment Head needs to be replaced.
To remove the expired Treatment Head:
Step 1: Press and hold both Head Latch Buttons shown on each side of the Treatment Head.
Step 2: Separate the Treatment Head from the Device Body.
To install a new Treatment Head:
Step 1: Align the three round plastic posts on the back of the new Treatment Head with the three post sockets on the Device Body. This will also align the square latch holes on the new Treatment Head with the Head Latch buttons on the Device Body.
Step 2: Press and hold both Head Latch Buttons on each side of the new Treatment Head.
Step 3: Press the new Treatment Head into place against the Device Body and release the Head Latch Buttons.
Step 4: Press Power Button for approximately 1 second to activate Status Mode (see page 19). The Information Display should now display the amount of cycles remaining on the new Treatment Head.
Step 5: Three dashed lines will appear if the new Treatment Head is incorrectly installed. Repeat the removal and
installation process if 3 dashed lines appear.
20