HOW TO CHANGE THE FADER UNIT
Note
Use a No. 1 Phillips screwdriver.
HOW TO REMOVE THE TOP PANEL
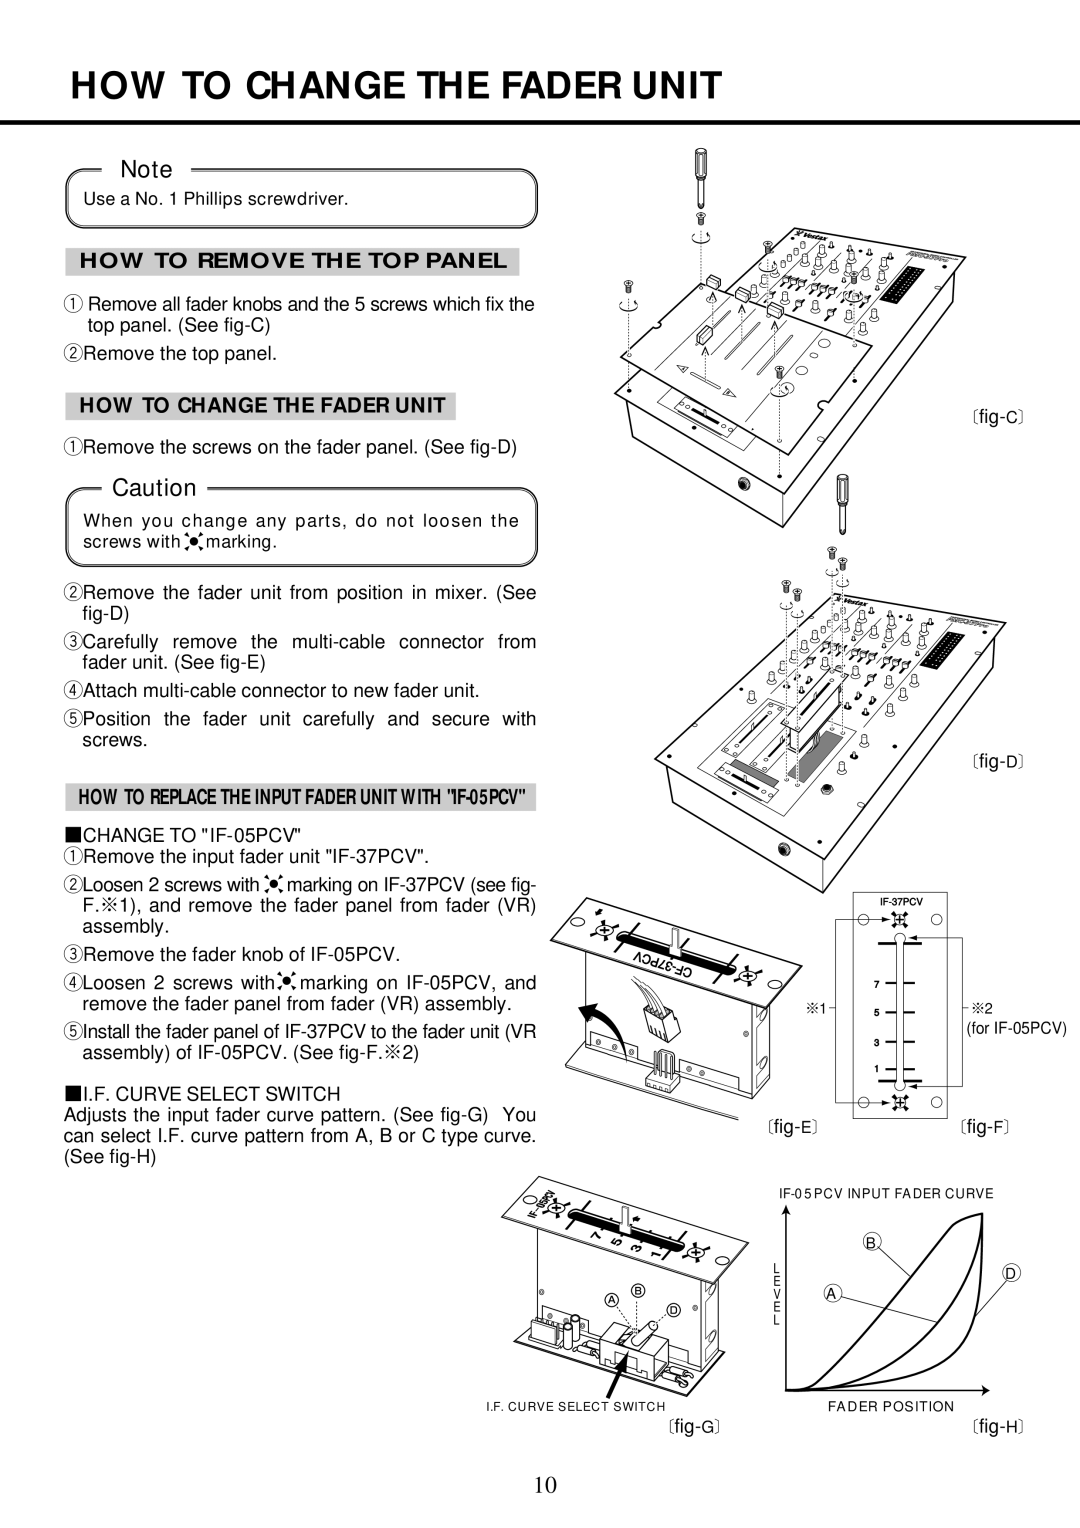
q Remove all fader knobs and the 5 screws which fix the top panel. (See
wRemove the top panel.
HOW TO CHANGE THE FADER UNIT
qRemove the screws on the fader panel. (See
Caution
When you change any parts, do not loosen the screws with ![]()
![]()
![]() marking.
marking.
wRemove the fader unit from position in mixer. (See
eCarefully remove the
rAttach
tPosition the fader unit carefully and secure with screws.
HOW TO REPLACE THE INPUT FADER UNIT WITH "IF-05PCV"
■CHANGE TO "IF-05PCV"
qRemove the input fader unit
wLoosen 2 screws with ![]()
![]()
![]() marking on
marking on
eRemove the fader knob of
rLoosen 2 screws with![]()
![]()
![]() marking on
marking on
tInstall the fader panel of
■I.F. CURVE SELECT SWITCH
Adjusts the input fader curve pattern. (See
※1
7
5
3
1
※2
(for
I.F. CURVE SELECT SWITCH
| ○ |
| B |
L | ○ |
E | |
| D |
V | ○ |
A | |
E |
|
L |
|
FADER POSITION
10