50 specifications
The Vidikron 50 is a cutting-edge display technology that masterfully combines style and performance, becoming a highly sought-after choice for both home theaters and professional environments. With its impressive size and resolution, the Vidikron 50 redefines the viewing experience by providing brilliant images that captivate audiences.One of the standout features of the Vidikron 50 is its Ultra High Definition (UHD) 4K resolution, delivering a stunning pixel count that ensures sharp images, rich colors, and detail like never before. This high resolution is perfect for those who wish to immerse themselves in their favorite movies, sports, and video games, creating a lifelike experience that makes viewers feel part of the action.
At the heart of the Vidikron 50 is its advanced display technology, utilizing a combination of LCD and LED technologies. This ensures not only vivid colors but also deep blacks and high contrast ratios that enhance depth and dimensionality. Coupled with a sophisticated color calibration system, users can expect accurate and vibrant color reproduction, which is crucial for both entertainment and professional presentations.
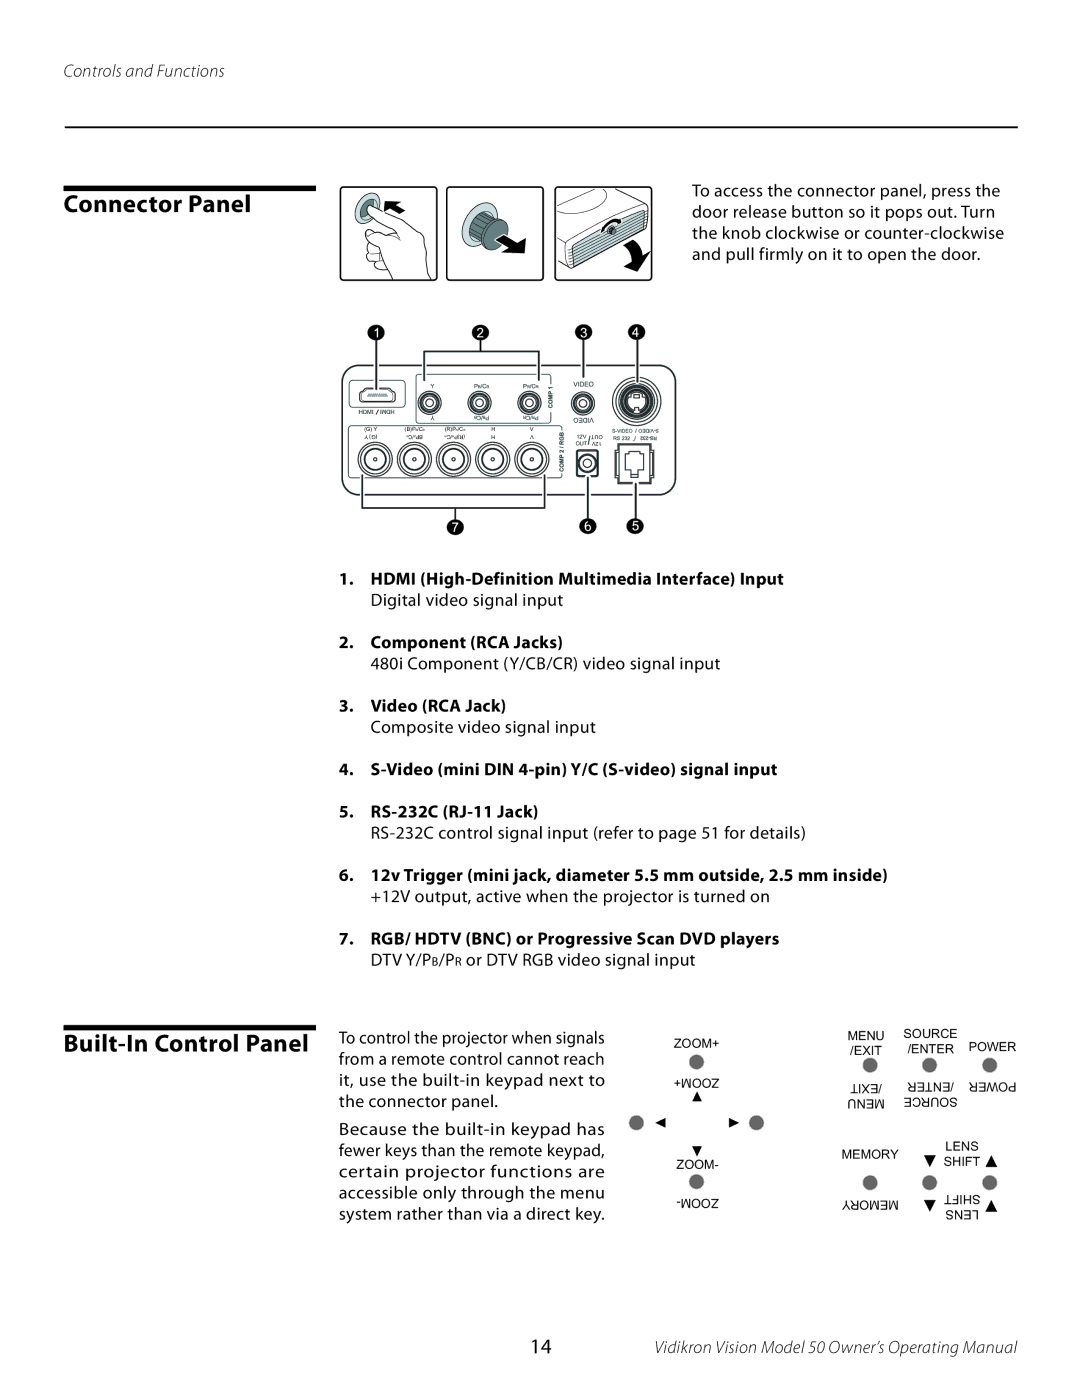
Another notable characteristic of the Vidikron 50 is its extensive connectivity options. With multiple HDMI inputs, USB ports, and compatibility with various devices and platforms, this display is designed to integrate seamlessly into any home or office setup. Whether connecting a gaming console, Blu-ray player, or streaming device, the Vidikron 50 ensures that the experience remains hassle-free and enjoyable.
In addition to its visual performance, the Vidikron 50 is equipped with advanced sound technology. With built-in high-fidelity speakers and support for surround sound formats, users can expect an immersive audio experience that complements the stunning visuals. For those seeking to enhance their experience, the display also supports external audio systems, providing flexibility in sound options.
The sleek design of the Vidikron 50 is another appealing aspect, featuring ultra-slim bezels and a modern aesthetic that fits beautifully in any environment. It's not just a functional device; it's a stylish addition to any room.
Finally, energy efficiency is a fundamental concern in today's technology-driven landscape. The Vidikron 50 is designed with eco-friendly features that minimize power consumption without compromising performance, making it a responsible choice for environmentally conscious consumers.
Overall, the Vidikron 50 stands out as a leading display option, combining performance, style, and modern technology to satisfy the demands of varied users, from casual viewers to professional content creators.

