Setting Viewing Options
You can control all of the viewing options in the Setup menu using the buttons on the top of the frame.
1.To show the Setup menu, Press the Exit button until Select Mode or Select Card screen shows, then press Setup button.
2.With the Setup menu open, use the Up and Down arrows to choose a display option.
3.Press Enter to select the option. A second menu opens, listing the available settings. A white square shows the current setting.
4.Use the Up and down arrows to choose the desired setting.
5.Press Enter to select the setting. The white square moves to the selected setting.
6.You can make as many changes as you wish in the same manner. When you are finished, press the Exit button to close the Settings Menu.
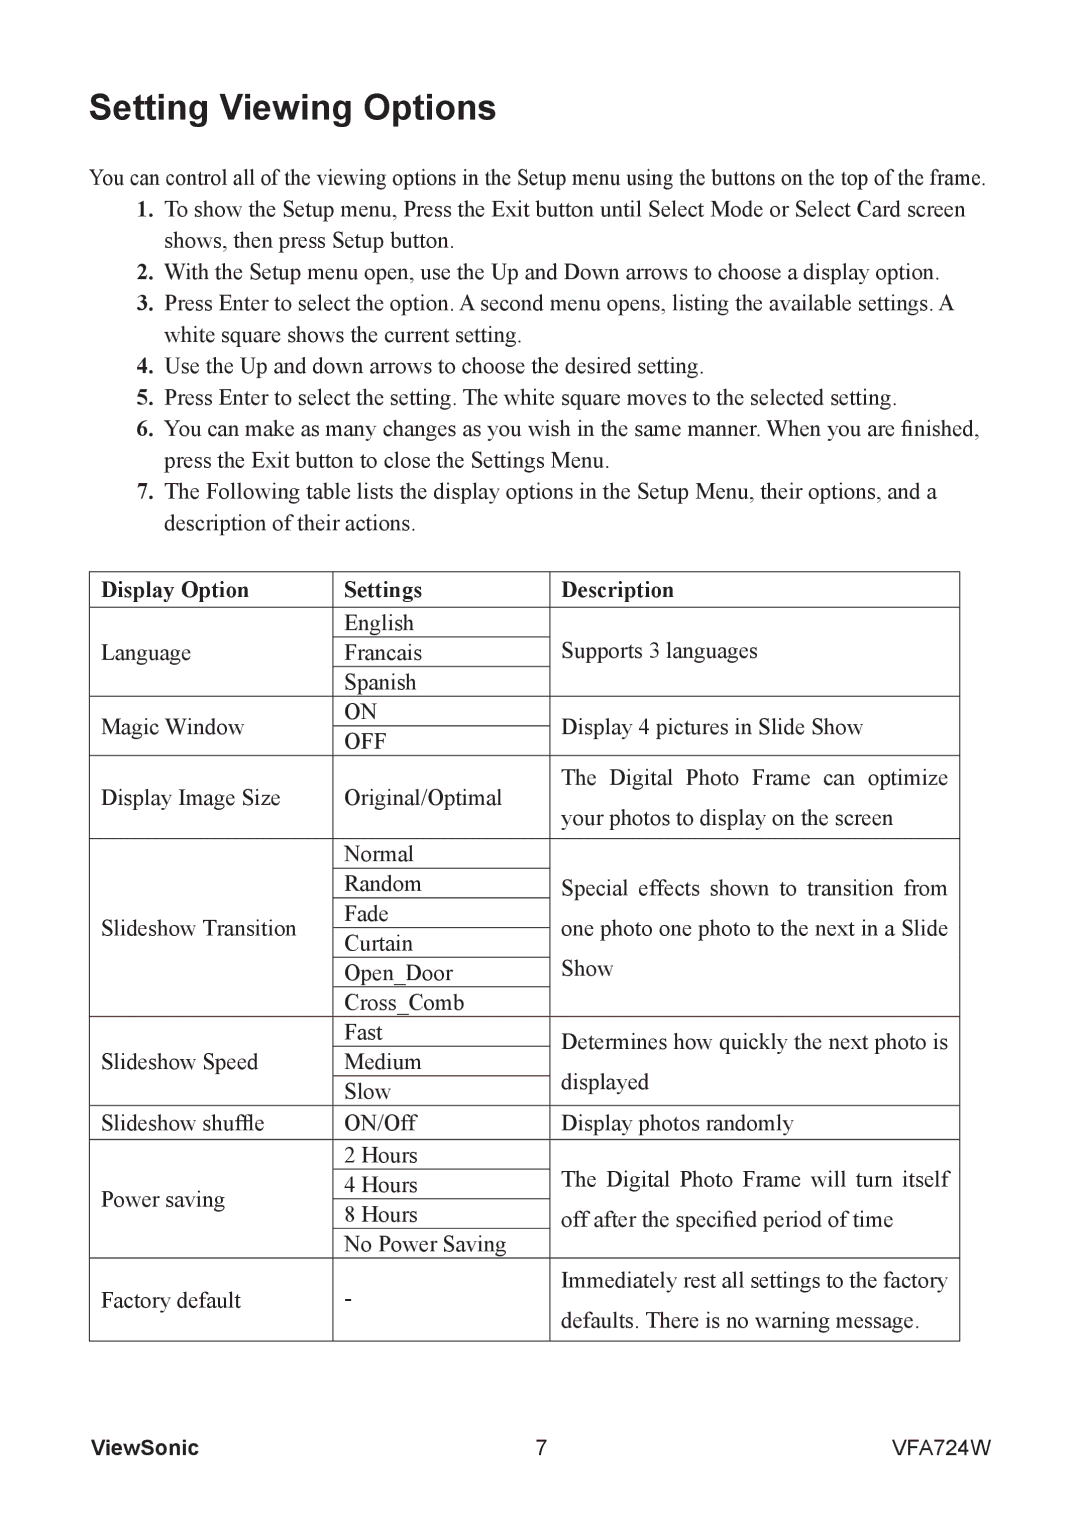
7.The Following table lists the display options in the Setup Menu, their options, and a description of their actions.
Display Option | Settings | Description | |
|
|
| |
Language | English | Supports 3 languages | |
Francais | |||
| Spanish |
| |
Magic Window | ON | Display 4 pictures in Slide Show | |
OFF | |||
|
| ||
Display Image Size | Original/Optimal | The Digital Photo Frame can optimize | |
your photos to display on the screen | |||
|
| ||
|
|
| |
| Normal |
| |
| Random | Special effects shown to transition from | |
Slideshow Transition | Fade | one photo one photo to the next in a Slide | |
Curtain | |||
| Show | ||
| Open_Door | ||
| Cross_Comb |
| |
| Fast | Determines how quickly the next photo is | |
Slideshow Speed | Medium | ||
displayed | |||
| Slow | ||
|
| ||
Slideshow shuffle | ON/Off | Display photos randomly | |
| 2 Hours | The Digital Photo Frame will turn itself | |
Power saving | 4 Hours | ||
8 Hours | off after the specified period of time | ||
| |||
| No Power Saving |
| |
Factory default | - | Immediately rest all settings to the factory | |
defaults. There is no warning message. | |||
|
| ||
|
|
|
ViewSonic | 7 | VFA724W |
