Infrared Broiler Conversion
IMPORTANT: The infrared broiler orifice must be changed from rear of range before unit is installed.
Locate bag labeled IR Broiler Orifice.
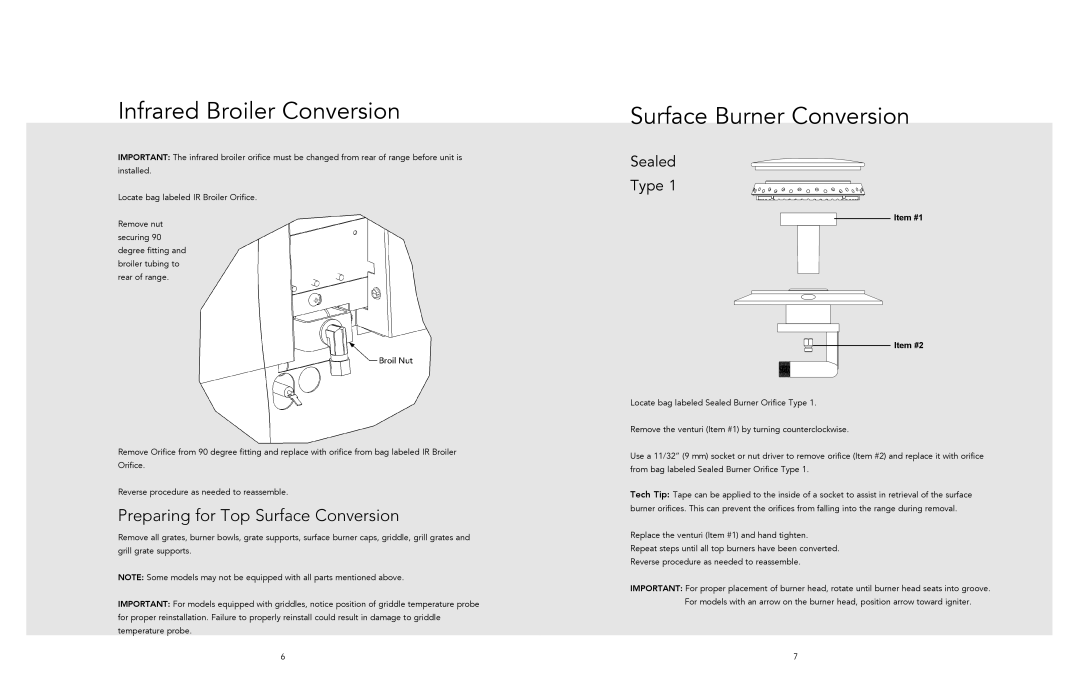
Remove nut securing 90 degree fitting and broiler tubing to rear of range.
Remove Orifice from 90 degree fitting and replace with orifice from bag labeled IR Broiler Orifice.
Reverse procedure as needed to reassemble.
Preparing for Top Surface Conversion
Remove all grates, burner bowls, grate supports, surface burner caps, griddle, grill grates and grill grate supports.
NOTE: Some models may not be equipped with all parts mentioned above.
IMPORTANT: For models equipped with griddles, notice position of griddle temperature probe for proper reinstallation. Failure to properly reinstall could result in damage to griddle temperature probe.
6
Surface Burner Conversion
Sealed
Type 1
Item #1
Item #2
Locate bag labeled Sealed Burner Orifice Type 1.
Remove the venturi (Item #1) by turning counterclockwise.
Use a 11/32” (9 mm) socket or nut driver to remove orifice (Item #2) and replace it with orifice from bag labeled Sealed Burner Orifice Type 1.
Tech Tip: Tape can be applied to the inside of a socket to assist in retrieval of the surface burner orifices. This can prevent the orifices from falling into the range during removal.
Replace the venturi (Item #1) and hand tighten.
Repeat steps until all top burners have been converted.
Reverse procedure as needed to reassemble.
IMPORTANT: For proper placement of burner head, rotate until burner head seats into groove. For models with an arrow on the burner head, position arrow toward igniter.
7
