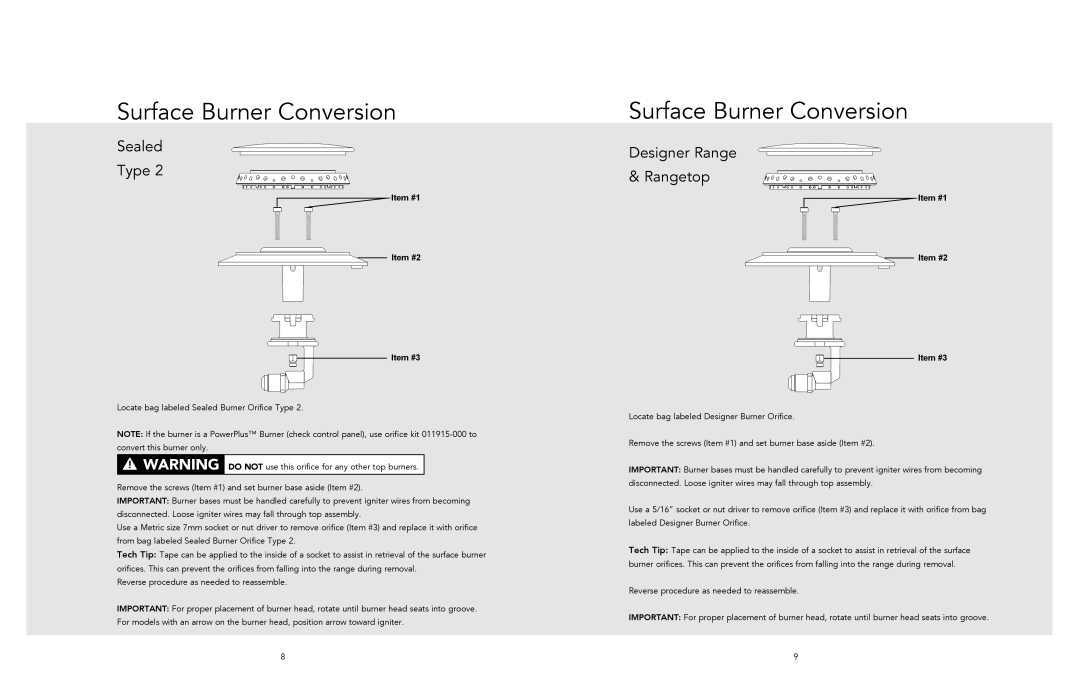
Surface Burner Conversion
Sealed
Type 2
 Item #1
Item #2
Item #3
Locate bag labeled Sealed Burner Orifice Type 2.
NOTE: If the burner is a PowerPlus™ Burner (check control panel), use orifice kit
![]() DO NOT use this orifice for any other top burners.
DO NOT use this orifice for any other top burners.
Remove the screws (Item #1) and set burner base aside (Item #2).
IMPORTANT: Burner bases must be handled carefully to prevent igniter wires from becoming disconnected. Loose igniter wires may fall through top assembly.
Use a Metric size 7mm socket or nut driver to remove orifice (Item #3) and replace it with orifice from bag labeled Sealed Burner Orifice Type 2.
Tech Tip: Tape can be applied to the inside of a socket to assist in retrieval of the surface burner orifices. This can prevent the orifices from falling into the range during removal.
Reverse procedure as needed to reassemble.
IMPORTANT: For proper placement of burner head, rotate until burner head seats into groove. For models with an arrow on the burner head, position arrow toward igniter.
Surface Burner Conversion
Designer Range
& Rangetop
![]() Item #1
Item #1
Item #2
Item #3
Locate bag labeled Designer Burner Orifice.
Remove the screws (Item #1) and set burner base aside (Item #2).
IMPORTANT: Burner bases must be handled carefully to prevent igniter wires from becoming disconnected. Loose igniter wires may fall through top assembly.
Use a 5/16” socket or nut driver to remove orifice (Item #3) and replace it with orifice from bag labeled Designer Burner Orifice.
Tech Tip: Tape can be applied to the inside of a socket to assist in retrieval of the surface burner orifices. This can prevent the orifices from falling into the range during removal.
Reverse procedure as needed to reassemble.
IMPORTANT: For proper placement of burner head, rotate until burner head seats into groove.
8 | 9 |