
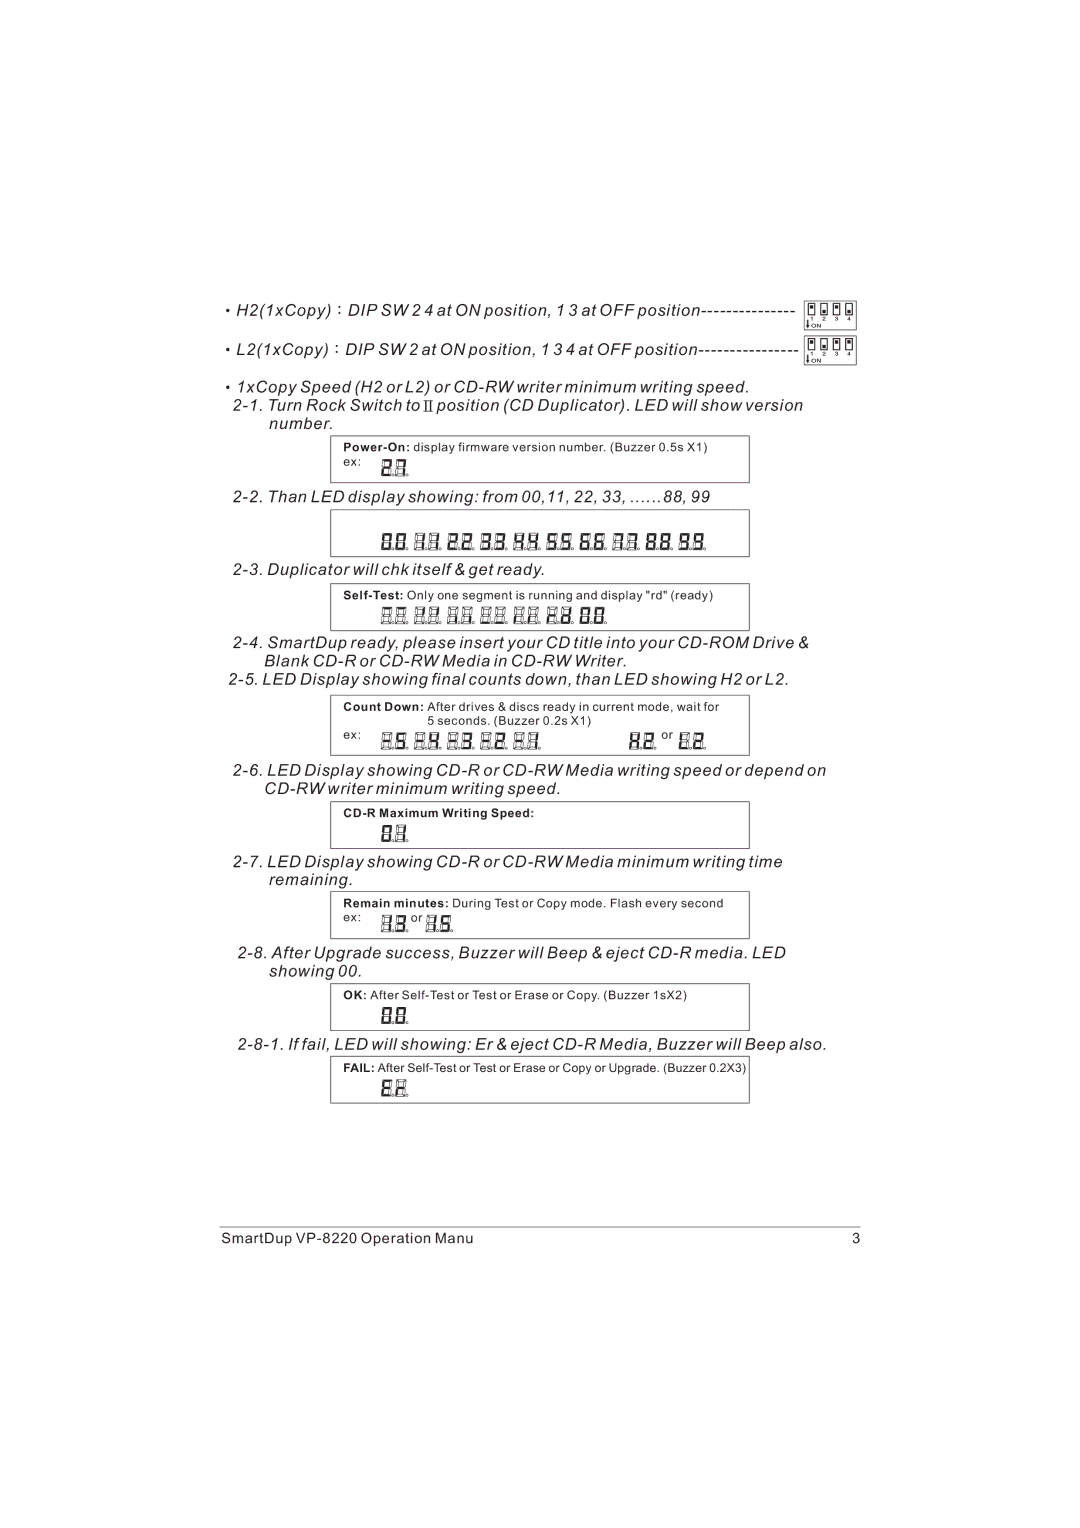
VP-8220 specifications
The VIPowER VP-8220 is a high-performance portable power solution designed to meet the needs of modern lifestyles. With a sleek and compact design, this powerful device is ideal for outdoor enthusiasts, travelers, and anyone in need of reliable power on the go.One of the standout features of the VP-8220 is its impressive capacity. Equipped with a robust battery, it offers a substantial power output, allowing users to charge multiple devices simultaneously. This makes it perfect for camping trips, long road journeys, and outdoor events where access to traditional power sources might be limited.
The VP-8220 comes with multiple USB ports, allowing users to charge smartphones, tablets, and other portable devices effortlessly. It also includes AC and DC output options, providing versatility for powering a wide range of electronics from laptops to small appliances. This makes it an essential companion for both leisure and professional activities.
In terms of technology, VIPowER has integrated advanced lithium-ion battery technology, which not only enhances energy efficiency but also promotes a longer lifespan for the device. The intelligent charging system ensures that devices are charged quickly and safely, reducing the risk of overheating or overcharging. Additionally, the power bank features a built-in LCD display that provides real-time feedback on battery status, making it easy to monitor remaining power levels.
Durability is another key characteristic of the VP-8220. Constructed with high-quality materials, it is designed to withstand harsh environmental conditions. Its rugged exterior is resistant to dust and water, making it suitable for outdoor adventures. This resilience, paired with its lightweight design, ensures that users can carry it with them wherever they go without adding unnecessary bulk.
Moreover, the VIPowER VP-8220 is equipped with various safety features, including overcurrent protection, short circuit prevention, and temperature control. These ensure safe operation while providing peace of mind for users.
In conclusion, the VIPowER VP-8220 stands out as a versatile and reliable portable power bank that caters to the needs of a variety of users. Its combination of substantial power capacity, advanced technology, multiple output options, and durable design makes it an essential tool for anyone seeking dependable power on the move. Whether for leisure or work, the VP-8220 provides the functionality and reliability users demand in today's fast-paced world.