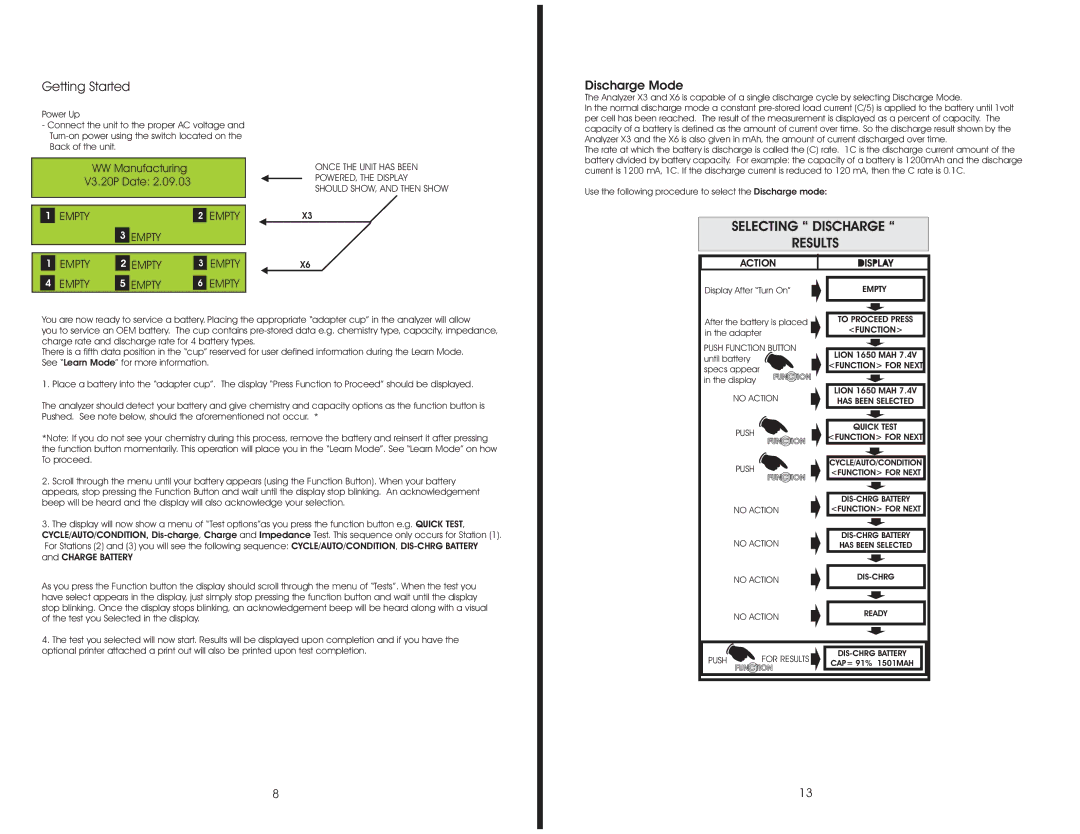
Getting Started
Power Up
-Connect the unit to the proper AC voltage and
WWManufacturing V3.20P Date: 2.09.03
1 | EMPTY | 2 EMPTY |
3EMPTY
1 | EMPTY | 2 | EMPTY | 3 | EMPTY | |
|
|
|
|
|
| EMPTY |
4 | EMPTY | 5 EMPTY | 6 | |||
ONCE THE UNIT HAS BEEN
POWERED, THE DISPLAY
SHOULD SHOW, AND THEN SHOW
X3
X6
Discharge Mode
The Analyzer X3 and X6 is capable of a single discharge cycle by selecting Discharge Mode.
In the normal discharge mode a constant
The rate at which the battery is discharge is called the (C) rate. 1C is the discharge current amount of the battery divided by battery capacity. For example: the capacity of a battery is 1200mAh and the discharge current is 1200 mA, 1C. If the discharge current is reduced to 120 mA, then the C rate is 0.1C.
Use the following procedure to select the Discharge mode:
SELECTING “ DISCHARGE “
RESULTS
ACTION
Display After “Turn On”
EMPTY
You are now ready to service a battery. . Placing the appropriate “adapter cup” in the analyzer will allow
you to service an OEM battery. The cup contains
There is a fifth data position in the “cup” reserved for user defined information during the Learn Mode. See “Learn Mode” for more information.
1. Place a battery into the “adapter cup”. The display “Press Function to Proceed” should be displayed.
The analyzer should detect your battery and give chemistry and capacity options as the function button is
Pushed. See note below, should the aforementioned not occur. *
*Note: If you do not see your chemistry during this process, remove the battery and reinsert it after pressing the function button momentarily. This operation will place you in the “Learn Mode”. See “Learn Mode” on how To proceed.
2.Scroll through the menu until your battery appears (using the Function Button). When your battery appears, stop pressing the Function Button and wait until the display stop blinking. An acknowledgement beep will be heard and the display will also acknowledge your selection.
3.The display will now show a menu of “Test options”as you press the function button e.g. QUICK TEST,
CYCLE/AUTO/CONDITION,
After the battery is placed in the adapter
PUSH FUNCTION BUTTON until battery
specs appear in the display
NO ACTION
PUSH
PUSH
NO ACTION
NO ACTION
TO PROCEED PRESS
<FUNCTION>
LION 1650 MAH 7.4V
<FUNCTION> FOR NEXT
LION 1650 MAH 7.4V HAS BEEN SELECTED
QUICK TEST
<FUNCTION> FOR NEXT
CYCLE/AUTO/CONDITION <FUNCTION> FOR NEXT
<FUNCTION> FOR NEXT
As you press the Function button the display should scroll through the menu of “Tests”. When the test you have select appears in the display, just simply stop pressing the function button and wait until the display stop blinking. Once the display stops blinking, an acknowledgement beep will be heard along with a visual of the test you Selected in the display.
4.The test you selected will now start. Results will be displayed upon completion and if you have the optional printer attached a print out will also be printed upon test completion.
8
| NO ACTION | ||
|
| ||
| NO ACTION | READY | |
|
| ||
PUSH | FOR RESULTS | ||
CAP= 91% 1501MAH | |||
|
|
13