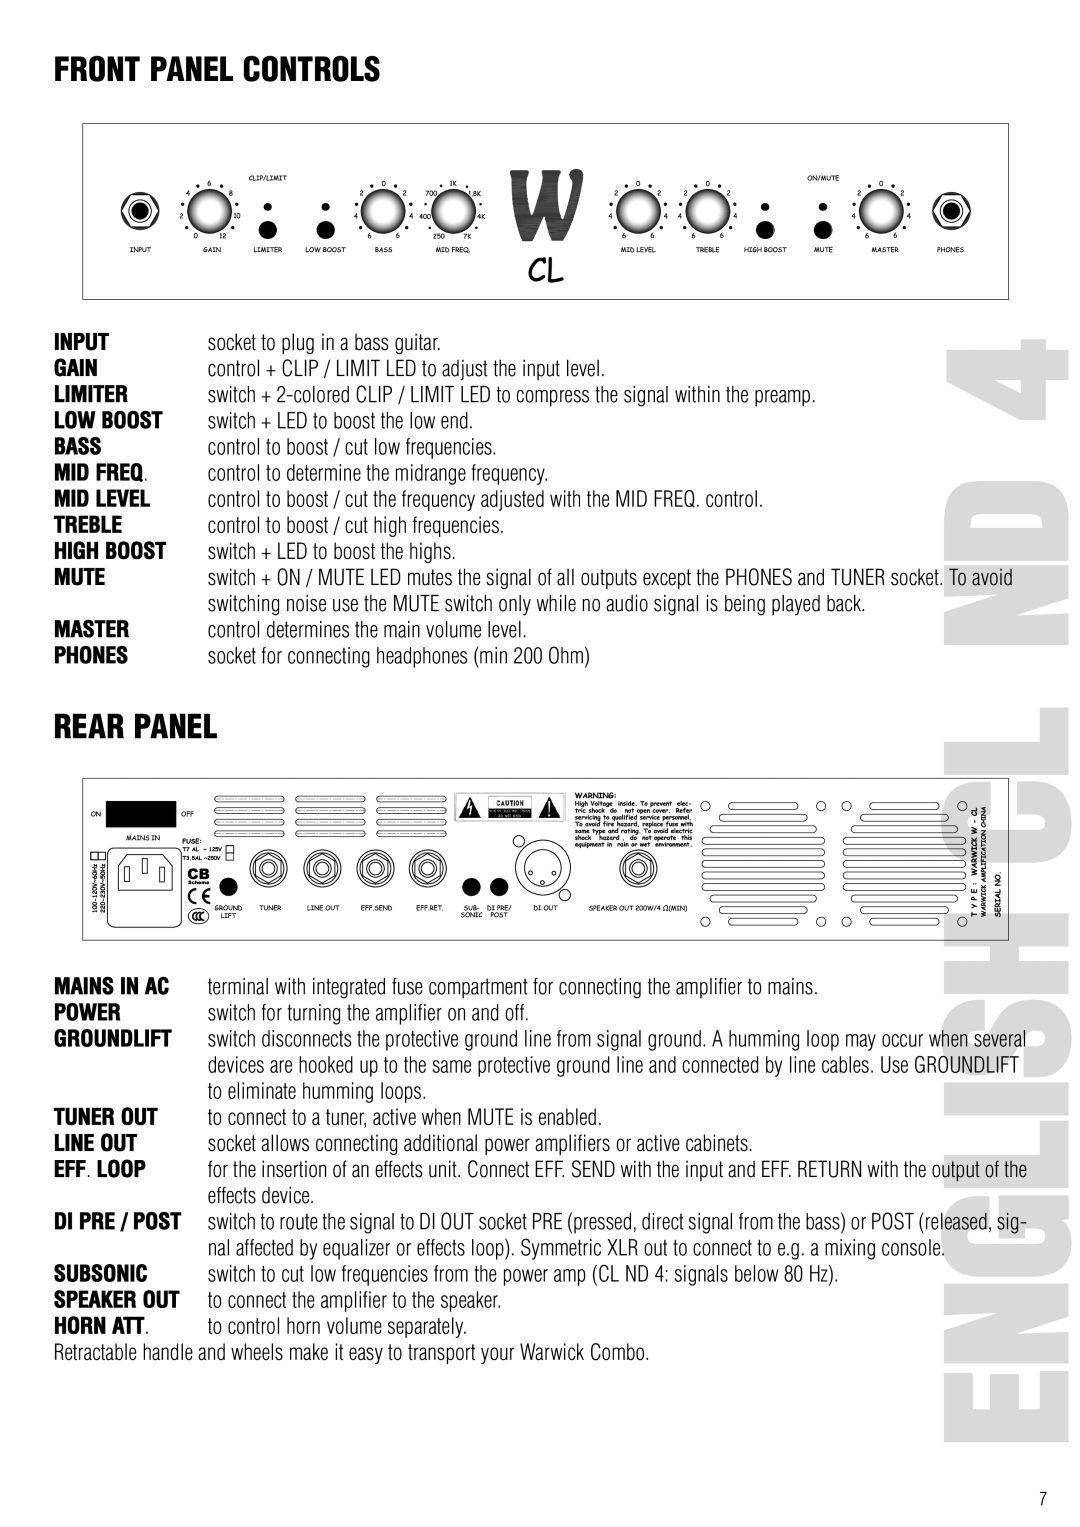
FRONT PANEL CONTROLS
socket to plug in a bass guitar.
control + CLIP / LIMIT LED to adjust the input level.
switch +
control to boost / cut low frequencies. control to determine the midrange frequency.
control to boost / cut the frequency adjusted with the MID FREQ. control. control to boost / cut high frequencies.
switch + LED to boost the highs.
switch + ON / MUTE LED mutes the signal of all outputs except the PHONES and TUNER socket. switching noise use the MUTE switch only while no audio signal is being played back.
control determines the main volume level.
socket for connecting headphones (min 200 Ohm)
4NDTo avoid
REAR PANEL | CL | |
|
| |
MAINS IN AC | terminal with integrated fuse compartment for connecting the amplifier to mains. |
|
POWER | switch for turning the amplifier on and off. |
|
GROUNDLIFT | switch disconnects the protective ground line from signal ground. A humming loop may occur when several | |
| devices are hooked up to the same protective ground line and connected by line cables. Use GROUNDLIFT | |
TUNER OUT | to eliminate humming loops. |
|
to connect to a tuner, active when MUTE is enabled. |
| |
LINE OUT | socket allows connecting additional power amplifiers or active cabinets. |
|
EFF. LOOP | for the insertion of an effects unit. Connect EFF. SEND with the input and EFF. RETURN with the output of the | |
DI PRE / POST | effects device. |
|
switch to route the signal to DI OUT socket PRE (pressed, direct signal from the bass) or POST (released, sig- | ||
SUBSONIC | nal affected by equalizer or effects loop). Symmetric XLR out to connect to e.g. a mixing console. | ENGLISH |
switch to cut low frequencies from the power amp (CL ND 4: signals below 80 Hz). | ||
SPEAKER OUT | to connect the amplifier to the speaker. | |
HORN ATT. | to control horn volume separately. | |
Retractable handle and wheels make it easy to transport your Warwick Combo. | ||
|
| |
7
