8
Showerpik® Installation Instructions
Installation of Showerpik® Bracket
Do NOT use pipe tape.
1.Remove current fixed mount showerhead or handheld showerhead bracket from shower pipe leaving only the shower pipe. Remove any leftover pipe tape residue. Ensure that the washer from the old shower is not connected to the pipe. Use a thin utensil to check inside the pipe for washer such as a pencil or screw driver.
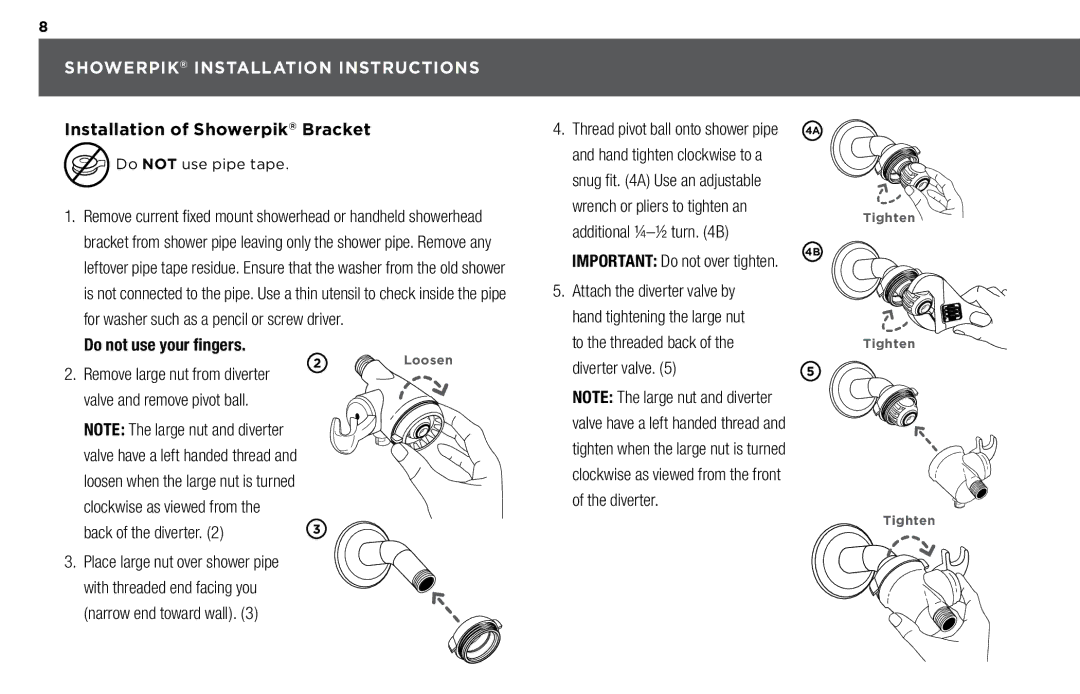
4. | Thread pivot ball onto shower pipe |
| and hand tighten clockwise to a |
| snug fit. (4A) Use an adjustable |
| wrench or pliers to tighten an |
| additional |
| IMPORTANT: Do not over tighten. |
5. | Attach the diverter valve by |
| hand tightening the large nut |
4A
Tighten
4B
Do not use your fingers.
2.Remove large nut from diverter valve and remove pivot ball. NOTE: The large nut and diverter valve have a left handed thread and loosen when the large nut is turned clockwise as viewed from the back of the diverter. (2)
3.Place large nut over shower pipe with threaded end facing you
(narrow end toward wall). (3)
2 ![]() Loosen
Loosen
3
to the threaded back of the |
diverter valve. (5) |
NOTE: The large nut and diverter |
valve have a left handed thread and |
tighten when the large nut is turned |
clockwise as viewed from the front |
of the diverter. |
Tighten
5
Tighten