INSTALLING CENTER BRACKET
 Step 3
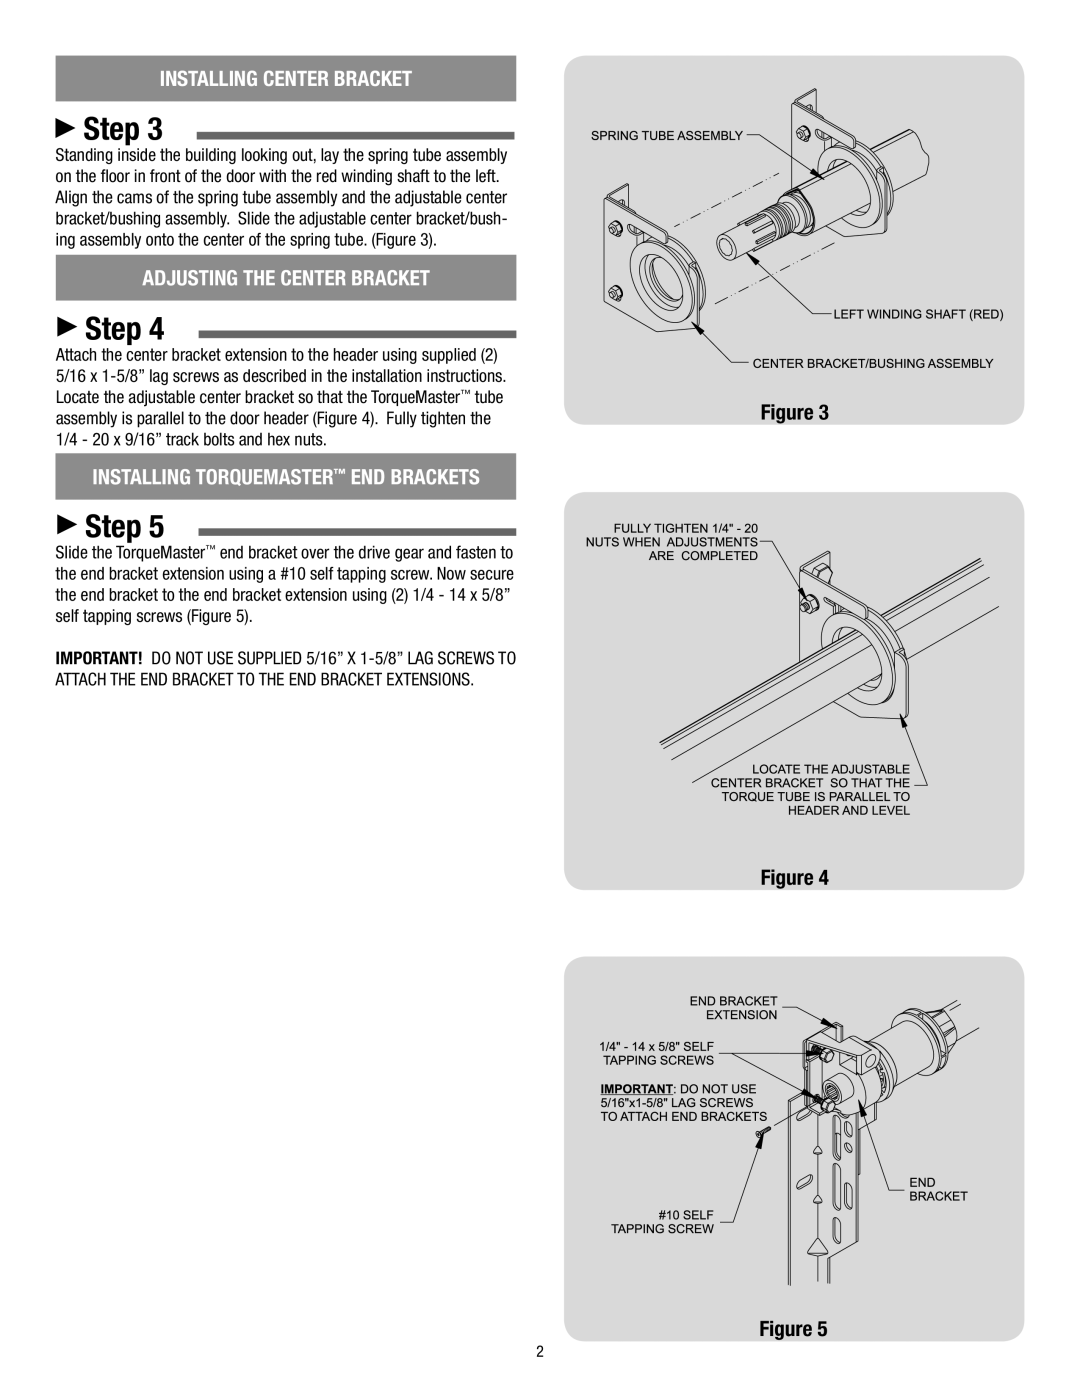
Standing inside the building looking out, lay the spring tube assembly on the floor in front of the door with the red winding shaft to the left. Align the cams of the spring tube assembly and the adjustable center bracket/bushing assembly. Slide the adjustable center bracket/bush- ing assembly onto the center of the spring tube. (Figure 3).
ADJUSTING THE CENTER BRACKET
 Step 4
Attach the center bracket extension to the header using supplied (2) 5/16 x
INSTALLING TorqueMaster™ END BRACKETS
 Step 5
Slide the TorqueMaster™ end bracket over the drive gear and fasten to the end bracket extension using a #10 self tapping screw. Now secure the end bracket to the end bracket extension using (2) 1/4 - 14 x 5/8” self tapping screws (Figure 5).
IMPORTANT! Do not use supplied 5/16” x
Figure 3
Figure 4
Figure 5
2
