GAS INSTRUCTIONS
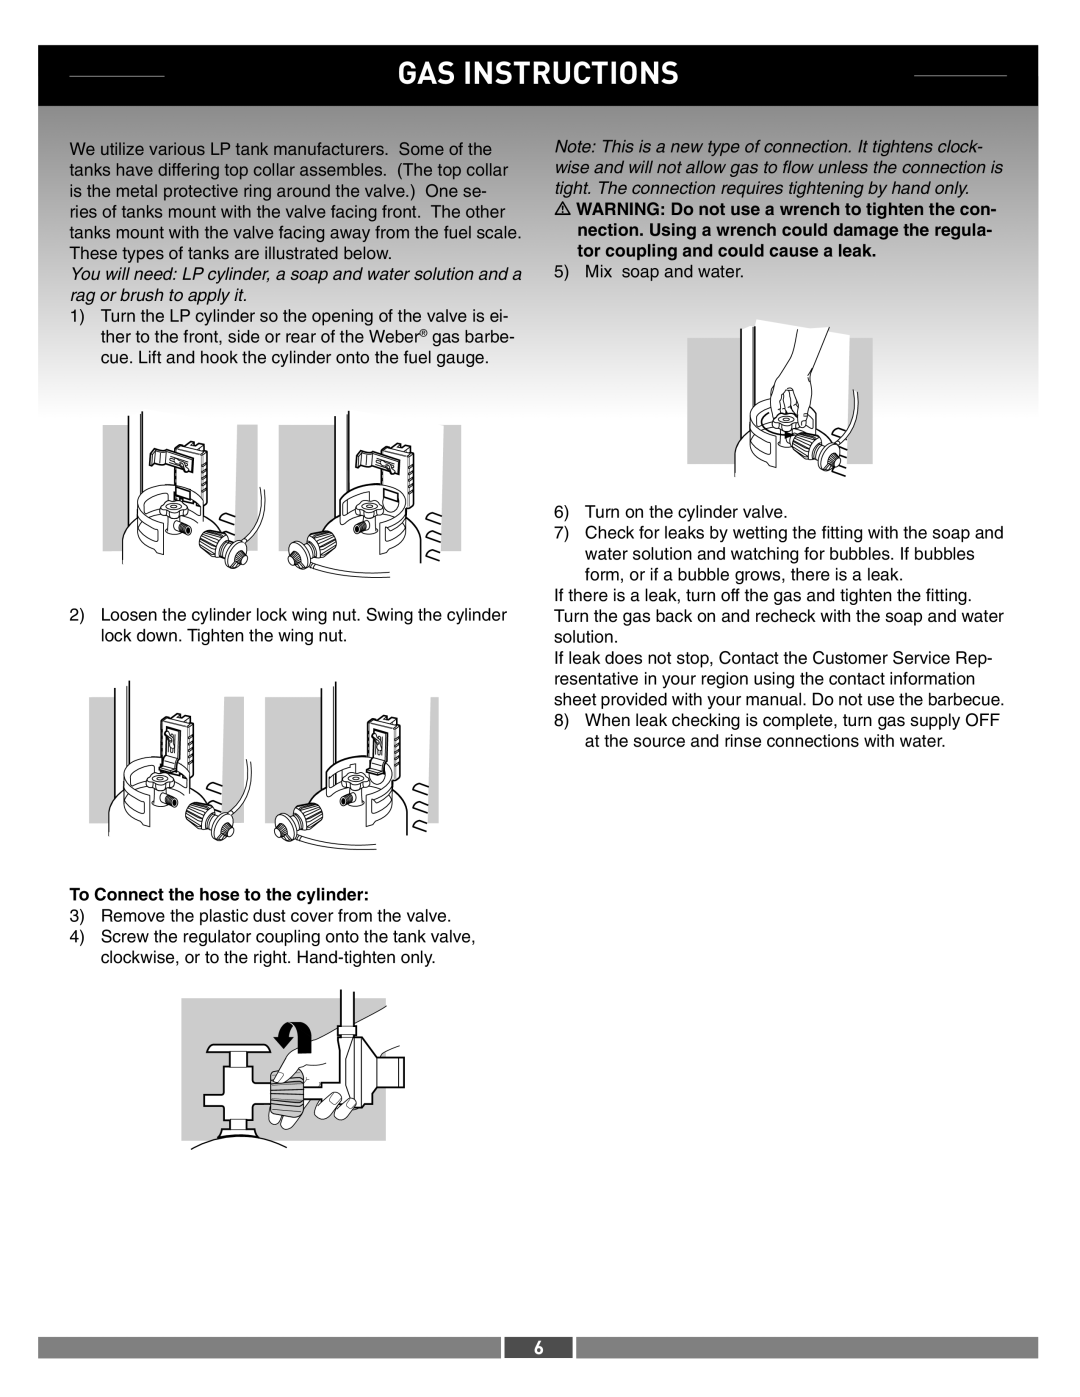
We utilize various LP tank manufacturers. Some of the tanks have differing top collar assembles. (The top collar is the metal protective ring around the valve.) One se- ries of tanks mount with the valve facing front. The other tanks mount with the valve facing away from the fuel scale. These types of tanks are illustrated below.
You will need: LP cylinder, a soap and water solution and a rag or brush to apply it.
1)Turn the LP cylinder so the opening of the valve is ei- ther to the front, side or rear of the Weber® gas barbe- cue. Lift and hook the cylinder onto the fuel gauge.
2)Loosen the cylinder lock wing nut. Swing the cylinder lock down. Tighten the wing nut.
To Connect the hose to the cylinder:
3)Remove the plastic dust cover from the valve.
4)Screw the regulator coupling onto the tank valve, clockwise, or to the right.
Note: This is a new type of connection. It tightens clock- wise and will not allow gas to flow unless the connection is tight. The connection requires tightening by hand only.
WARNING: Do not use a wrench to tighten the con- nection. Using a wrench could damage the regula- tor coupling and could cause a leak.
5) Mix soap and water.
6)Turn on the cylinder valve.
7)Check for leaks by wetting the fitting with the soap and water solution and watching for bubbles. If bubbles form, or if a bubble grows, there is a leak.
If there is a leak, turn off the gas and tighten the fitting. Turn the gas back on and recheck with the soap and water solution.
If leak does not stop, Contact the Customer Service Rep- resentative in your region using the contact information sheet provided with your manual. Do not use the barbecue.
8)When leak checking is complete, turn gas supply OFF at the source and rinse connections with water.
6
