Step 11
Install igniter
Note - The igniter wires are already attached to the Gas Catcher Ignition Chamber and the igniter. This was done to factory test the ignition system.
The igniter lock nut is on the igniter.
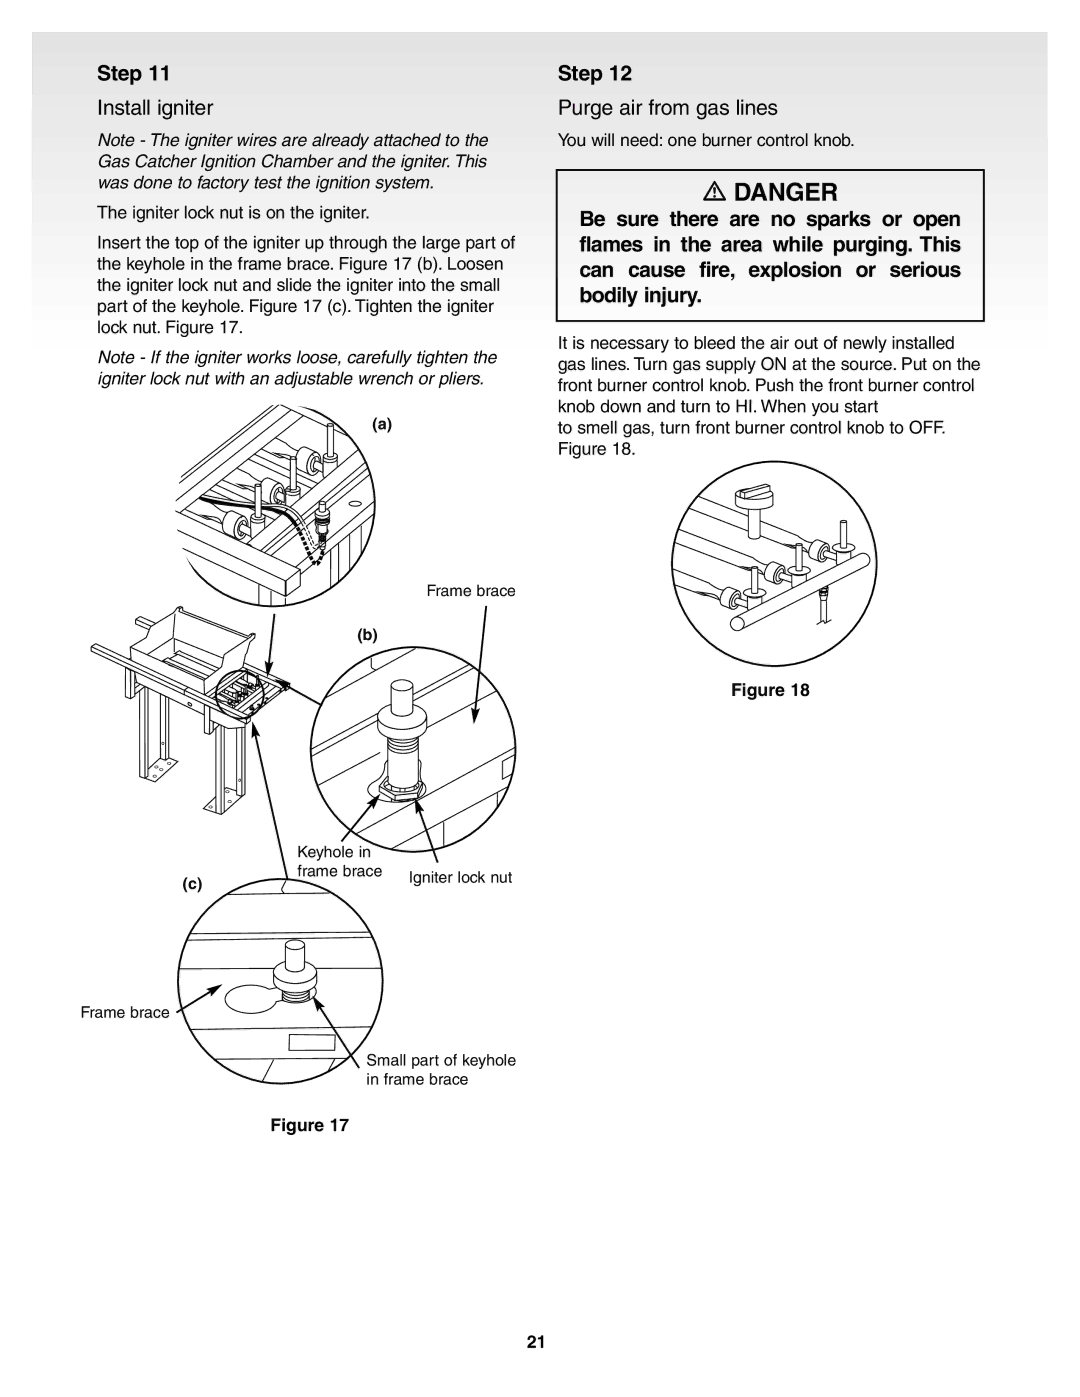
Insert the top of the igniter up through the large part of the keyhole in the frame brace. Figure 17 (b). Loosen the igniter lock nut and slide the igniter into the small part of the keyhole. Figure 17 (c). Tighten the igniter lock nut. Figure 17.
Note - If the igniter works loose, carefully tighten the igniter lock nut with an adjustable wrench or pliers.
(a)
Frame brace
(b)
| Keyhole in |
|
(c) | frame brace | Igniter lock nut |
| ||
|
|
Frame brace ![]()
Small part of keyhole in frame brace
Figure 17
Step 12
Purge air from gas lines
You will need: one burner control knob.
DANGER
Be sure there are no sparks or open flames in the area while purging. This can cause fire, explosion or serious bodily injury.
It is necessary to bleed the air out of newly installed gas lines. Turn gas supply ON at the source. Put on the front burner control knob. Push the front burner control knob down and turn to HI. When you start
to smell gas, turn front burner control knob to OFF. Figure 18.
Figure 18
21