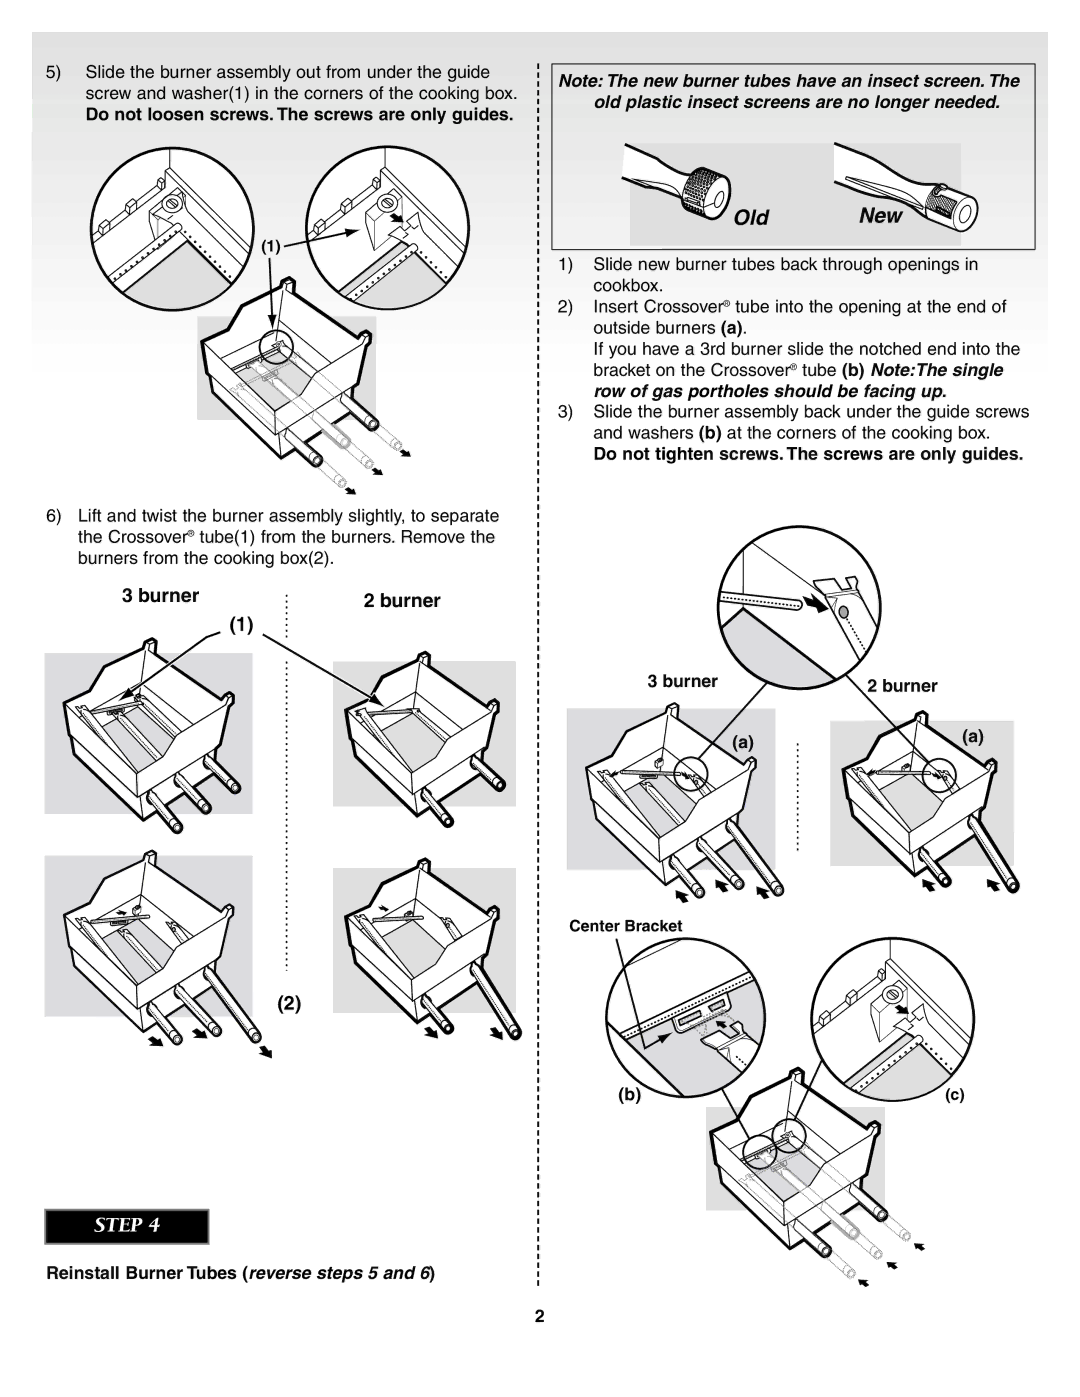
5)Slide the burner assembly out from under the guide screw and washer(1) in the corners of the cooking box.
Do not loosen screws. The screws are only guides.
(1) ![]()
6)Lift and twist the burner assembly slightly, to separate the Crossover® tube(1) from the burners. Remove the burners from the cooking box(2).
3 burner |
|
| 2 burner |
| (1) |
| |
|
|
|
|
|
|
|
|
|
|
|
|
|
|
|
|
Note: The new burner tubes have an insect screen. The old plastic insect screens are no longer needed.
 Old New
1)Slide new burner tubes back through openings in cookbox.
2)Insert Crossover® tube into the opening at the end of outside burners (a).
If you have a 3rd burner slide the notched end into the bracket on the Crossover® tube (b) Note:The single row of gas portholes should be facing up.
3)Slide the burner assembly back under the guide screws and washers (b) at the corners of the cooking box.
Do not tighten screws. The screws are only guides.
3 burner |
| 2 burner |
| (a) | (a) |
|
|
Center Bracket
(2)
(b) | (c) |
STEP 4
Reinstall Burner Tubes (reverse steps 5 and 6)
2
