STEP 5
Reinstall the Manifold and Valve Assembly and the Control Panel.
Follow steps 1 through 3 in reverse order.
STEP 6
Check for gas leaks.
DANGER
Do not use an open flame to check for gas leaks. Be sure there are no sparks or open flames in the area while you check for leaks. Sparks or flames will result in a fire or explosion which can cause serious bodily injury or death, and damage to property.
1)Mix soap and water.
2)Turn on the gas supply.
3)Check for leaks by wetting the fitting with the soap and water solution and watching for bubbles. If bubbles form, or if a bubble grows, there is a leak.
If there is a leak, turn off the gas and tighten the fitting. Turn the gas back on and recheck with the soap and water solution.
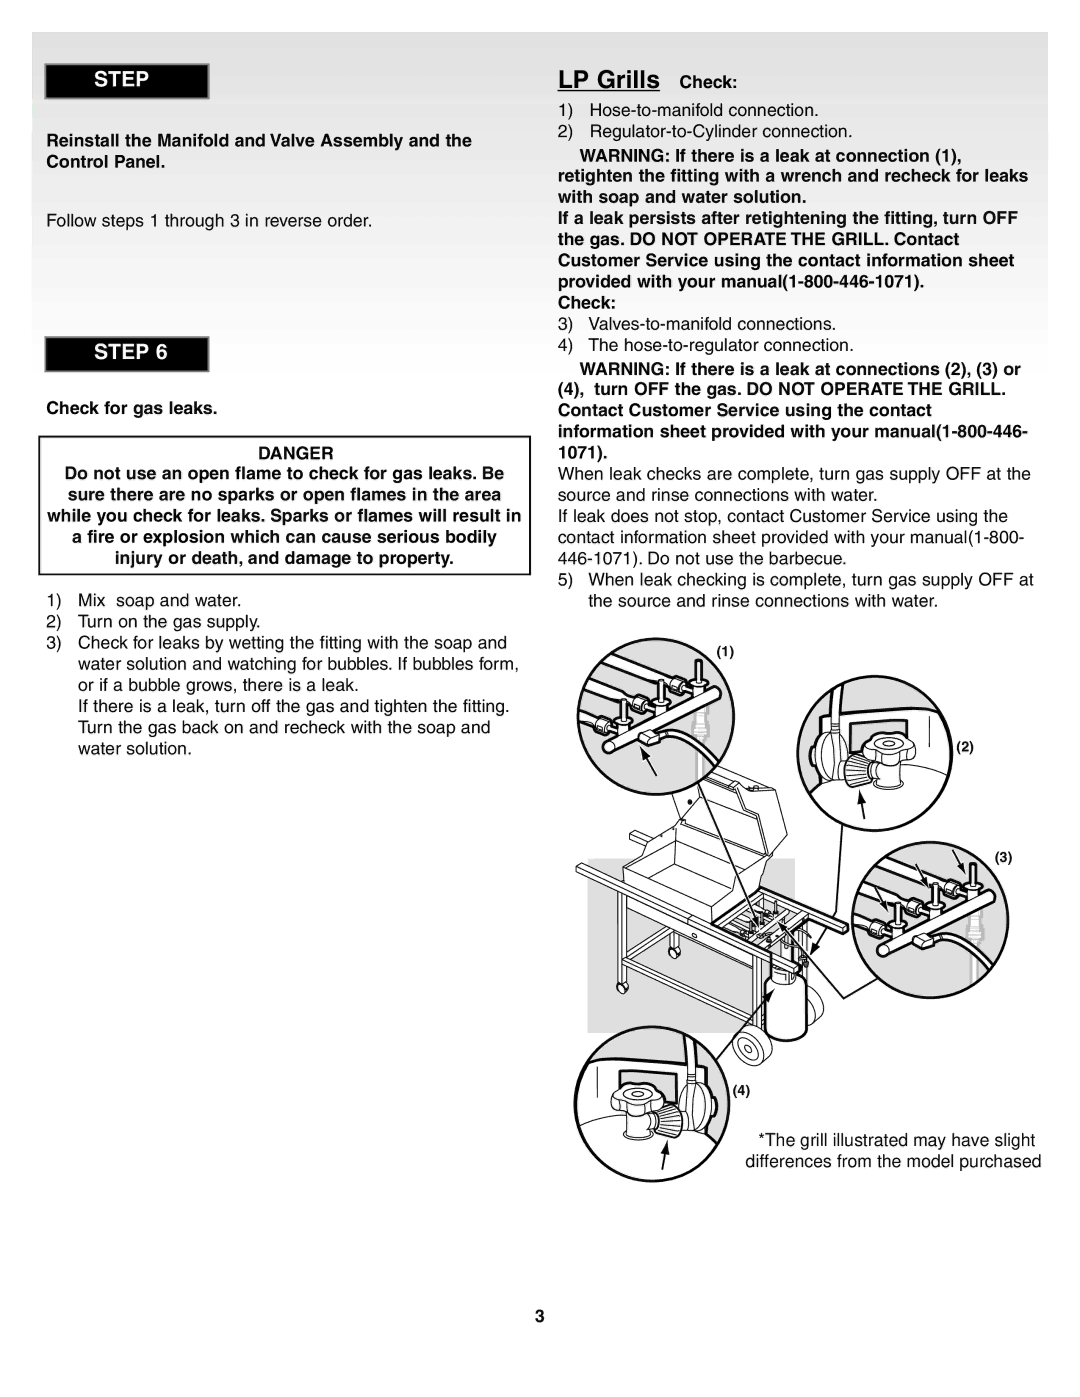
LP Grills Check:
1)
2)
WARNING: If there is a leak at connection (1), retighten the fitting with a wrench and recheck for leaks with soap and water solution.
If a leak persists after retightening the fitting, turn OFF the gas. DO NOT OPERATE THE GRILL. Contact Customer Service using the contact information sheet provided with your
Check:
3)
4)The
WARNING: If there is a leak at connections (2), (3) or (4), turn OFF the gas. DO NOT OPERATE THE GRILL. Contact Customer Service using the contact information sheet provided with your
When leak checks are complete, turn gas supply OFF at the source and rinse connections with water.
If leak does not stop, contact Customer Service using the contact information sheet provided with your
5)When leak checking is complete, turn gas supply OFF at the source and rinse connections with water.
(1)
(2)
(3)
(4)
*The grill illustrated may have slight differences from the model purchased
3
