Step 8
Install igniter
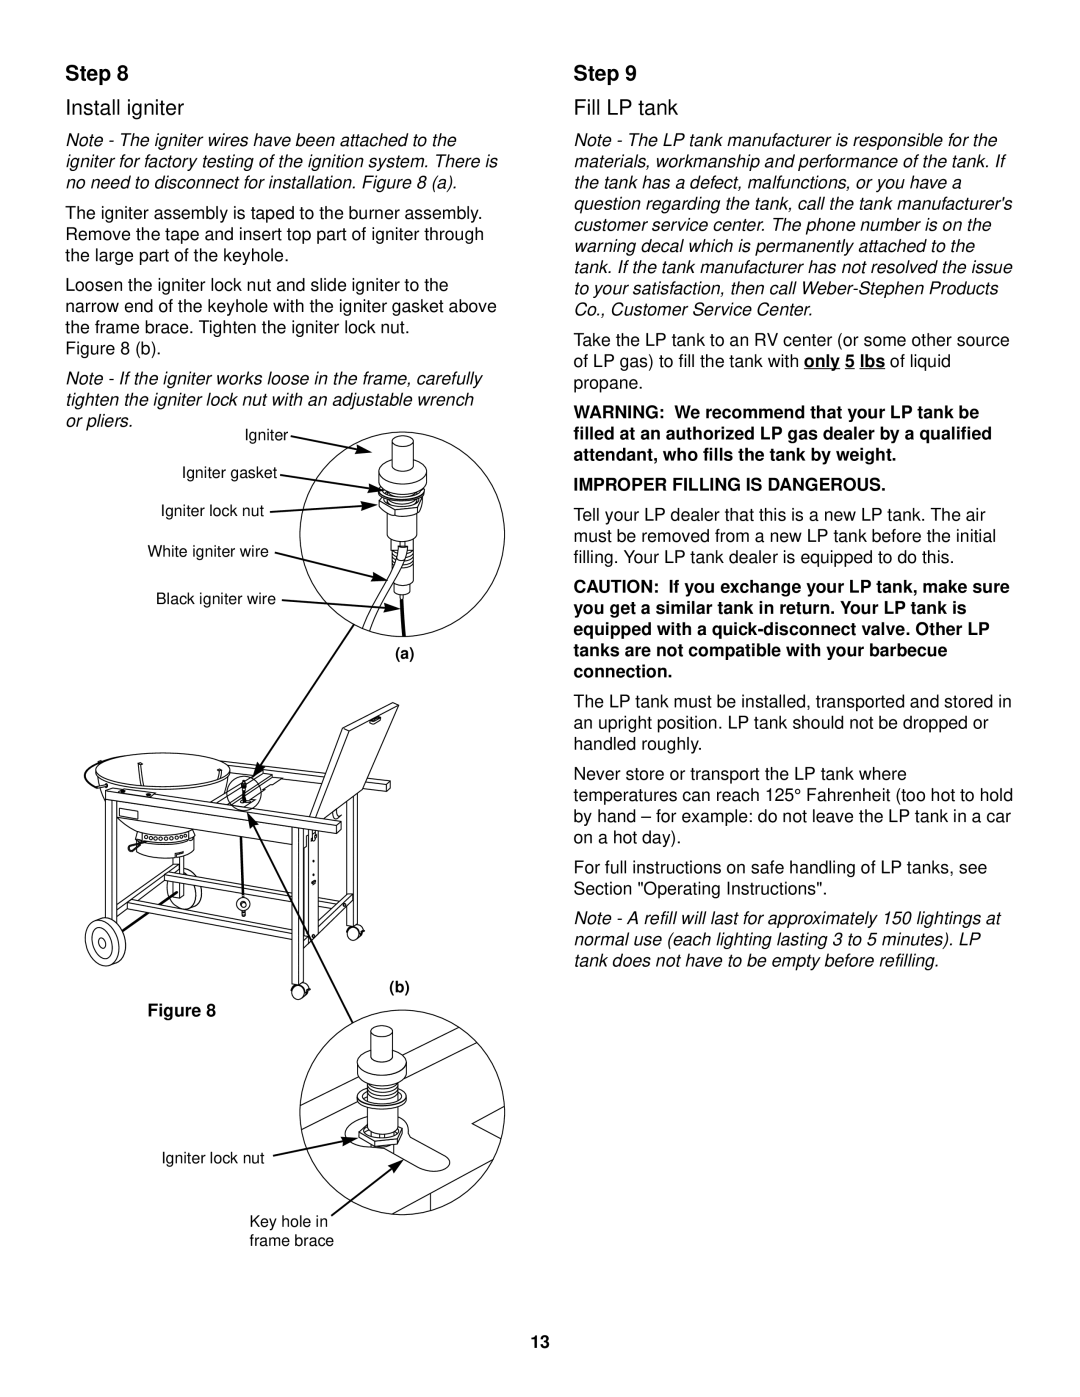
Note - The igniter wires have been attached to the igniter for factory testing of the ignition system. There is no need to disconnect for installation. Figure 8 (a).
The igniter assembly is taped to the burner assembly. Remove the tape and insert top part of igniter through the large part of the keyhole.
Loosen the igniter lock nut and slide igniter to the narrow end of the keyhole with the igniter gasket above the frame brace. Tighten the igniter lock nut.
Figure 8 (b).
Note - If the igniter works loose in the frame, carefully tighten the igniter lock nut with an adjustable wrench or pliers.
Igniter
Igniter gasket
Igniter lock nut ![]()
![]()
White igniter wire
Black igniter wire ![]()
(a)
(b)
Figure 8
Igniter lock nut
Key hole in frame brace
Step 9
Fill LP tank
Note - The LP tank manufacturer is responsible for the materials, workmanship and performance of the tank. If the tank has a defect, malfunctions, or you have a question regarding the tank, call the tank manufacturer's customer service center. The phone number is on the warning decal which is permanently attached to the tank. If the tank manufacturer has not resolved the issue to your satisfaction, then call
Take the LP tank to an RV center (or some other source of LP gas) to fill the tank with only 5 lbs of liquid propane.
WARNING: We recommend that your LP tank be filled at an authorized LP gas dealer by a qualified attendant, who fills the tank by weight.
IMPROPER FILLING IS DANGEROUS.
Tell your LP dealer that this is a new LP tank. The air must be removed from a new LP tank before the initial filling. Your LP tank dealer is equipped to do this.
CAUTION: If you exchange your LP tank, make sure you get a similar tank in return. Your LP tank is equipped with a
The LP tank must be installed, transported and stored in an upright position. LP tank should not be dropped or handled roughly.
Never store or transport the LP tank where temperatures can reach 125° Fahrenheit (too hot to hold by hand – for example: do not leave the LP tank in a car on a hot day).
For full instructions on safe handling of LP tanks, see Section "Operating Instructions".
Note - A refill will last for approximately 150 lightings at normal use (each lighting lasting 3 to 5 minutes). LP tank does not have to be empty before refilling.
13