
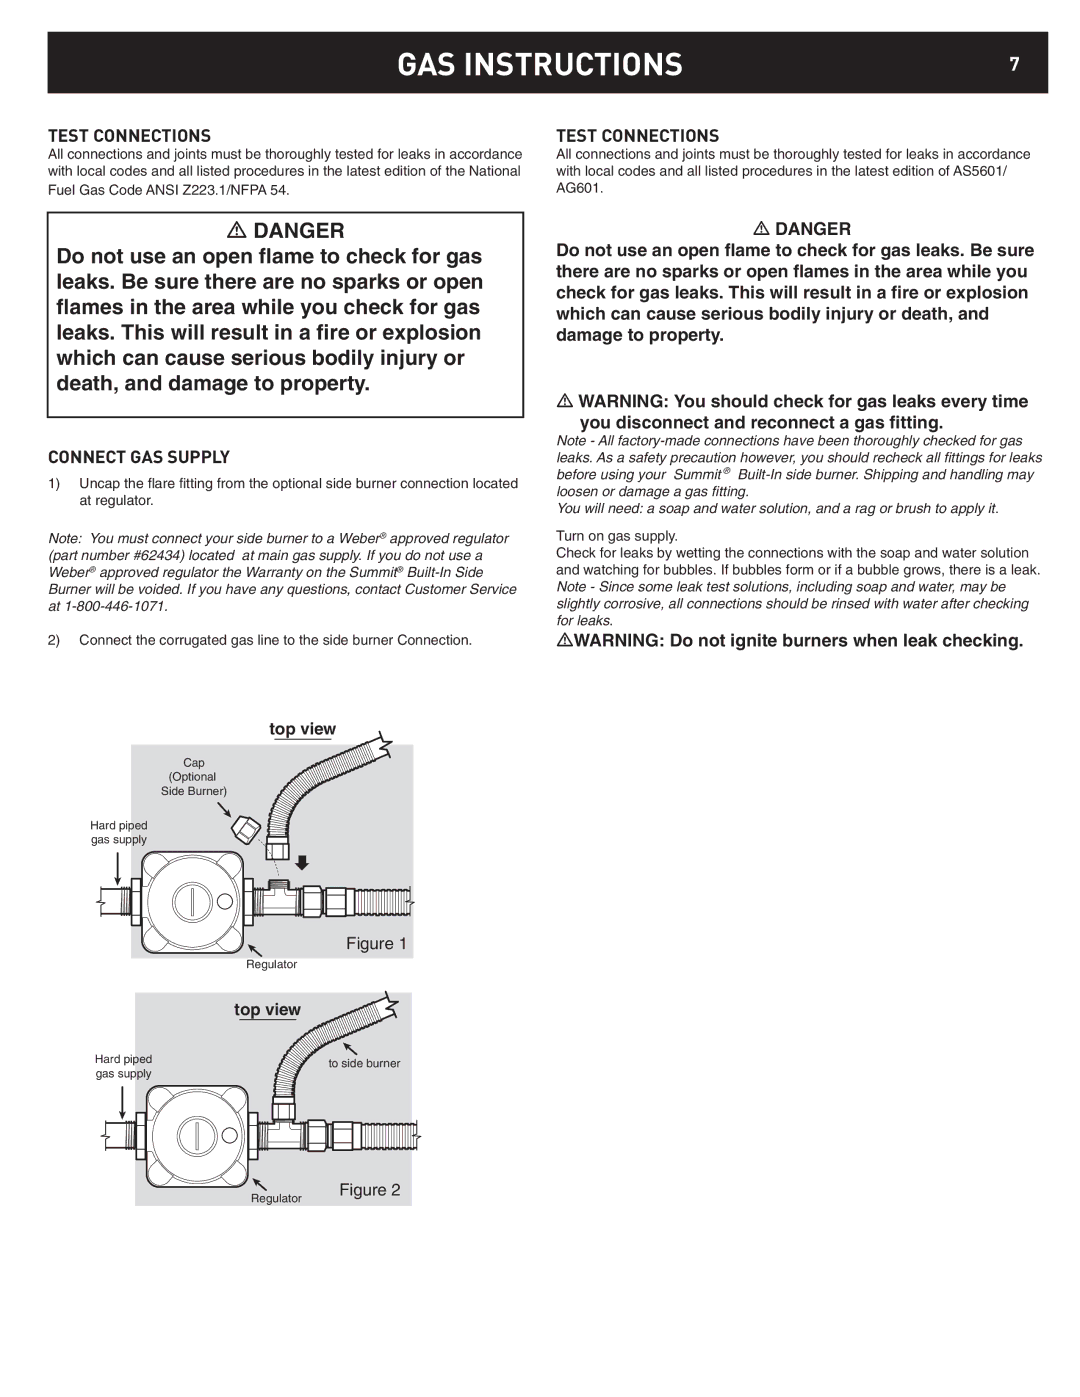
42377, Summit Built-In NG Side Burner specifications
The Weber 42377 Summit Built-In NG Side Burner is a high-performance addition to outdoor kitchens, designed to elevate your grilling experience with its advanced features and robust construction. This side burner is an integral component of the Weber Summit series, renowned for its commitment to quality and innovation.One of the standout characteristics of the Weber 42377 is its powerful burner system. Equipped with a premium stainless steel burner, it delivers an impressive 12,000 BTUs of cooking power. This ensures rapid heating and exceptional temperature control, allowing you to prepare a variety of dishes with ease. Whether you’re sautéing vegetables, boiling sauces, or whipping up side dishes, this side burner can handle the task efficiently.
The construction of the Weber 42377 is another highlight, featuring durable stainless steel materials that not only enhance its aesthetics but also ensure longevity. Stainless steel is resistant to rust and corrosion, making this side burner ideal for outdoor use where it is subjected to varying weather conditions. Additionally, the sleek design integrates seamlessly into any outdoor kitchen setup.
The side burner includes an easy-to-use electronic ignition system, which allows for quick and hassle-free startup. With just a push of a button, the burner lights up, saving time and effort compared to traditional match-lighting techniques. This convenience is complemented by the convenient control knobs that provide precision heat adjustments, letting you fine-tune the cooking temperature to suit your culinary needs.
Another notable feature is the locked lid design. When not in use, the lid can be securely locked, keeping the burner safe from the elements and preventing debris accumulation. This attention to detail reflects Weber’s dedication to usability and maintenance.
Furthermore, the Weber 42377 Summit Built-In NG Side Burner is designed to be compatible with natural gas, making it an efficient choice for homeowners looking for a reliable, permanent cooking solution. With its thoughtful features and durable construction, this side burner exemplifies Weber's commitment to enhancing the outdoor cooking experience, making it an essential addition for grilling enthusiasts. Whether you’re hosting a barbecue or enjoying a quiet evening cookout, the Weber 42377 provides the versatility and performance needed to create delicious meals with ease.