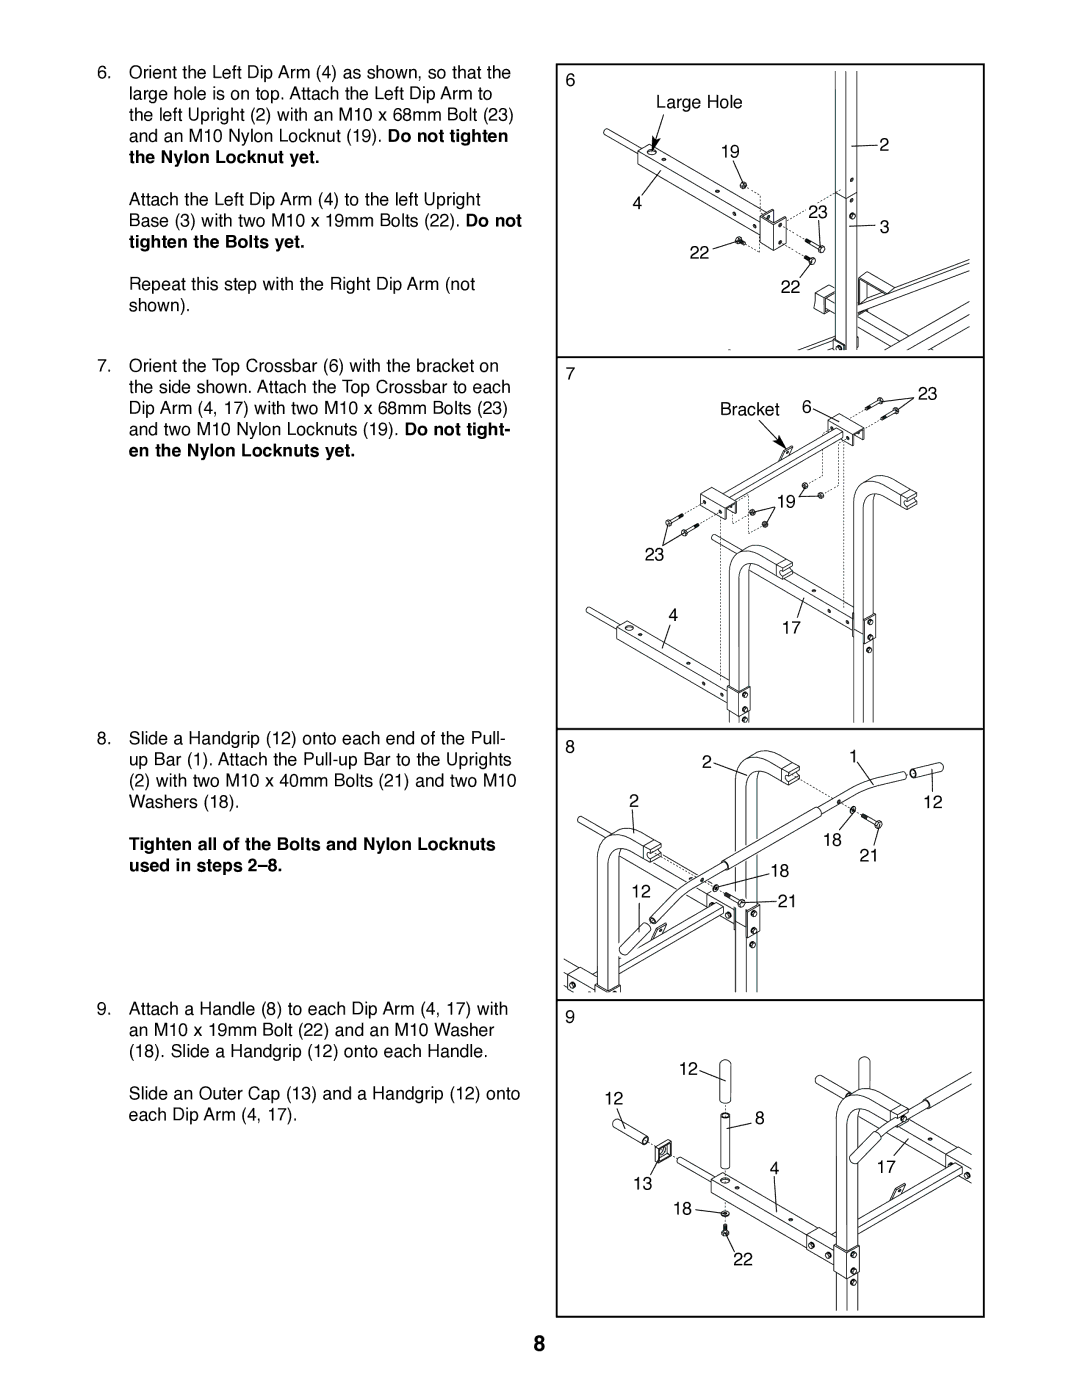
6.Orient the Left Dip Arm (4) as shown, so that the large hole is on top. Attach the Left Dip Arm to the left Upright (2) with an M10 x 68mm Bolt (23) and an M10 Nylon Locknut (19). Do not tighten the Nylon Locknut yet.
Attach the Left Dip Arm (4) to the left Upright Base (3) with two M10 x 19mm Bolts (22). Do not tighten the Bolts yet.
Repeat this step with the Right Dip Arm (not shown).
7.Orient the Top Crossbar (6) with the bracket on the side shown. Attach the Top Crossbar to each Dip Arm (4, 17) with two M10 x 68mm Bolts (23) and two M10 Nylon Locknuts (19). Do not tight- en the Nylon Locknuts yet.
8.Slide a Handgrip (12) onto each end of the Pull- up Bar (1). Attach the
(2) with two M10 x 40mm Bolts (21) and two M10 Washers (18).
Tighten all of the Bolts and Nylon Locknuts used in steps 2–8.
9.Attach a Handle (8) to each Dip Arm (4, 17) with an M10 x 19mm Bolt (22) and an M10 Washer (18). Slide a Handgrip (12) onto each Handle.
Slide an Outer Cap (13) and a Handgrip (12) onto each Dip Arm (4, 17).
8
6 |
|
|
| Large Hole |
|
| 19 | 2 |
|
| |
4 |
| 23 |
|
| |
|
| 3 |
| 22 |
|
| 22 |
|
7 |
| 23 |
| Bracket | |
| 6 | |
| 19 |
|
23 |
| |
| 4 |
|
| 17 |
|
8 | 2 | 1 |
| ||
|
| |
2 |
| 12 |
|
| 18 |
| 18 | 21 |
|
| |
12 | 21 |
|
|
| |
9 |
|
|
| 12 |
|
12 | 8 |
|
|
| |
13 | 4 | 17 |
|
| |
| 18 |
|
| 22 |
|