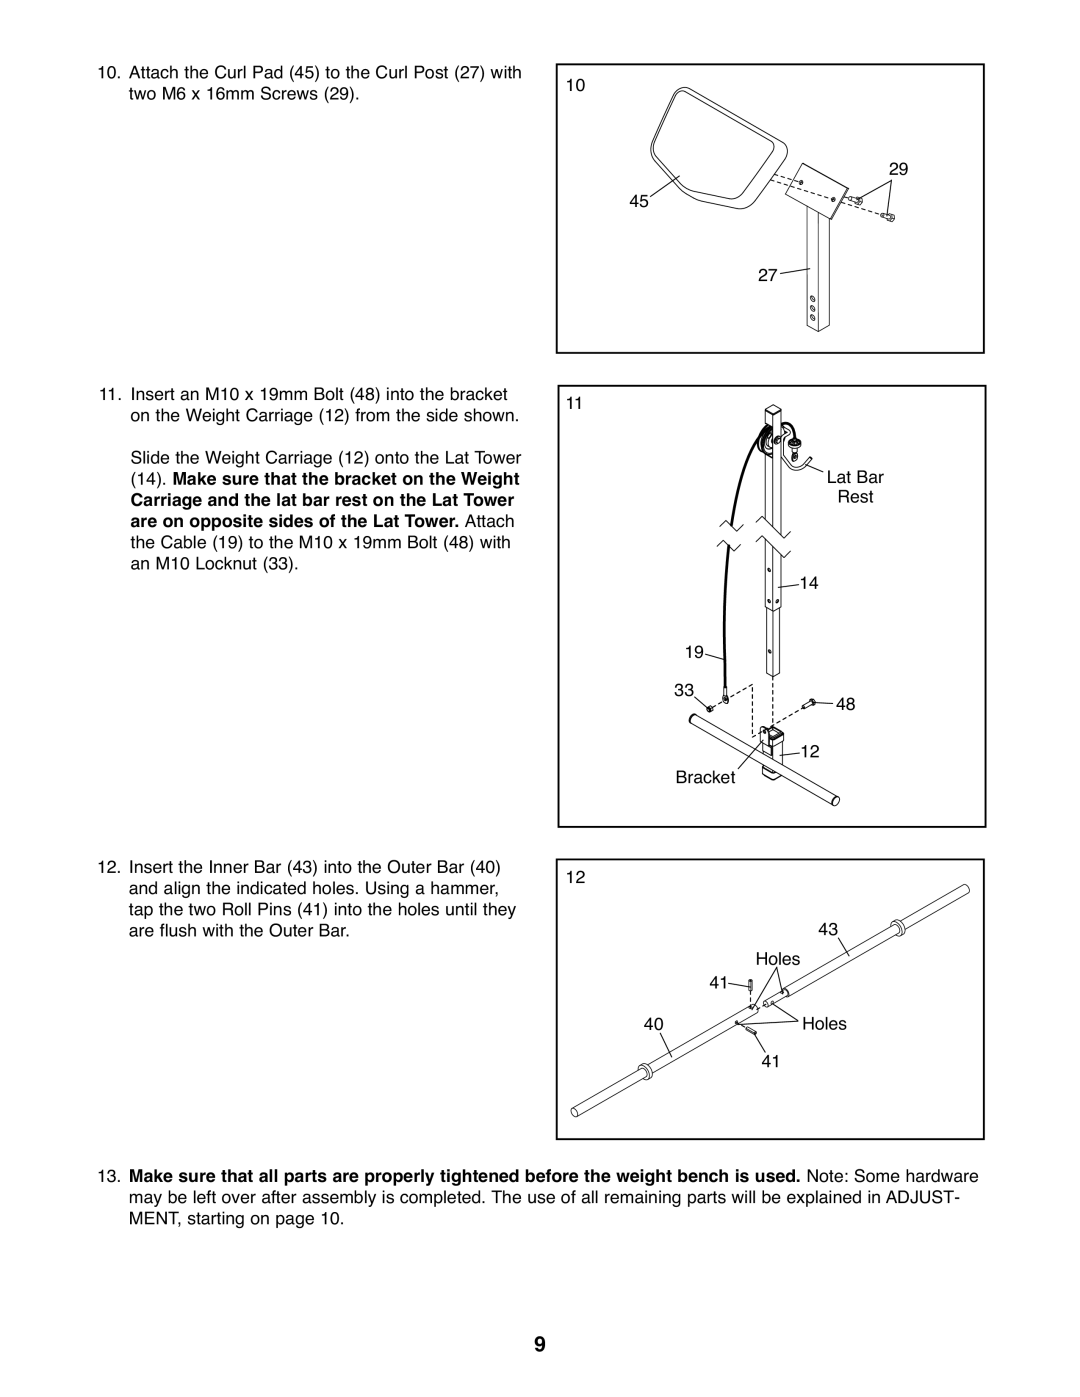
10. Attach the Curl Pad (45) to the Curl Post (27) with | 10 |
|
| |
two M6 x 16mm Screws (29). |
|
| ||
|
| 45 |
| 29 |
|
|
|
| |
|
|
| 27 |
|
11. Insert an M10 x 19mm Bolt (48) into the bracket | 11 |
|
| |
on the Weight Carriage (12) from the side shown. |
|
| ||
Slide the Weight Carriage (12) onto the Lat Tower |
|
| Lat Bar | |
(14). Make sure that the bracket on the Weight |
|
| ||
Carriage and the lat bar rest on the Lat Tower |
|
| Rest | |
are on opposite sides of the Lat Tower. Attach |
|
|
| |
the Cable (19) to the | M10 x 19mm Bolt (48) with |
|
|
|
an M10 Locknut (33). |
|
| 14 | |
|
|
| ||
|
| 19 |
|
|
|
| 33 |
| 48 |
|
| Bracket | 12 | |
|
|
|
| |
12. Insert the Inner Bar (43) into the Outer Bar (40) | 12 |
|
| |
and align the indicated holes. Using a hammer, |
|
| ||
tap the two Roll Pins (41) into the holes until they |
|
| 43 | |
are flush with the Outer Bar. | 41 | Holes | ||
|
|
| Holes | |
|
| 40 | 41 | |
|
|
|
| |
13.Make sure that all parts are properly tightened before the weight bench is used. Note: Some hardware may be left over after assembly is completed. The use of all remaining parts will be explained in ADJUST- MENT, starting on page 10.
9
