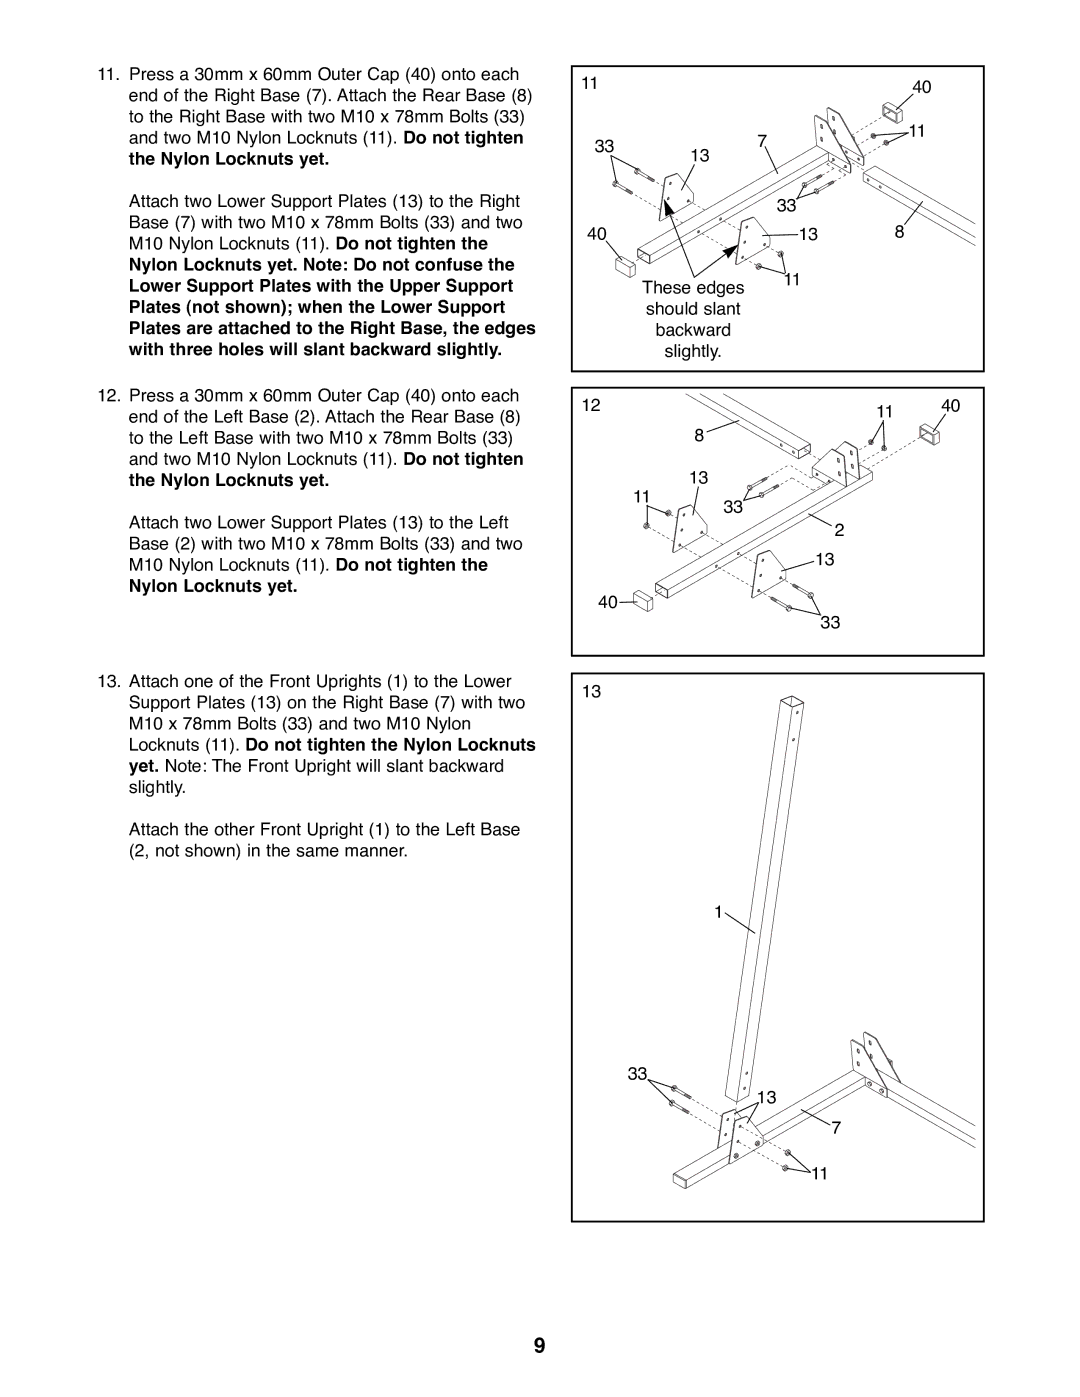
11.Press a 30mm x 60mm Outer Cap (40) onto each end of the Right Base (7). Attach the Rear Base (8) to the Right Base with two M10 x 78mm Bolts (33) and two M10 Nylon Locknuts (11). Do not tighten the Nylon Locknuts yet.
Attach two Lower Support Plates (13) to the Right Base (7) with two M10 x 78mm Bolts (33) and two M10 Nylon Locknuts (11). Do not tighten the
Nylon Locknuts yet. Note: Do not confuse the Lower Support Plates with the Upper Support Plates (not shown); when the Lower Support Plates are attached to the Right Base, the edges with three holes will slant backward slightly.
12.Press a 30mm x 60mm Outer Cap (40) onto each end of the Left Base (2). Attach the Rear Base (8) to the Left Base with two M10 x 78mm Bolts (33) and two M10 Nylon Locknuts (11). Do not tighten the Nylon Locknuts yet.
Attach two Lower Support Plates (13) to the Left Base (2) with two M10 x 78mm Bolts (33) and two M10 Nylon Locknuts (11). Do not tighten the
Nylon Locknuts yet.
13.Attach one of the Front Uprights (1) to the Lower Support Plates (13) on the Right Base (7) with two M10 x 78mm Bolts (33) and two M10 Nylon Locknuts (11). Do not tighten the Nylon Locknuts yet. Note: The Front Upright will slant backward slightly.
Attach the other Front Upright (1) to the Left Base (2, not shown) in the same manner.
11 |
|
| 40 |
33 |
| 7 | 11 |
13 |
| ||
|
| ||
|
|
| |
|
| 33 |
|
40 |
| 13 | 8 |
| These edges | 11 |
|
|
|
| |
| should slant |
|
|
| backward |
|
|
| slightly. |
|
|
12 |
| 11 | 40 |
|
|
| |
|
| 8 |
|
| 11 | 13 |
|
| 33 |
| |
|
|
| |
|
| 2 |
|
|
| 13 |
|
40 |
| 33 |
|
|
|
| |
13 |
|
|
|
1
33
13
7
11
9