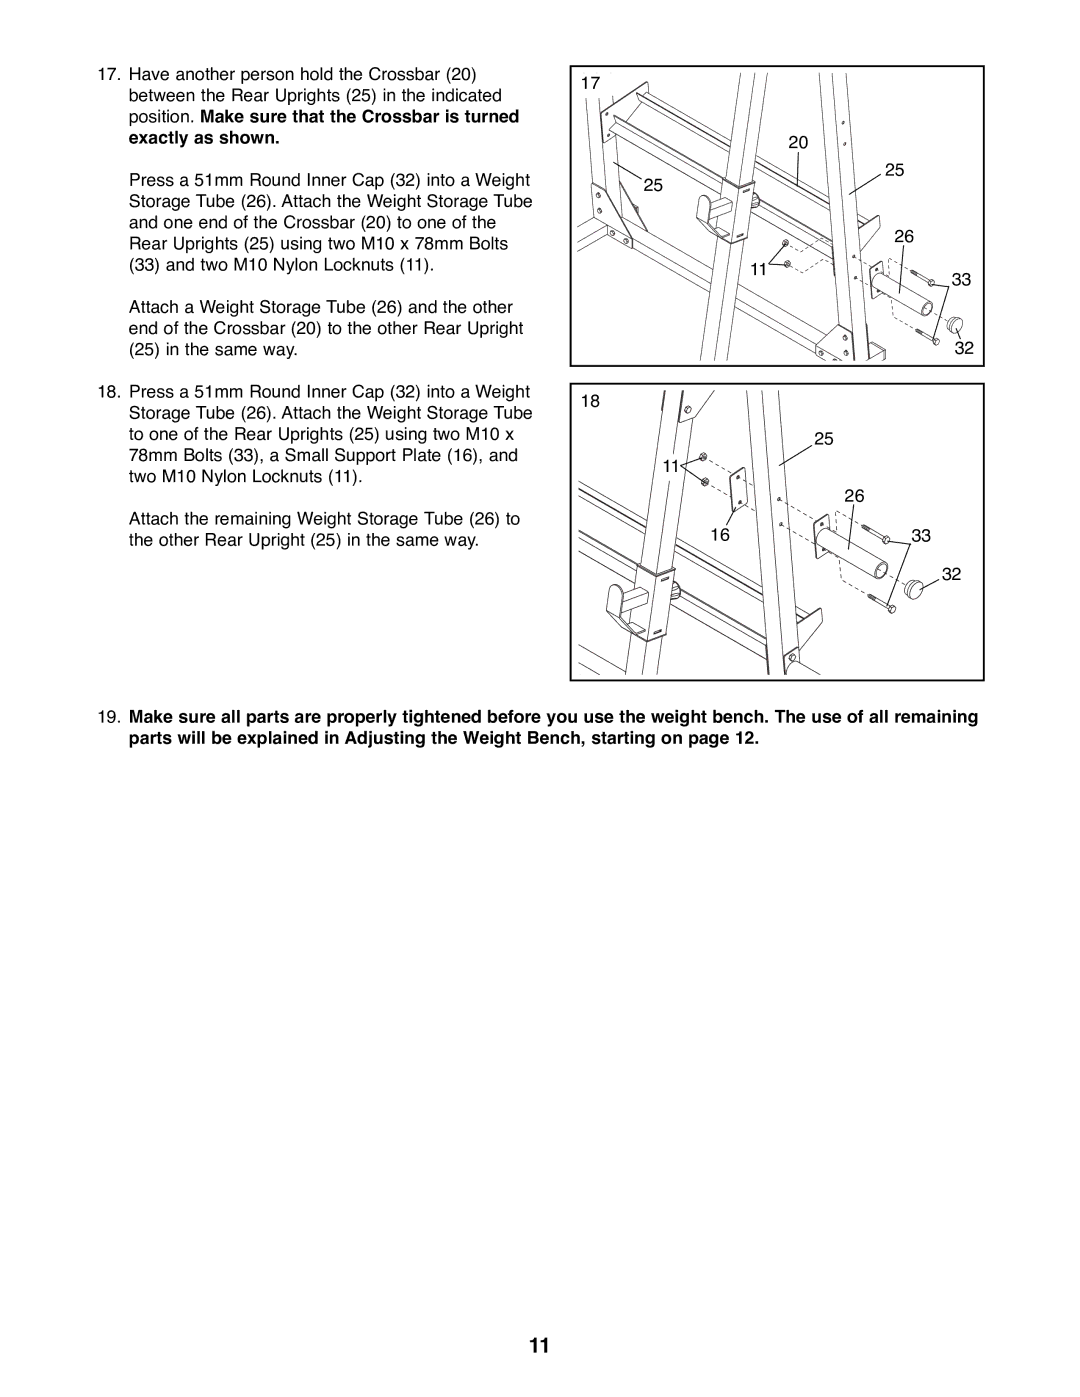
17. Have another person hold the Crossbar (20) | 17 |
|
|
between the Rear Uprights (25) in the indicated |
|
| |
|
|
| |
position. Make sure that the Crossbar is turned |
|
|
|
exactly as shown. |
|
| 20 |
Press a 51mm Round Inner Cap (32) into a Weight | 25 |
| 25 |
|
| ||
Storage Tube (26). Attach the Weight Storage Tube |
|
| |
|
|
| |
and one end of the Crossbar (20) to one of the |
|
| 26 |
Rear Uprights (25) using two M10 x 78mm Bolts |
|
| |
|
|
| |
(33) and two M10 Nylon Locknuts (11). |
| 11 | 33 |
|
|
| |
Attach a Weight Storage Tube (26) and the other |
|
|
|
end of the Crossbar (20) to the other Rear Upright |
|
| 32 |
(25) in the same way. |
|
| |
18. Press a 51mm Round Inner Cap (32) into a Weight | 18 |
|
|
Storage Tube (26). Attach the Weight Storage Tube |
|
| |
|
|
| |
to one of the Rear Uprights (25) using two M10 x |
|
| 25 |
78mm Bolts (33), a Small Support Plate (16), and | 11 |
|
|
two M10 Nylon Locknuts (11). |
|
| |
|
| 26 | |
|
|
| |
Attach the remaining Weight Storage Tube (26) to | 16 |
| 33 |
the other Rear Upright (25) in the same way. |
| ||
|
|
| 32 |
19.Make sure all parts are properly tightened before you use the weight bench. The use of all remaining parts will be explained in Adjusting the Weight Bench, starting on page 12.
11
