ASSEMBLY
Assembly requires two people. Set the treadmill in a cleared area and remove all packing materials. Do not dispose of the packing materials until assembly is completed. Refer to the drawings below to identify the small
parts used | in assembly. | Assembly | requires | your own phillips screwdriver _, | two adjustable |
wrenches | _ | , and wire | cutters | ,_._. |
|
Note: The underside of the treadmill walking belt is coated with
@
1 1/4" Screw
3/8" Nut
1/4" x 1" Bolt
Screw
Handrail | Washer | 3/8" | Washer |
| 3/8" x 2" Bolt |
| ||
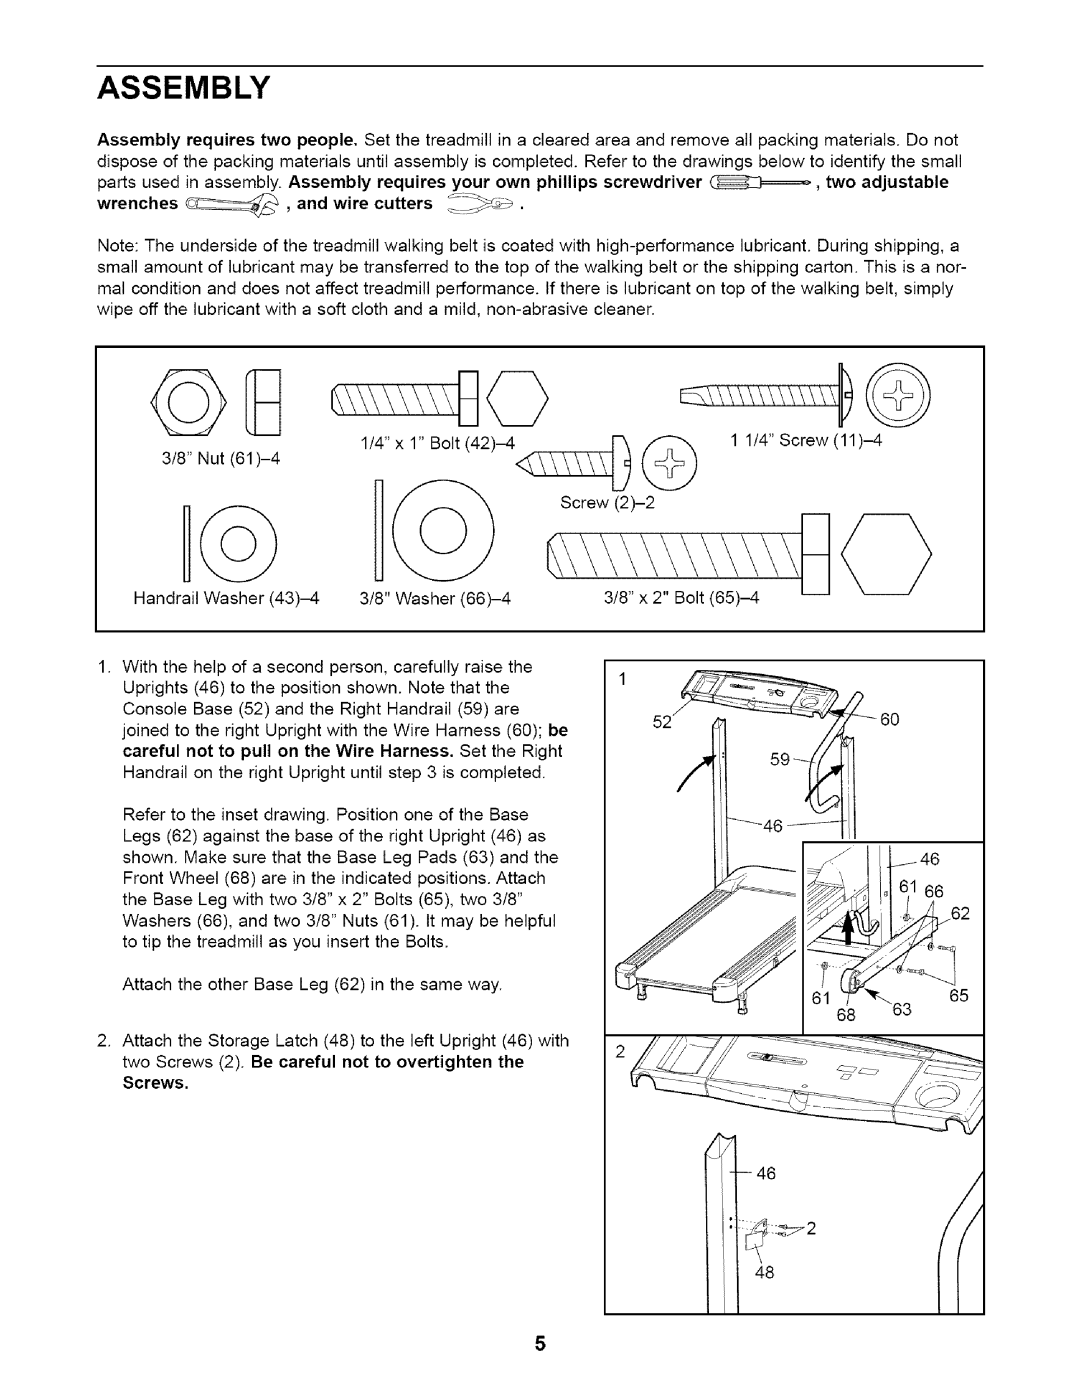
1. With the | help of a second person, | carefully | raise | the |
|
| ||
Uprights | (46) to the position | shown. Note that | the |
|
|
| ||
Console | Base (52) and the | Right | Handrail | (59) | are | 52 _ |
| |
joined to the right Upright with the Wire Harness (60); be |
| |||||||
|
| |||||||
careful not to pull on the Wire Harness. Set the Right |
|
| ||||||
Handrail | on the right Upright | until step 3 is completed. |
|
| ||||
Refer to the inset drawing. Position one of the Base | _46 | J | ||||||
|
|
|
|
|
|
| ||
Legs (62) against the base of the right Upright (46) as shown. Make sure that the Base Leg Pads (63) and the Front Wheel (68) are in the indicated positions. Attach the Base Leg with two 3/8" x 2" Bolts (65), two 3/8" Washers (66), and two 3/8" Nuts (61). It may be helpful to tip the treadmill as you insert the Bolts.
Attach the other Base Leg (62) in the same way.
68
2.Attach the Storage Latch (48) to the left Upright (46) with
two Screws (2). Be careful not to overtighten the
Screws.
I1148
5