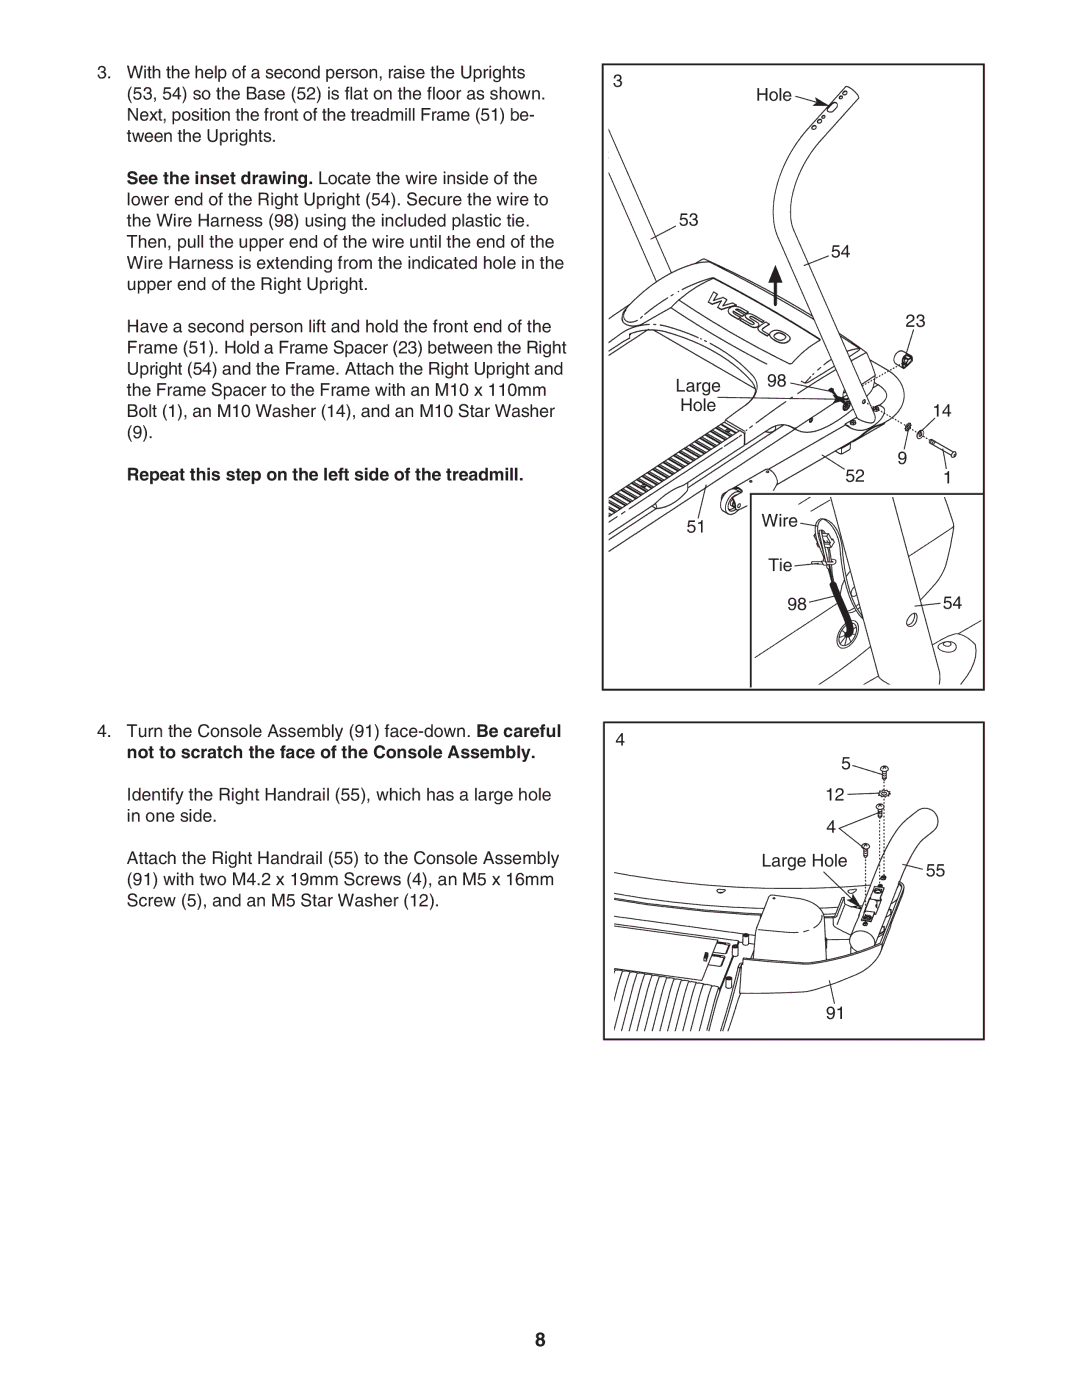
3. With the help of a second person, raise the Uprights | 3 |
|
|
(53, 54) so the Base (52) is flat on the floor as shown. | Hole |
| |
|
| ||
Next, position the front of the treadmill Frame (51) be- |
|
|
|
tween the Uprights. |
|
|
|
See the inset drawing. Locate the wire inside of the |
|
|
|
lower end of the Right Upright (54). Secure the wire to |
|
|
|
the Wire Harness (98) using the included plastic tie. | 53 |
|
|
Then, pull the upper end of the wire until the end of the |
| 54 |
|
Wire Harness is extending from the indicated hole in the |
|
| |
|
|
| |
upper end of the Right Upright. |
|
|
|
Have a second person lift and hold the front end of the |
|
| 23 |
|
|
| |
Frame (51). Hold a Frame Spacer (23) between the Right |
|
|
|
Upright (54) and the Frame. Attach the Right Upright and | Large | 98 |
|
the Frame Spacer to the Frame with an M10 x 110mm |
| ||
|
| ||
Bolt (1), an M10 Washer (14), and an M10 Star Washer | Hole |
| 14 |
|
| ||
(9). |
|
|
|
Repeat this step on the left side of the treadmill. |
| 52 | 9 |
| 1 | ||
| 51 | Wire |
|
|
|
| |
|
| Tie |
|
|
| 98 | 54 |
4. Turn the Console Assembly (91) | 4 |
|
|
not to scratch the face of the Console Assembly. |
|
| |
| 5 |
| |
|
|
| |
Identify the Right Handrail (55), which has a large hole |
| 12 |
|
in one side. |
| 4 |
|
|
|
| |
Attach the Right Handrail (55) to the Console Assembly |
| Large Hole | 55 |
(91) with two M4.2 x 19mm Screws (4), an M5 x 16mm |
|
| |
|
|
| |
Screw (5), and an M5 Star Washer (12). |
|
|
|
|
| 91 |
|
8
