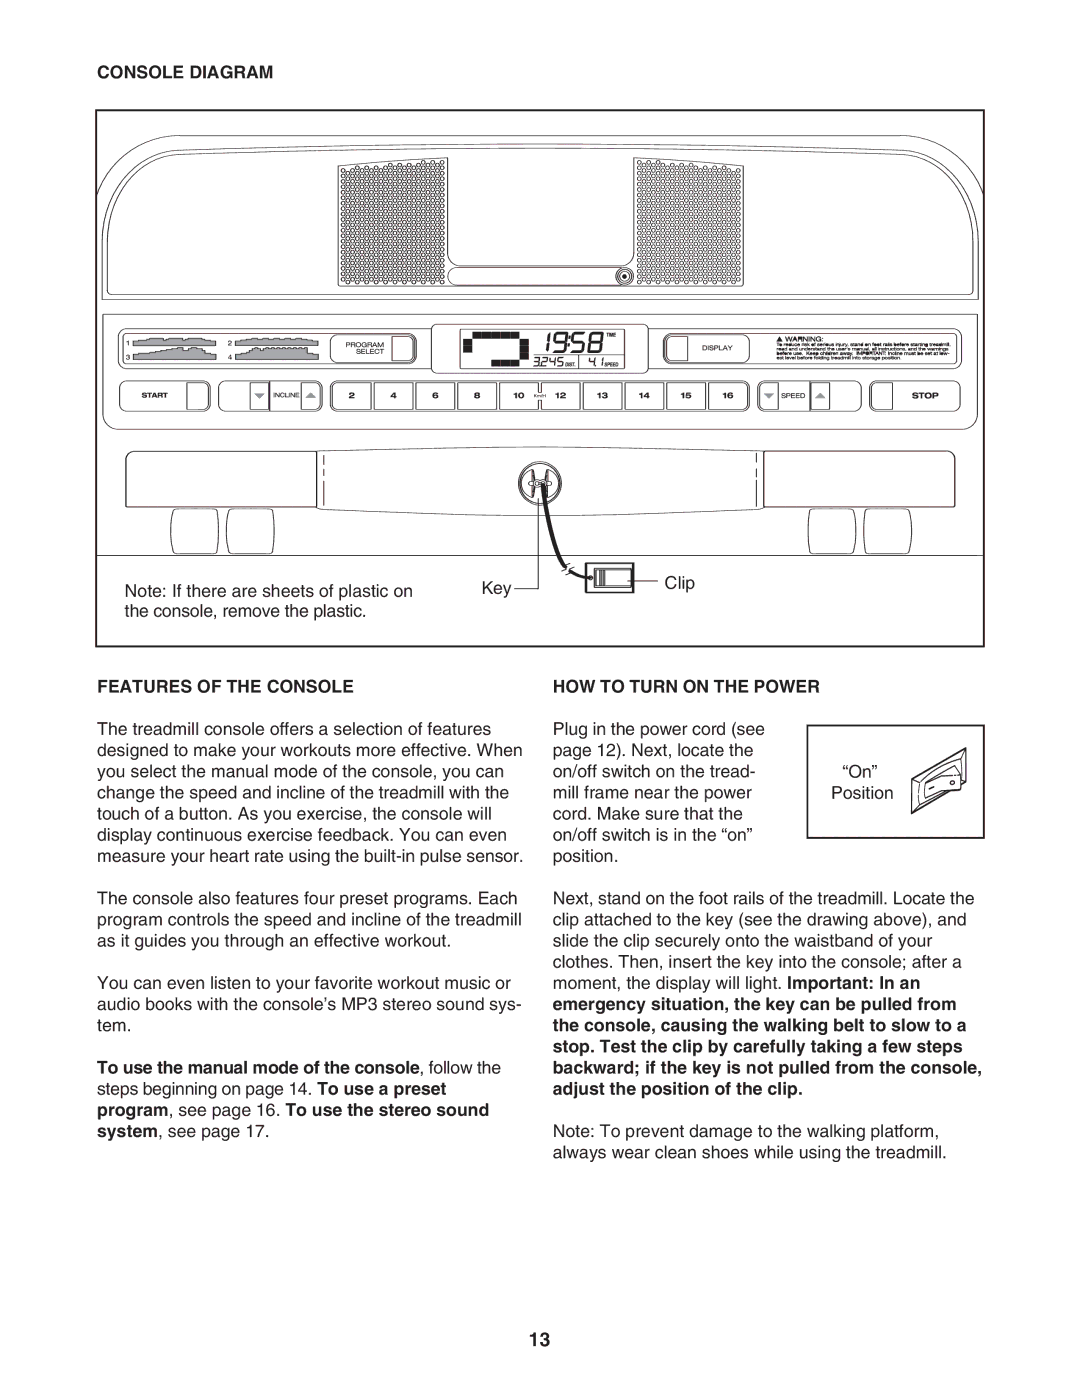
CONSOLE DIAGRAM
|
|
|
|
|
|
|
|
|
|
|
|
|
|
|
|
|
|
|
|
|
|
|
|
|
|
|
|
|
|
|
|
|
|
|
|
|
| Key |
|
|
|
Note: If there are sheets of plastic on |
|
|
|
| ||
|
|
|
| |||
the console, remove the plastic. |
|
|
|
|
| |
|
|
|
|
| ||
|
|
|
|
|
|
|
![]()
![]()
![]() Clip
Clip
FEATURES OF THE CONSOLE
The treadmill console offers a selection of features designed to make your workouts more effective. When you select the manual mode of the console, you can change the speed and incline of the treadmill with the touch of a button. As you exercise, the console will display continuous exercise feedback. You can even measure your heart rate using the
The console also features four preset programs. Each program controls the speed and incline of the treadmill as it guides you through an effective workout.
You can even listen to your favorite workout music or audio books with the console’s MP3 stereo sound sys- tem.
To use the manual mode of the console, follow the steps beginning on page 14. To use a preset program, see page 16. To use the stereo sound system, see page 17.
HOW TO TURN ON THE POWER
Plug in the power cord (see |
|
|
|
|
|
| |
page 12). Next, locate the |
|
|
|
on/off switch on the tread- |
|
|
|
| “On” | ||
mill frame near the power |
| Position |
|
cord. Make sure that the |
|
|
|
|
|
| |
on/off switch is in the “on” |
|
|
|
|
|
| |
position. |
|
|
|
Next, stand on the foot rails of the treadmill. Locate the clip attached to the key (see the drawing above), and slide the clip securely onto the waistband of your clothes. Then, insert the key into the console; after a moment, the display will light. Important: In an emergency situation, the key can be pulled from the console, causing the walking belt to slow to a stop. Test the clip by carefully taking a few steps backward; if the key is not pulled from the console, adjust the position of the clip.
Note: To prevent damage to the walking platform, always wear clean shoes while using the treadmill.
13
