ASSEMBLY
Assembly requires two persons. Set the treadmill in a cleared area and remove all packing materials; do not dispose of the packing materials until assembly is completed. Note: The underside of the treadmill walking belt is coated with
Assembly requires the included hex keys and your own Phillips screwdriver | , standard | ||
screwdriver | , and needlenose pliers | . |
|
Use the drawings below to identify the assembly hardware. The number in parentheses below each drawing is the key number of the part, from the PART LIST near the end of this manual. The number after the parentheses is the quantity needed for assembly. Note: Some small parts may have been
4.2 x 19mm | #10 x 1" Tek |
|
Screw | Screw |
|
M10 x 45mm Bolt | M10 x 65mm Bolt |
|
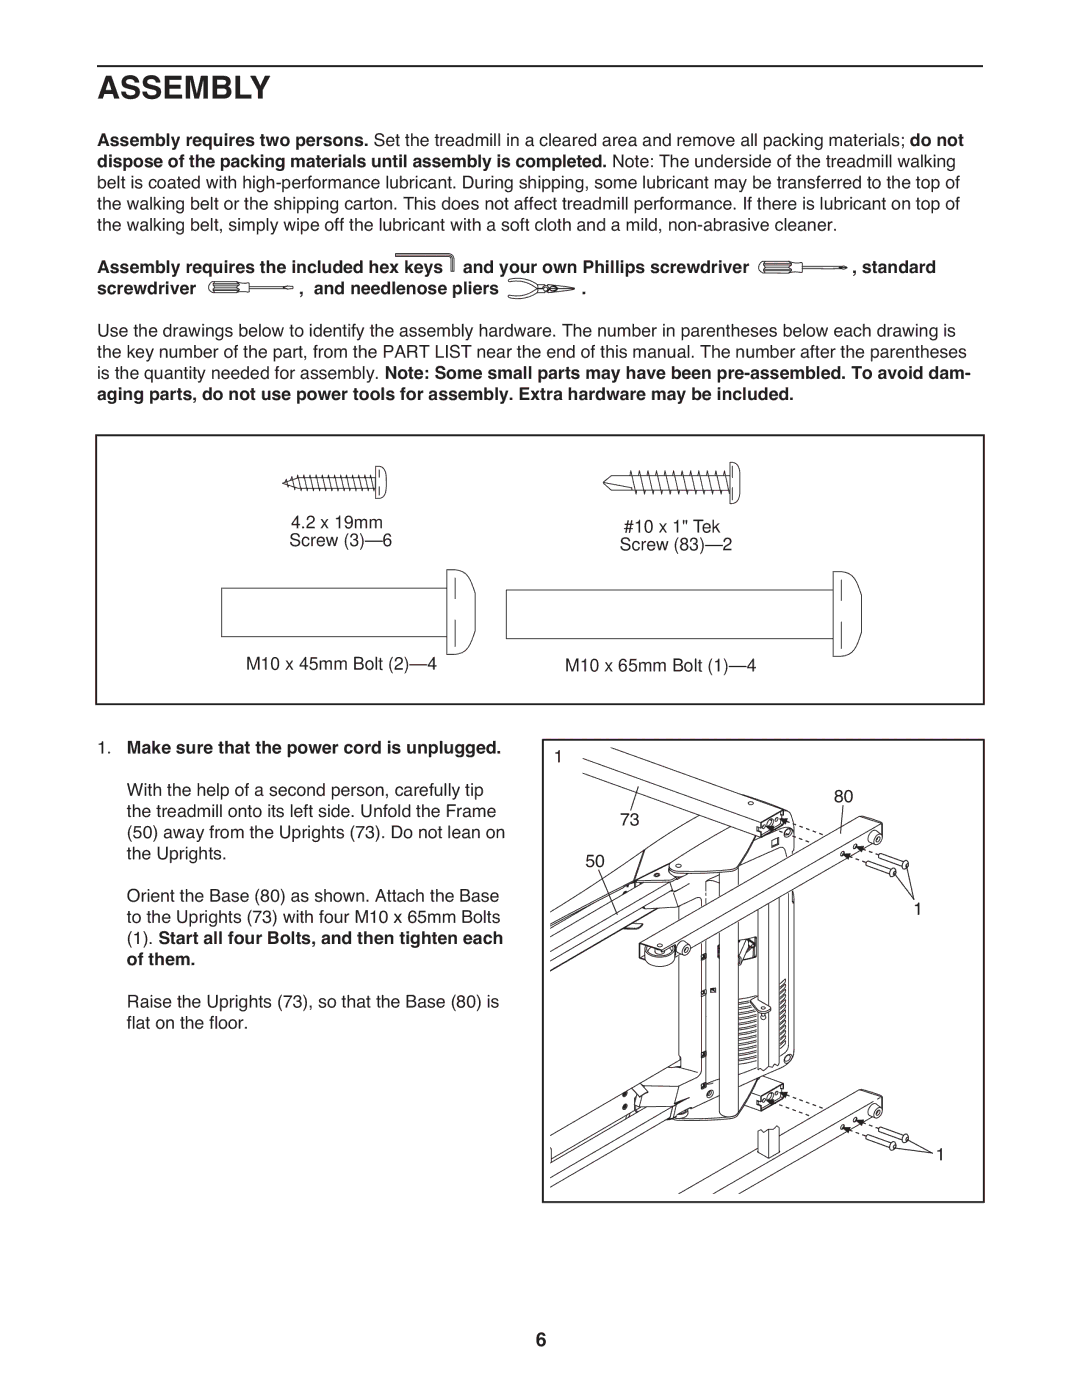
1. Make sure that the power cord is unplugged. | 1 | 80 |
With the help of a second person, carefully tip |
| |
the treadmill onto its left side. Unfold the Frame | 73 |
|
(50) away from the Uprights (73). Do not lean on |
| |
the Uprights. | 50 |
|
Orient the Base (80) as shown. Attach the Base |
| 1 |
to the Uprights (73) with four M10 x 65mm Bolts |
| |
(1). Start all four Bolts, and then tighten each |
|
|
of them. |
|
|
Raise the Uprights (73), so that the Base (80) is |
|
|
flat on the floor. |
|
|
|
| 1 |
| 6 |
|