ASSEMBLY
• To watch an assembly video, go to http://productvideo.co/ assembly/kmart/weslo or use your mobile phone or smartphone to read the QR code at the right. A reader applica- tion such as ShopSavvy
must be installed on your mobile phone or smartphone.
•To hire an authorized service technician to assemble your exercise equipment, call
•Assembly requires two persons.
•Place all parts in a cleared area and remove the packing materials. Do not dispose of the packing materials until you finish all assembly steps.
•After shipping, there may be an oily substance on the exterior of the treadmill. This is normal. If there is an oily substance on the treadmill, wipe it off with a soft cloth and a mild,
•Left parts are marked “L” or “Left” and right parts are marked “R” or “Right.”
•To identify small parts, see page 6.
•Assembly requires the following tools:
the included hex keys
one adjustable wrench
one Phillips screwdriver
needlenose pliers
To avoid damaging parts, do not use power tools.
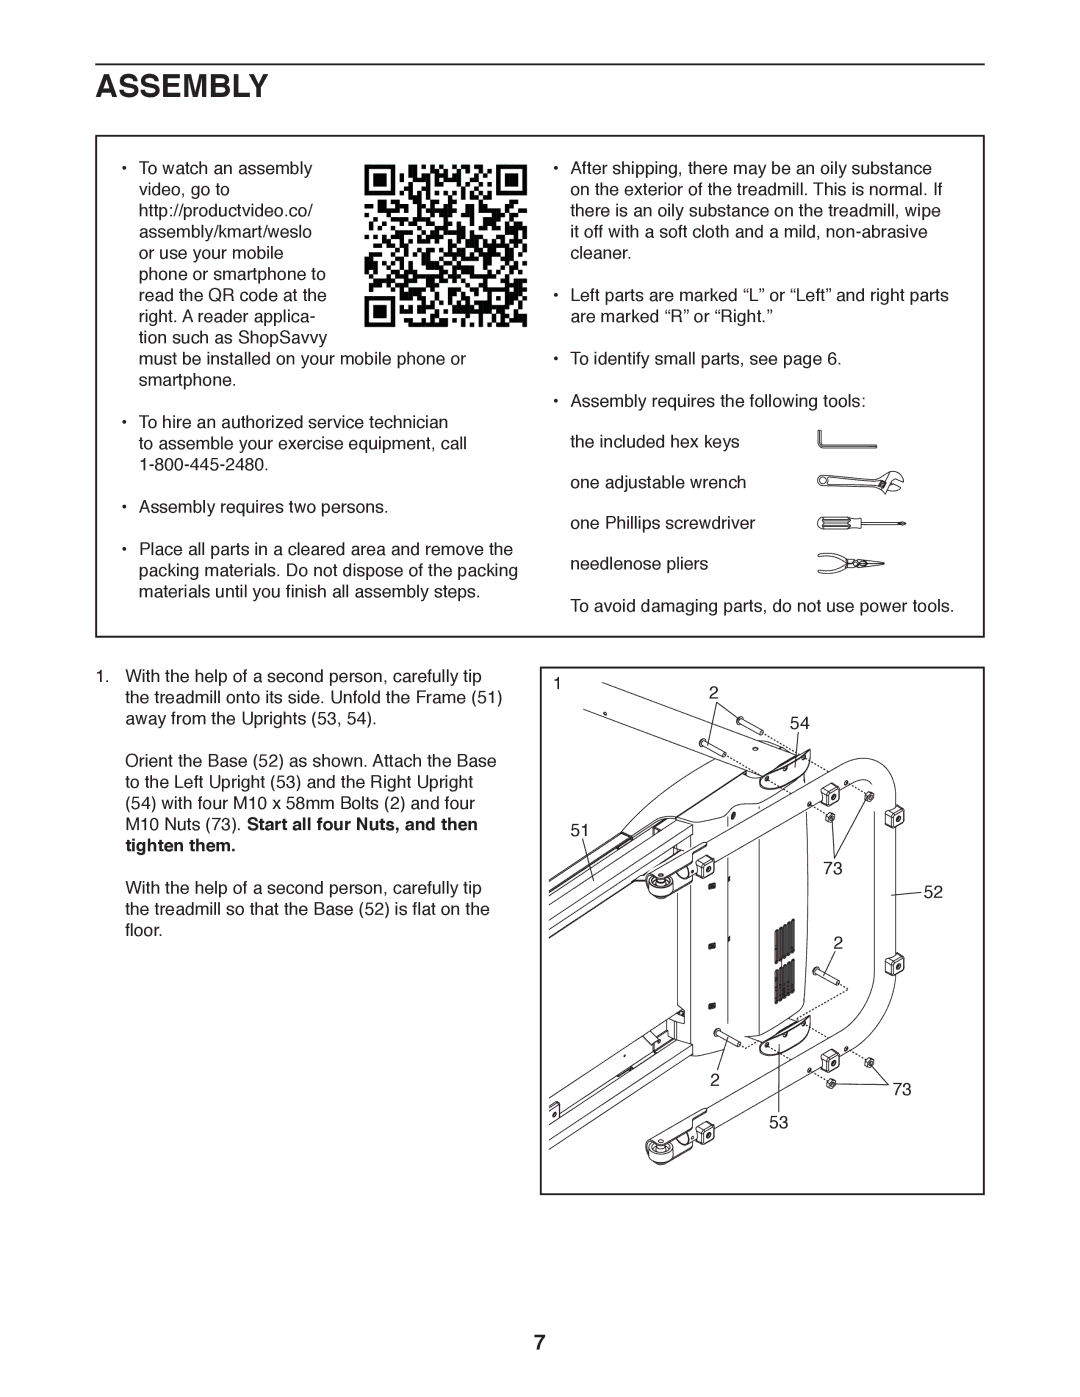
1. With the help of a second person, carefully tip | 1 | 2 |
|
the treadmill onto its side. Unfold the Frame (51) |
| ||
|
| ||
away from the Uprights (53, 54). |
|
| 54 |
Orient the Base (52) as shown. Attach the Base |
|
|
|
to the Left Upright (53) and the Right Upright |
|
|
|
(54) with four M10 x 58mm Bolts (2) and four |
| 51 |
|
M10 Nuts (73). Start all four Nuts, and then |
|
| |
tighten them. |
|
| 73 |
With the help of a second person, carefully tip |
|
| |
|
| 52 | |
the treadmill so that the Base (52) is flat on the |
|
|
|
floor. |
|
| 2 |
|
|
| |
|
| 2 | 73 |
|
|
| |
|
|
| 53 |
| 7 |
|
|