5.Connect the other two wires to outer terminal block screws using the same method(s) described in step 4. Tighten all terminal block screws firmly.
6.Tighten the strain relief screws.
7.Insert tab of terminal block cover into slot of the dryer rear panel. Secure cover with
NOTE: If local codes do not permit the connection of a
Alternate Connection:
If local codes do not permit the connection of a
1.Disconnect power.
2.Make sure the power supply cord or direct wire cable is in place (see steps
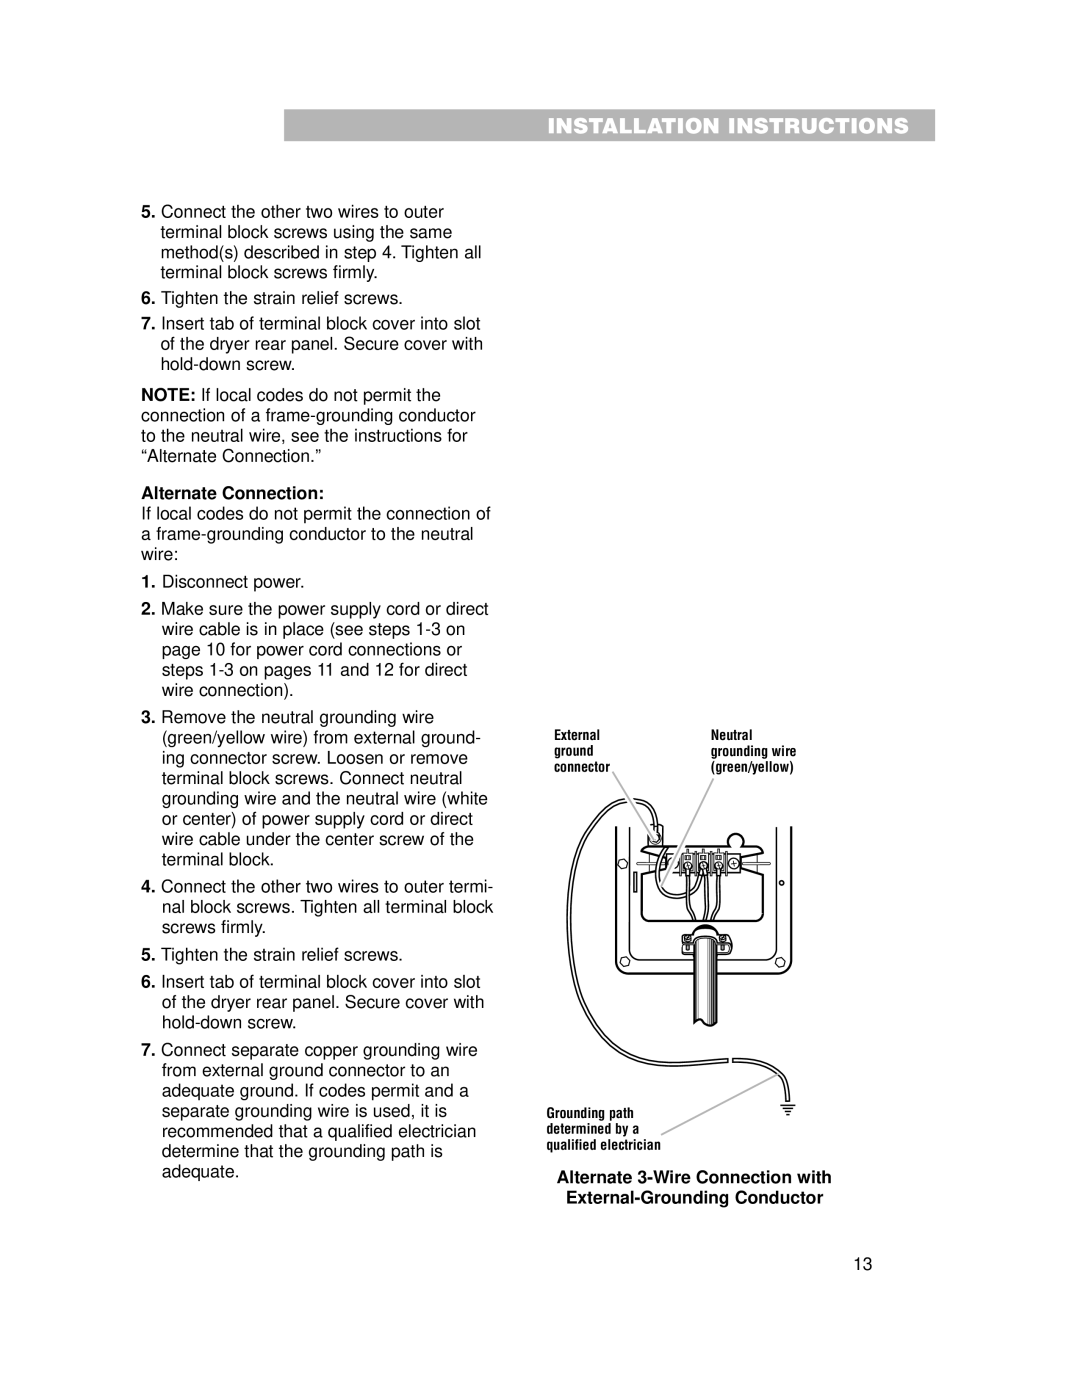
3.Remove the neutral grounding wire (green/yellow wire) from external ground- ing connector screw. Loosen or remove terminal block screws. Connect neutral grounding wire and the neutral wire (white or center) of power supply cord or direct wire cable under the center screw of the terminal block.
4.Connect the other two wires to outer termi- nal block screws. Tighten all terminal block screws firmly.
5.Tighten the strain relief screws.
6.Insert tab of terminal block cover into slot of the dryer rear panel. Secure cover with
7.Connect separate copper grounding wire from external ground connector to an adequate ground. If codes permit and a separate grounding wire is used, it is recommended that a qualified electrician determine that the grounding path is adequate.
INSTALLATION INSTRUCTIONS
External | Neutral |
ground | grounding wire |
connector | (green/yellow) |
Grounding path determined by a qualified electrician
Alternate
13
