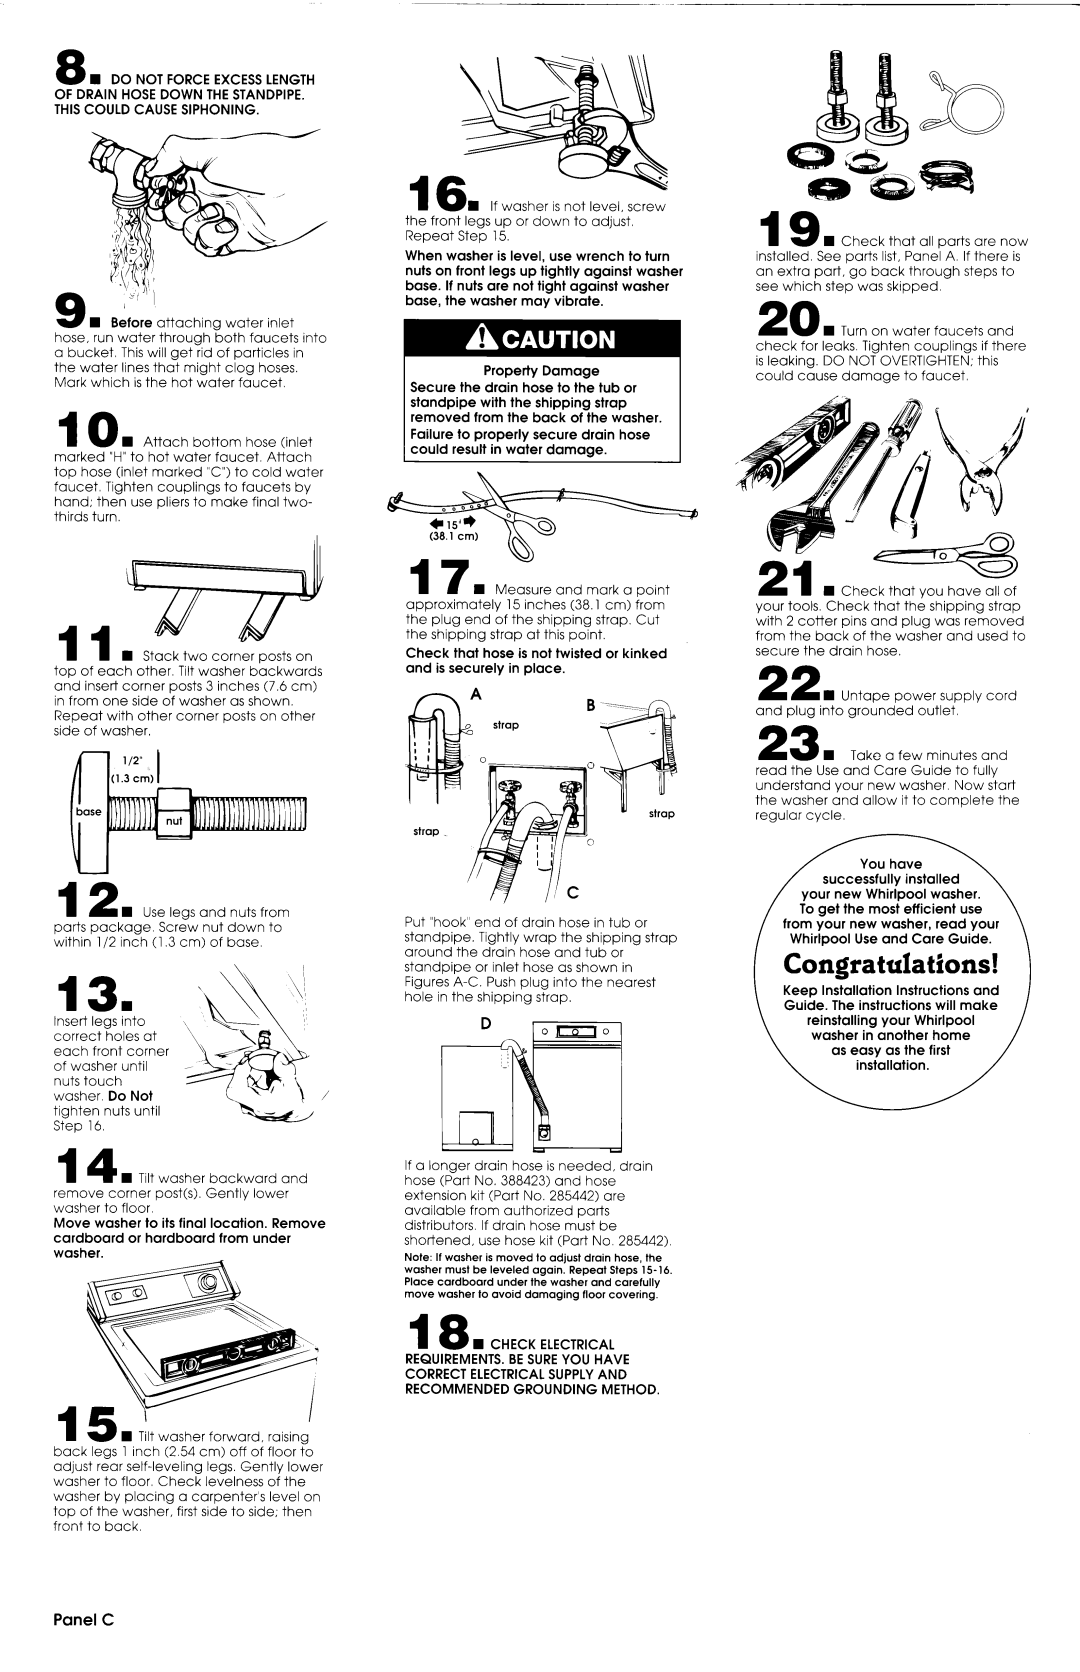
8 n DO NOT FORCE EXCESS LENGTH OF DRAIN HOSE DOWN THE STANDPIPE. THIS COULD CAUSE SIPHONING.
9 n 1
Before attaching water inlet hose, run water through both faucets into a bucket. This will get rid of particles in the water lines that might clog hoses. Mark which is the hot water faucet.
10 W Attach bottom hose (inlet marked “H”to hot water faucet. Attach top hose (inlet marked “C”)to cold water faucet. Tighten couplings to faucets by hand: then use pliers to make final two- thirds turn.
11 n Stack two corner posts on top of each other. Tilt washer backwards and insert corner posts 3 inches (7.6 cm) in from one side of washer as shown.
Repeat with other corner posts on other side of washer.
nIf washer is not level, screw
the front legs up or down to adjust. Repeat Step 15.
When washer is level, use wrench to turn nuts on front legs up tightly against washer base. If nuts are not tight against washer base, the washer may vibrate.
Property Damage Secure the drain hose to the tub or standpipe with the shipping strap removed from the back of the washer.
Failure to properly secure drain hose could result in water damage.
17 H Measure and mark a point
approximately 15 inches (38.1 cm) from the plug end of the shipping strap. Cut the shipping strap at this point.
Check that hose is not twisted or kinked and is securely in place.
19 n Check that all parts are now installed. See parts list, Pane’1 A. If there is an extra part, go back through steps to see which step was skipped.
20 n Turn on water faucets and check for leaks. Tighten couplings if there is leaking. DO NOT OVERTIGHTEN: this could cause damage to faucet.
H Check that YOU have all of your tools. Check that the shipping strap with 2 cotter pins and plug was removed from the back of the washer and used to secure the drain hose.
and plug into grounded outlet’.
read the Use and Care Guide to fully understand your new washer. Now start the washer and allow it to complete the regular cycle.
12 n Use leas and nuts from parts package. Screw nut down to within l/2 inch (1.3 cm) of base,
Insert legs into correct holes at each front corner of washer until nuts touch washer. Do Not tighten nuts until Step 16.
14 W Tilt washer backward and remove corner post(s). Gently lower washer to floor.
Move washer to its final location. Remove cardboard or hardboard from under washer.
n Tilt washer forward, raising back legs 1 inch (2.54 cm) off of floor to adjust rear
Put “hook” end of drain hose in tub or standpipe. Tightly wrap the shipping strap around the drain hose and tub or standpipe or inlet hose as shown in Figures
If a longer drain hose is needed, drain hose (Part No. 388423) and hose extension kit (Part No. 285442) are available from authorized parts distributors. If drain hose must be shortened, use hose kit (Part No. 285442).
Note: If washer is moved to adjust drain hose, the washer must be leveled again. Repeat Steps 1516. Place cardboard under the washer and carefully move washer to avoid damaging floor covering.
18 n CHECK ELECTRICAL REQUIREMENTS. BE SUREYOU HAVE CORRECT ELECTRICAL SUPPLY AND RECOMMENDED GROUNDING METHOD.
I Congratulatfons! I
Keep Installation Instructions and
Guide. The instructions will make
Panel C