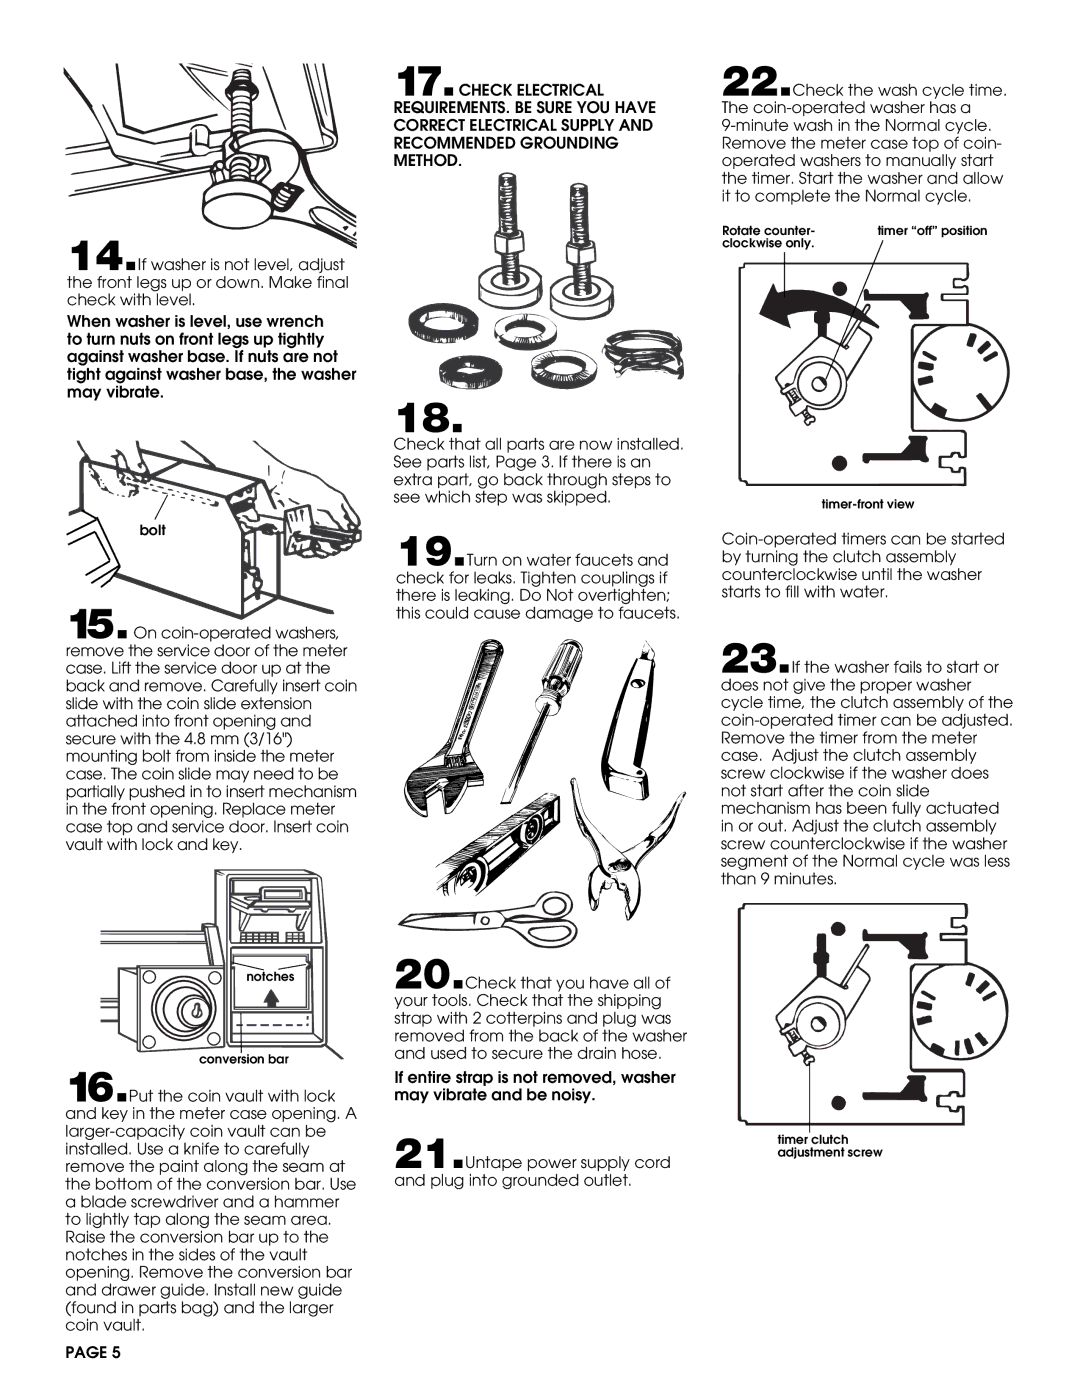
14.If washer is not level, adjust the front legs up or down. Make final check with level.
When washer is level, use wrench to turn nuts on front legs up tightly against washer base. If nuts are not tight against washer base, the washer may vibrate.
bolt
15.On
notches
conversion bar
16.Put the coin vault with lock and key in the meter case opening. A
17.CHECK ELECTRICAL REQUIREMENTS. BE SURE YOU HAVE CORRECT ELECTRICAL SUPPLY AND RECOMMENDED GROUNDING METHOD.
18.
Check that all parts are now installed. See parts list, Page 3. If there is an extra part, go back through steps to see which step was skipped.
19.Turn on water faucets and check for leaks. Tighten couplings if there is leaking. Do Not overtighten; this could cause damage to faucets.
20.Check that you have all of your tools. Check that the shipping strap with 2 cotterpins and plug was removed from the back of the washer and used to secure the drain hose.
If entire strap is not removed, washer may vibrate and be noisy.
22.Check the wash cycle time. The
Rotate counter- | timer “off” position |
clockwise only. |
|
23.If the washer fails to start or does not give the proper washer cycle time, the clutch assembly of the
installed. Use a knife to carefully remove the paint along the seam at the bottom of the conversion bar. Use a blade screwdriver and a hammer to lightly tap along the seam area. Raise the conversion bar up to the notches in the sides of the vault opening. Remove the conversion bar and drawer guide. Install new guide (found in parts bag) and the larger coin vault.
PAGE 5
timer clutch
21.adjustment screw Untape power supply cord
and plug into grounded outlet.
