Recessed and closet installation instructions
Fire/Health Hazard
l Exhaust the dryer to the outside to prevent exposure to substances in the gas fuels and combustion which may be harmful to your hwlth.
l If dryer is installed in a closet, the dryer MUST be exhausted outside.
Failure to do so may result in a fire.
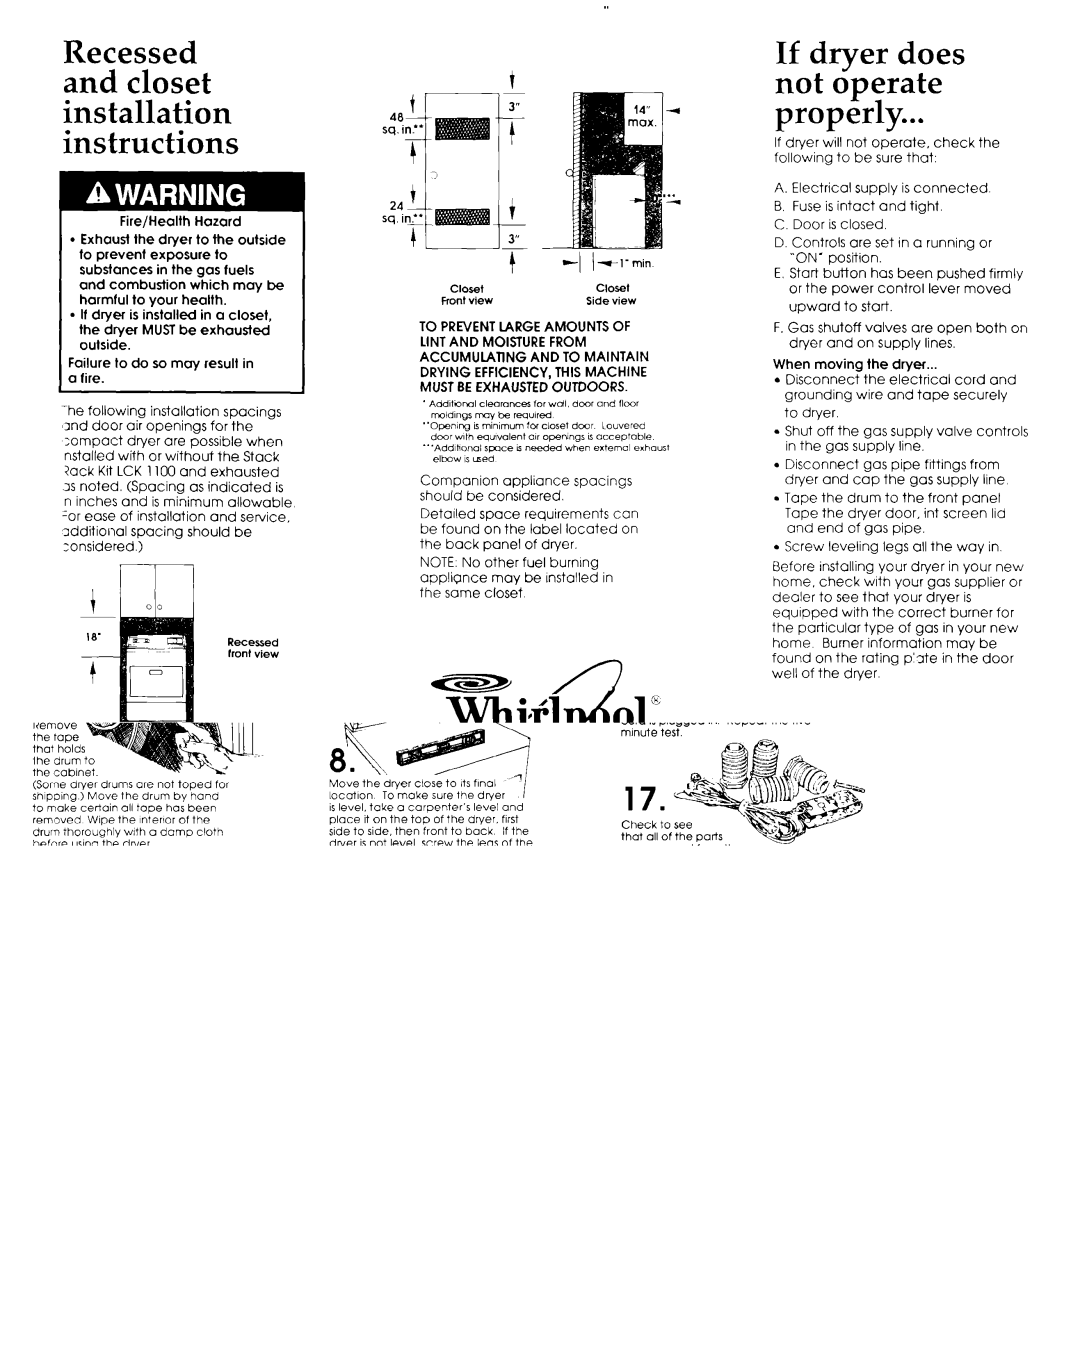
Recessed front view
? | |
*I 1 | |
Closet | closet |
Front view | Side view |
TO PREVENT LARGE AMOUNTS OF LINT AND MOISTURE FROM
ACCUMUlAllNG AND TO MAINTAIN DRYING EFFICIENCY, THIS MACHINE MUST BE EXHAUSTED OUTDOORS.
’Addhnal cleorancer tar wall. door and floor moldw$ may be
“Opening is minimum for closet door louvered
door w~,h eqwalent cur openings LI occeptoble “‘Add,hono, space LSneeded when external exhaust
elbow ISused
Companion appliance spacings should be considered.
Detalled space requirements can be found on the label located on the back panel of dryer.
NOTE. No other fuel burning appliQnce may be Installed in the same closet
If drver does not dperate properly*...
If dryer will not operate, check the following to be sure that:
A. Electrical supply is connected. B. Fuse is intact and tight.
C. Door is closed.
D. Controls are set in a running or “ON’ position.
E. Start button has been pushed firmly or the power control lever moved
upward to start.
F. Gas shutoff valves are open both on dryer and on supply lines.
When moving the dryer...
l Disconnect the electrical cord and grounding wire and tape securely
to dryer.
l Shut off the gas supply valve controls in the gas supply line.
l Disconnect gas pipe fittings from dryer and cap the gas supply line
l Tape the drum to the front panel Tape the dryer door, int screen lid and end of gas pipe.
l Screw leveling legs all the way in.
Before installing your dryer in your new home, check with your gas supplier or dealer to see that your dryer is equipped with the correct burner for the particular type of gas in your new home Burner information may be found on the rating p’gte in the door well of the dryer.