Electrical requirements
Eleclrrcol Shock Hazard
. Electrical ground is required on this opptlance.
. Improper connection of the
conductor co” result in a risk of electrrcat shock.
. Check wrth o qualrlred electrrcra” II you are r” doubt OSto whether the opplrance IS properly grounded. Do Nol modify the power supply
cord ~Iua. If it will not fit the outlei, h&e o proper outlet installed by o qualrfied electrician.
-Do Not use on extensron cord wit thrs appliance. Such use may result rn a fire, electrrcol shock or other personal injury.
. Do Not have a fuse in the neutral or groundrng circuit. A fuse in the neutral or grounding circuit could result in electriical shock.
Failure to follow these rnstructions could result in electrical shock or other personal injury.
A 12CFvolt. 60.Hz. AC only. 15or 20. Amoere fused electrical SUDDIV IS required.
breoker is recommended. It is recommended that a separate circuit sewing only this appliance be provided
Recommended grounding method
Electncol ground is required on thus appliance.
DO NOT. UNDER ANY
CIRCUMSTANCES, REMOVE THE POWER SUPPLY CORD GROUNDING PRONG.
For your personal safety. thrs appliance must be grounded. This appliance is equipped wrth a power supply cord having a
To minimize possible shock hazard. the cord must be plugged into a matrng
wall receptacle, grounded rn accordance wrth the Notronal Electrical Code. ANSI/NFPA 70 - latest
edition, and all local codes
and ordrnances. If a matrng wall receptacle is not avarlable. tt is the personal responsibrlity and OblrQation of the customer to hove a properly grounded
For added personal sotety. usrng the Clamp and Qreen~colored copper wrre furnished. connect this separo’e groundrng wrre (# 10 mrnrmum) from the external groundrng connector
on the back of the applrance to o grounded cold water pope ’
DO NOT. UNDER ANY
CIRCUMSTANCES. REMOVE THE POWER SUPPLY CORD GROUNDING PRONG
THIS. HOWEVER, IS NOT RECOMMENDED.
It changrng and properly grounding the wall receptacle ISrmpossible
Panel B
and where local codes permit (consult Your electrrcol Inspector). a temporary adapter may be plugged rnio the exrstrng
It this ISdone. you must connect a seporote copper grounding wire
Do not ground lo a gas supply pipe or hot water pipe. Do not connect to electrrcal supply untrl appliance is PermOnentlY QrOUnde
Frre/Heolth Hazard Do Not use
Do Not use metal duct smatter than four inches in diameter.
Do Not use exhaust hoods with mognelrc latches.
Check that exhaust system is not longer than specified. Exhaust systems longer than specified will:
Shorten the life of the dryer. Reduce performance, resulling in longer drying times and increased energy usage.
oilure to follow specifications nay resuli in o fire.
Do Not exhaust dryer into o chimney. furnace cold air duct. attic or crawl space, or any other duct used for venting. Clean the exhaust system every other yeor.
Do Not instoll flexible duct in enclosed walls, ceilings or floors. 6ccumulated lint could result in a re or cause moisture damage.
-Exhaust the dryer outsrde to prevent exposure to subslances in the gas tuels and combustion which may be harmful to your health.
me moisture and lint indoors may cause:
FIREHAZARD tram lrnt collected in dryer; Moisture damage to woodwork, furniture, paint. wallpaper. carpel. etc.
-House cleaning problems and
Possible health problems Failure to follow these instruchons :ould result rn fire damage or eersonol injury.
Met01 flexible duct may be used. It should be fully extended and supported when the dryer ISin Ifs trnal postion DO NOT KINK OR CRUSH THE DUCT The metal flexible duct must be completely open to allow adequate exhaust air to flow.
Use Duct Tape to seal | all ~ornis |
| |
If the dryer | is inslolled | in a confined | v |
area such OSa bedroom. bathroom or |
| ||
closet. it must be exhausted to the |
| ||
outstde and provrsion made for |
| ||
enough air for combustron and |
| ||
ventrlatron | (Check governrng codes |
| |
and ordrnonces 1 Also refer to the |
| ||
sectron of | thusInstructron coverrng |
| |
Recessed | and Closet | lnstructrons |
|
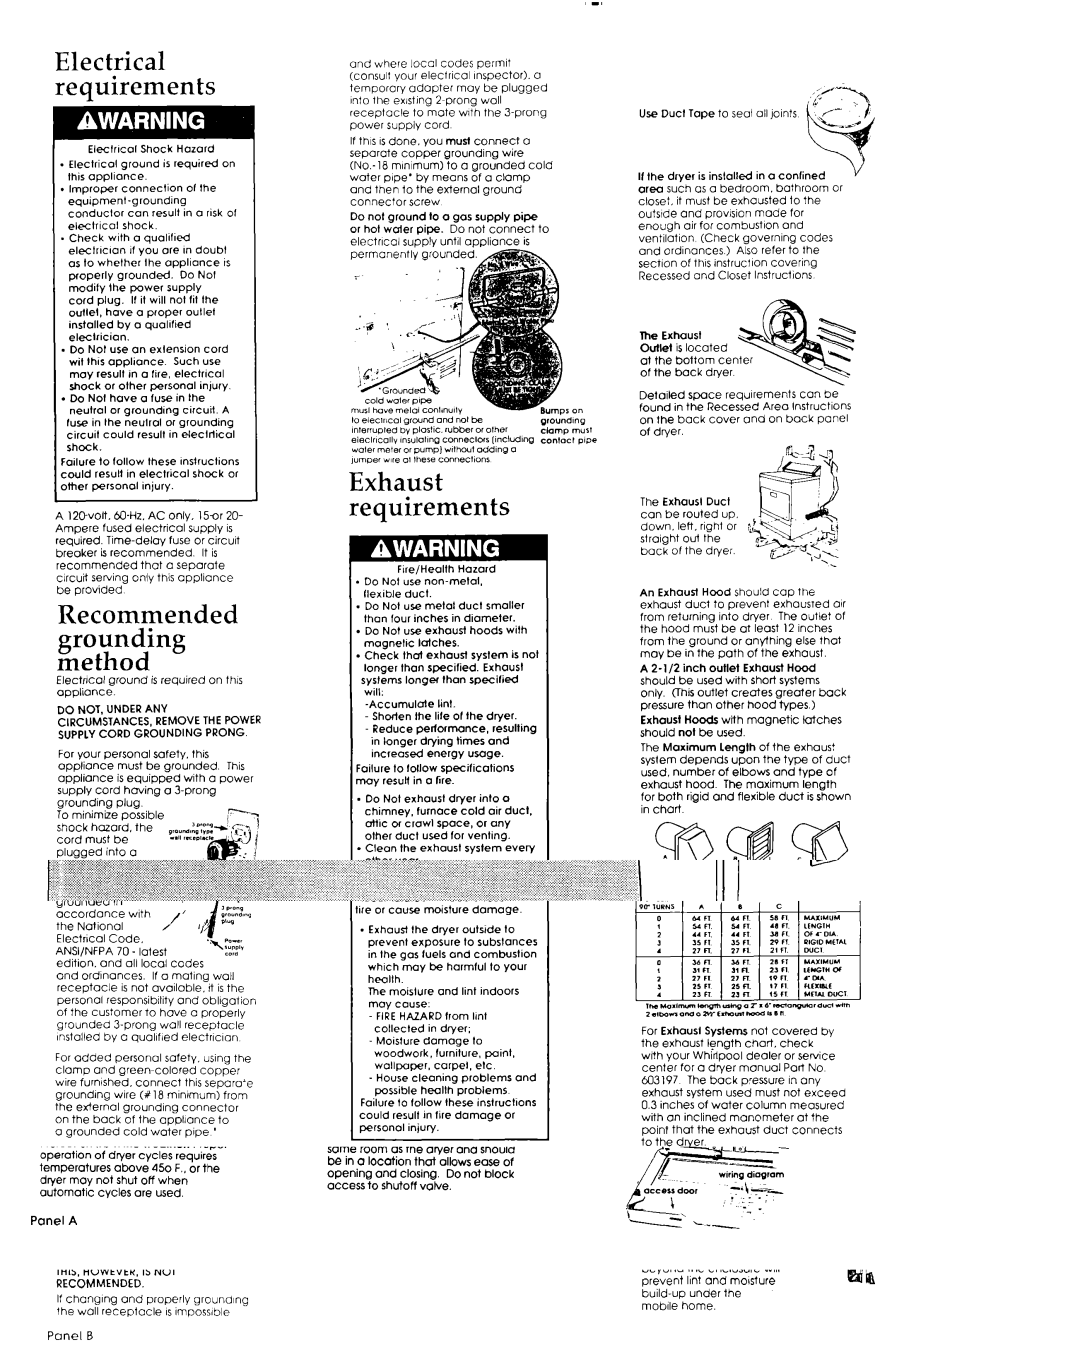
The Exhaust Oullei is located at the bottom ce of the back dryer
Detorled space requrrements can be found in the Recessed Area lnstructrons on the back cover and on back panel of dryer.
The Exhausl Duct can be routed up. down. left. rrght or strarght out the back of the dryer.
An Exhaust Hood should cap the exhaust duel to prevent exhausted art from returning into dryer The outlet of the hood must be at least 12 Inches from the ground or onylhing else that may be in the path of the exhaust.
A
Exhausl Haads with magnetic tatches should not be used.
The Maximum length of the exhaust system depends upon the type of duct used, number of elbows and type of exhaust hood. The maximum length for both riaid and flexible duct is shown in chart -
For Exhausl Systems not covered by the exhaust length chart. check wrth your Whirlpool dealer or sewice center for a dryer manual Port No 603197 The back pressure rn any exhaust system used must not exceed
0.3inches of water column measured with an inclined manometer at the point that the exhaust duct connects to the dryer
For Mobile Home rnstalla must have an outside ex exhaust the dn/er through the floor and the area under Your mobile home ISenclosed, the exhaust system must terminate outside the enclosed area. Extension beyond the enclosure wail prevent lrnt and morsture