E
Installation Steps |
B
![]() C
C
![]() H
H
DG
| F |
| A |
F | C |
E | E |
|
A
Preparation
E
A
B
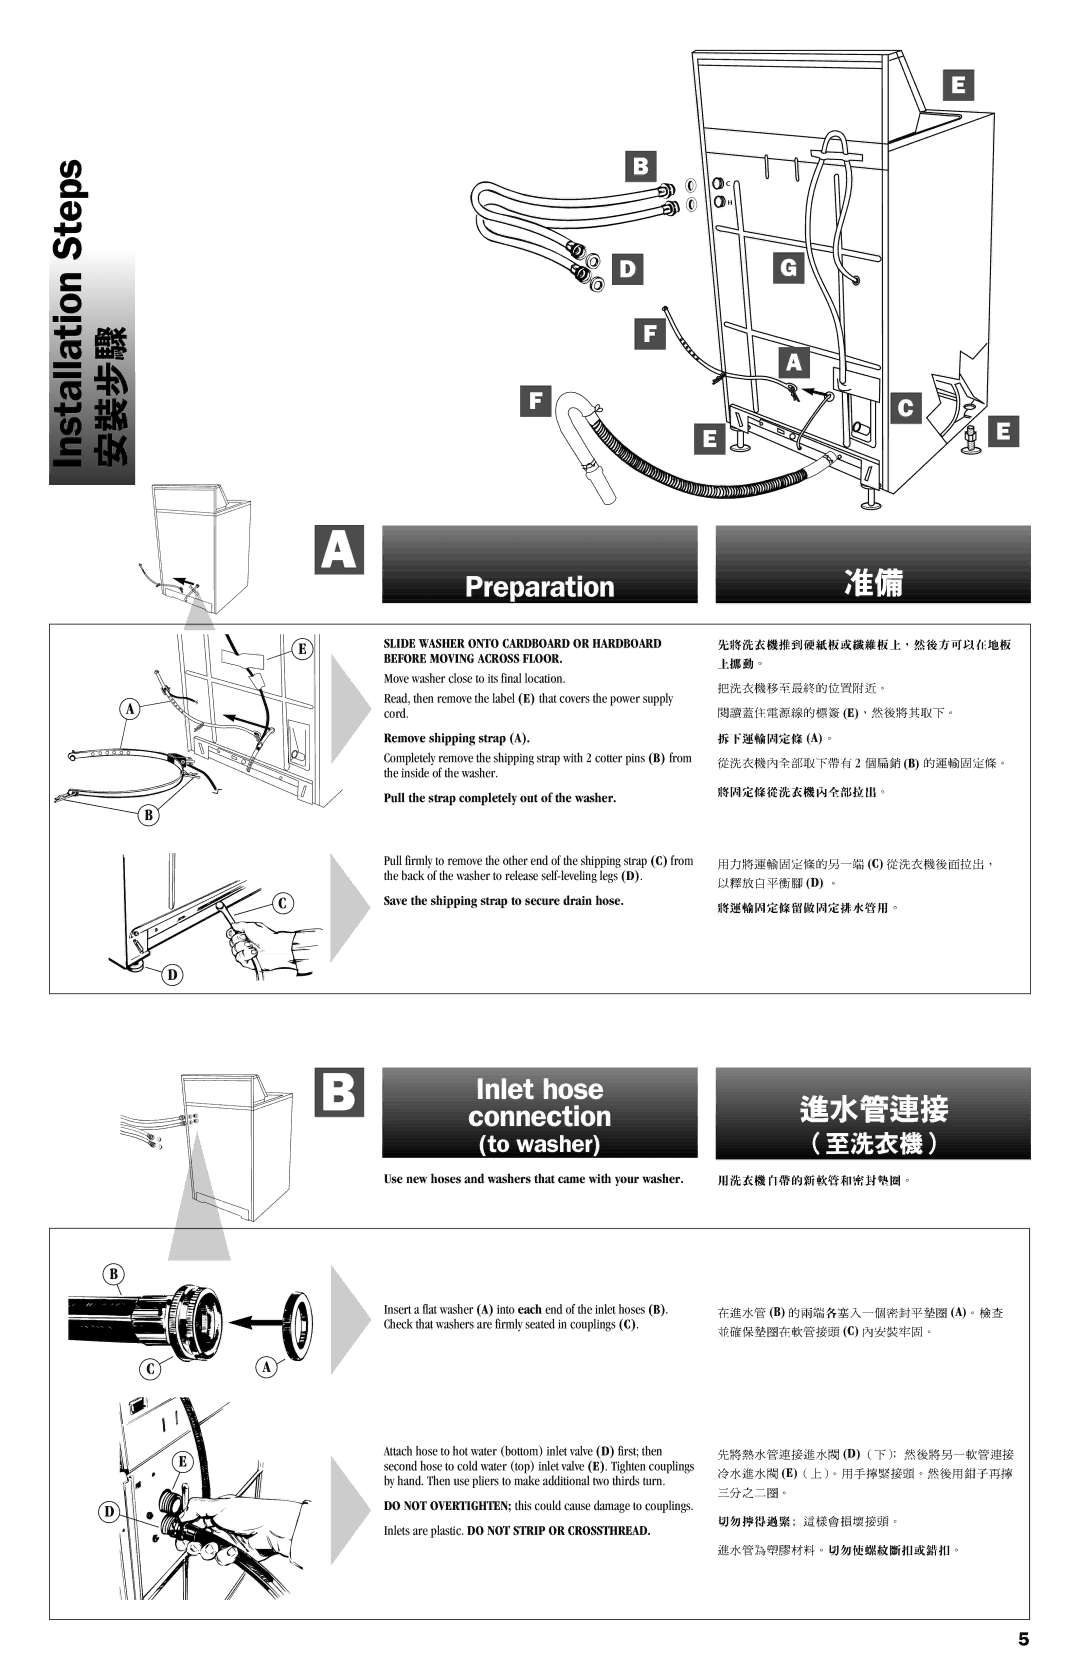
SLIDE WASHER ONTO CARDBOARD OR HARDBOARD BEFORE MOVING ACROSS FLOOR.
Move washer close to its final location.
Read, then remove the label (E) that covers the power supply cord.
Remove shipping strap (A).
Completely remove the shipping strap with 2 cotter pins (B) from the inside of the washer.
Pull the strap completely out of the washer.
![]() (E)
(E)![]()
![]()
![]()
![]()
![]()
![]()
![]()
![]() (A)
(A)![]()
![]()
![]()
![]()
![]()
![]()
![]() 2
2 ![]()
![]() (B)
(B) ![]()
![]()
![]()
![]()
C
Pull firmly to remove the other end of the shipping strap (C) from | (C) |
the back of the washer to release | (D) |
|
Save the shipping strap to secure drain hose.
D
B
Inlet hose
connection
(to washer)
Use new hoses and washers that came with your washer.
B
Insert a flat washer (A) into each end of the inlet hoses (B).
Check that washers are firmly seated in couplings (C).
CA
E | Attach hose to hot water (bottom) inlet valve (D) first; then |
second hose to cold water (top) inlet valve (E). Tighten couplings | |
| by hand. Then use pliers to make additional two thirds turn. |
D | DO NOT OVERTIGHTEN; this could cause damage to couplings. |
| |
| Inlets are plastic. DO NOT STRIP OR CROSSTHREAD. |
![]()
![]() (B)
(B) ![]()
![]()
![]()
![]()
![]()
![]()
![]() (A)
(A)![]()
![]()
![]()
![]()
![]()
![]()
![]() (C)
(C) ![]()
![]()
![]()
![]()
![]()
![]()
![]()
![]() (D)
(D) ![]()
![]()
![]()
![]()
![]()
![]()
![]()
![]()
![]()
![]() (E)
(E)![]()
![]()
![]()
![]()
![]()
![]()
![]()
![]()
![]()
5