Continued from page 7. | 7 |
C
B
D D
E
F
C |
H |
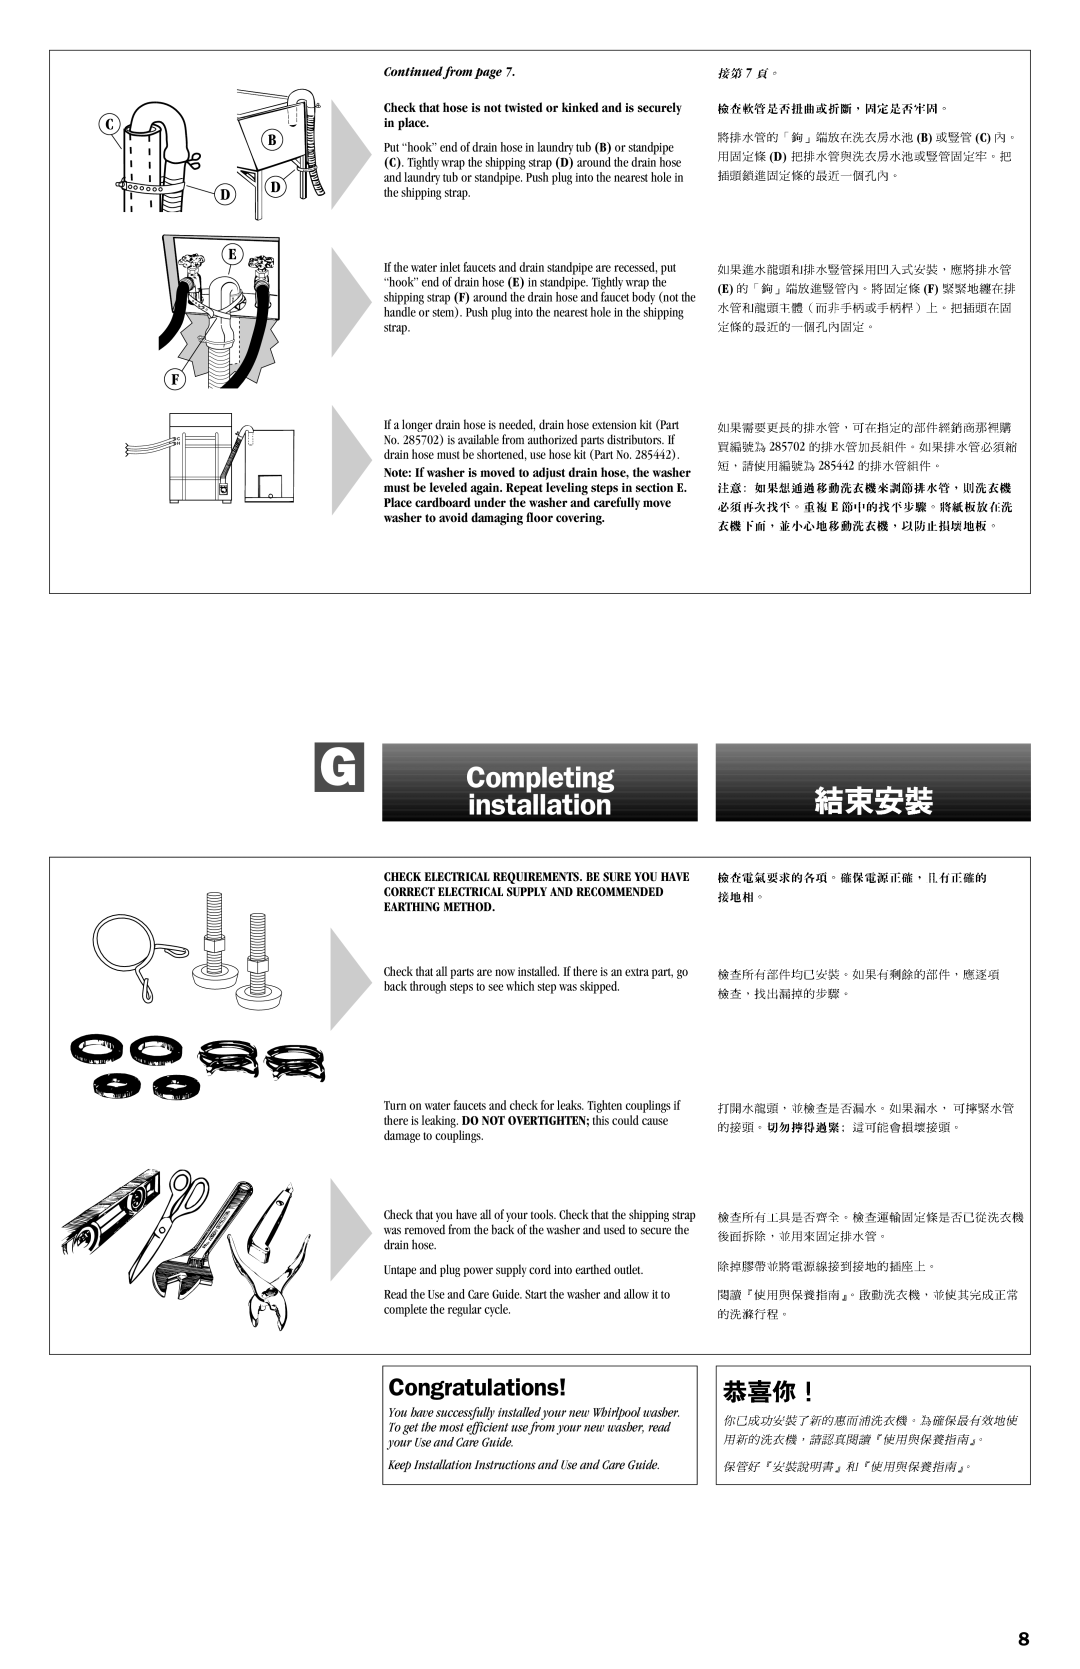
Check that hose is not twisted or kinked and is securely in place.
Put “hook” end of drain hose in laundry tub (B) or standpipe
(C). Tightly wrap the shipping strap (D) around the drain hose and laundry tub or standpipe. Push plug into the nearest hole in the shipping strap.
If the water inlet faucets and drain standpipe are recessed, put “hook” end of drain hose (E) in standpipe. Tightly wrap the shipping strap (F) around the drain hose and faucet body (not the handle or stem). Push plug into the nearest hole in the shipping strap.
If a longer drain hose is needed, drain hose extension kit (Part No. 285702) is available from authorized parts distributors. If drain hose must be shortened, use hose kit (Part No. 285442).
Note: If washer is moved to adjust drain hose, the washer must be leveled again. Repeat leveling steps in section E. Place cardboard under the washer and carefully move washer to avoid damaging floor covering.
![]()
![]()
![]()
![]()
![]()
![]()
![]()
![]() (B)
(B) ![]()
![]() (C)
(C) ![]()
![]()
![]() (D)
(D) ![]()
![]()
![]()
![]()
![]()
![]()
![]()
![]()
![]()
(E) ![]()
![]()
![]()
![]()
![]()
![]()
![]()
![]() (F)
(F) ![]()
![]()
![]()
![]()
![]() 285702
285702 ![]()
![]()
![]()
![]()
![]()
![]()
![]()
![]()
![]()
![]()
![]()
![]()
![]() 285442
285442 ![]()
![]()
![]()
![]()
![]()
![]()
![]()
![]()
![]() E
E ![]()
![]()
![]()
![]()
![]()
![]()
![]()
G
Completing
installation
CHECK ELECTRICAL REQUIREMENTS. BE SURE YOU HAVE CORRECT ELECTRICAL SUPPLY AND RECOMMENDED EARTHING METHOD.
Check that all parts are now installed. If there is an extra part, go back through steps to see which step was skipped.
Turn on water faucets and check for leaks. Tighten couplings if there is leaking. DO NOT OVERTIGHTEN; this could cause damage to couplings.
Check that you have all of your tools. Check that the shipping strap was removed from the back of the washer and used to secure the drain hose.
Untape and plug power supply cord into earthed outlet.
Read the Use and Care Guide. Start the washer and allow it to complete the regular cycle.
Congratulations!
You have successfully installed your new Whirlpool washer. To get the most efficient use from your new washer, read your Use and Care Guide.
Keep Installation Instructions and Use and Care Guide.
8