Determine vent path

Select the route that will provide the straightest and most direct path outdoors.

Plan the installation to use the fewest number of elbows and turns.

When using elbows or making turns, allow as much room as possible.

Bend vent gradually to avoid kinking.

Use the fewest 90° turns possible.

Determine vent length and elbows needed for best drying performance

Use the following Vent system chart to determine type of vent material and hood combinations acceptable to use.

NOTE: Do not use vent runs longer than those specified in the Vent system chart. Exhaust systems longer than those specified will:

Shorten the life of the dryer.

Reduce performance, resulting in longer drying times and increased energy usage.

The Vent system chart provides venting requirements that will help to achieve the best drying performance.

Vent system chart

Number of

Type of vent

Box or

Angled

90º turns


louvered

hoods

or elbows


hoods


0

Rigid metal

90 ft (27.4 m)

80 ft (24.4 m)


Flexible metal

64 ft (19.5 m)

58 ft (17.7 m)


1

Rigid metal

80 ft (24.4 m)

70 ft (21.3 m)


Flexible metal

58 ft (17.7 m)

52 ft (15.8 m)


2

Rigid metal

70 ft (21.3 m)

60 ft (18.3 m)


Flexible metal

50 ft (15.2 m)

42 ft (12.8 m)


Install VentSystem

1.Install exhaust hood. Use caulking compound to seal exterior wall opening around exhaust hood.

2.Connect vent to exhaust hood. Vent must fit inside exhaust hood. Secure vent to exhaust hood with 4" (10.2 cm) clamp.

3.Run vent to dryer location. Use the straightest path possible. See “Determine vent path” in “Plan Vent System.” Avoid 90º turns. Use clamps to seal all joints. Do not use duct tape, screws or other fastening devices that extend into the interior of the vent to secure vent.

ConnectVent

WARNING

Excessive Weight Hazard

Use two or more people to move and install dryer. Failure to do so can result in back or other injury.

1.To protect the floor, use a large, flat piece of cardboard from the dryer carton. Place cardboard under the entire bottom of the dryer.

2.Slide the dryer on the cardboard until it is close to its final location. Leave enough room to connect the exhaust vent.

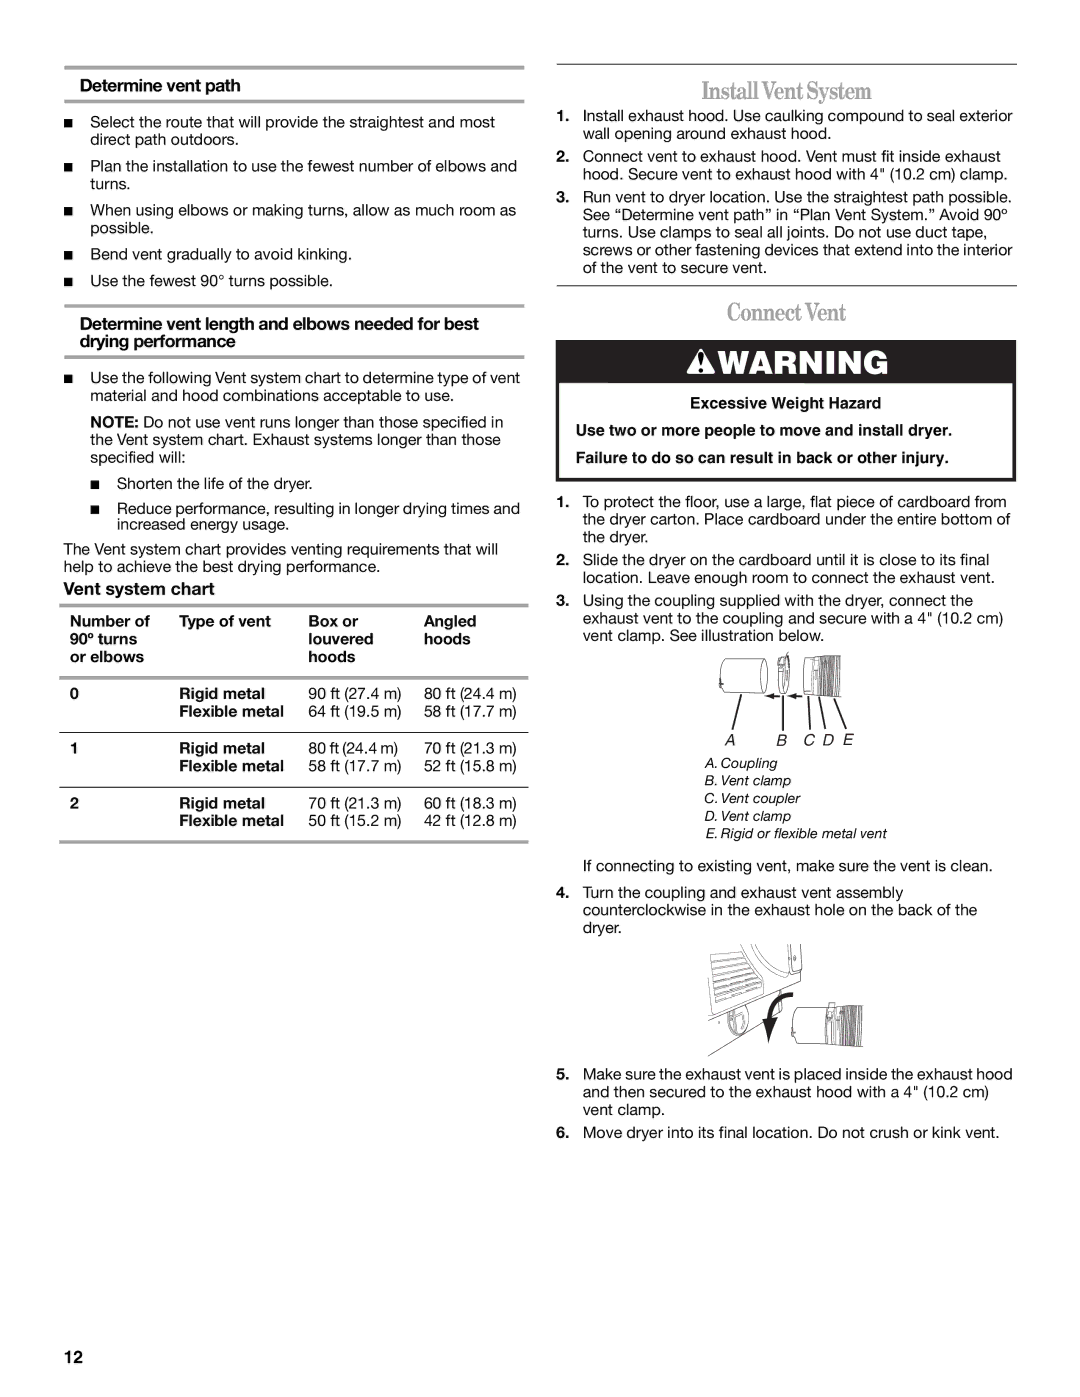
3.Using the coupling supplied with the dryer, connect the exhaust vent to the coupling and secure with a 4" (10.2 cm) vent clamp. See illustration below.

AB C D E

A.Coupling

B.Vent clamp

C.Vent coupler

D.Vent clamp

E.Rigid or flexible metal vent

If connecting to existing vent, make sure the vent is clean.

4.Turn the coupling and exhaust vent assembly counterclockwise in the exhaust hole on the back of the dryer.

5.Make sure the exhaust vent is placed inside the exhaust hood and then secured to the exhaust hood with a 4" (10.2 cm) vent clamp.

6.Move dryer into its final location. Do not crush or kink vent.

12

Page 12
Image 12
Whirlpool 8565592B manual Install VentSystem, ConnectVent, Determine vent path, Vent system chart

8565592B specifications

The Whirlpool 8565592B is a versatile and efficient appliance designed to enhance your laundry experience. As a part of Whirlpool's commitment to innovation and quality, this model boasts a range of features that set it apart in the competitive market of washing machines.

One of the standout features of the Whirlpool 8565592B is its impressive load capacity. It allows users to wash larger loads in a single cycle, saving both time and energy. This is particularly beneficial for families or individuals who often have bulky items such as bedding or towels to clean. The machine’s space-saving design is also a significant advantage, making it suitable for various laundry room sizes.

Equipped with advanced washing technologies, the 8565592B ensures optimal cleaning performance. Its Adaptive Wash Technology automatically senses the needs of each load and adjusts the wash motions and time accordingly. This not only enhances cleaning efficiency but also minimizes the wear and tear on fabrics. Moreover, the machine features a variety of wash cycles and settings, allowing users to customize their washing experience based on fabric type and soil level.

Energy efficiency is a pivotal characteristic of the Whirlpool 8565592B. Designed to consume less water and electricity, it helps users save on utility bills while contributing to an eco-friendly household. The unit may come with Energy Star certification, signifying that it meets strict energy efficiency guidelines set by the U.S. Environmental Protection Agency and the Department of Energy.

Another notable feature is the intuitive control panel, which simplifies operation. With clearly labeled buttons and a user-friendly interface, users can easily navigate through different settings without confusion. This enhances the overall user experience and accommodates varying levels of technological familiarity among users.

The design of the Whirlpool 8565592B combines functionality with aesthetics. Its sleek and modern appearance fits seamlessly into any laundry space, making it a stylish addition to your home. Additionally, the durable materials used in its construction ensure long-lasting performance, making it a worthwhile investment.

In summary, the Whirlpool 8565592B is more than just a washing machine; it is a reliable partner in maintaining the cleanliness and care of your garments. With its large load capacity, advanced technologies, energy efficiency, and user-friendly design, it caters to the diverse needs of contemporary households, ensuring that laundry days are less of a chore and more of a breeze.