Check operation of cooktop

17.Push in and turn each surface unit control knob to “LITE” position. The flame should light within 4 seconds. Turn control knob to “HI” position after burner lights.

Check each cooktop burner for proper flame. The small inner cone should have a very distinct blue flame 1/4"

(6.4 mm) to 1/2" (1.3 cm) long. The outer cone is not as distinct as the inner cone. If the flame is noisy or blowing, it is getting too much air. If the flame is soft

and lazy, it is not getting enough air. Turn each surface burner control knob to “OFF” position. Adjust air shutter if needed.

OFF

LITE

LO

HI

MED

If surface burner air shutters need adjusting:

a. Remove control knobs and 4 screws that attach control panel to range cabinet. Pull control panel forward to remove. Set panel, screws and knobs aside.

4 screws

b. Replace control knob for burner to be adjusted. Push knob in and turn to “LITE” position. When burner lites, turn to “HI” position.

c. Adjust the air shutter by hand as needed. Close the air shutter to decrease the amount of air to the flame. Open the air shutter to increase the amount of air to the flame.

air shutter

Adjust the air shutter to the widest opening that will not cause the flame to lift or blow off the burner.

Turn burner off and remove knob.

As needed, adjust other air shutters.

18.Replace control panel and tighten screws securely. Replace control knobs.

19.Push in and turn each cooktop control knob from “LITE” to “LO” setting quickly. The low flame should be a minimum, steady blue flame.

If flame needs to be adjusted, turn control knob to the “LO” setting and remove control knob. Insert a small flat- blade screwdriver into the valve stem. Turn the valve screw to obtain the smallest flame that will not go out when the control of a cold burner is quickly turned from “HI” to “LO”. Repeat for other cooktop burners as needed.

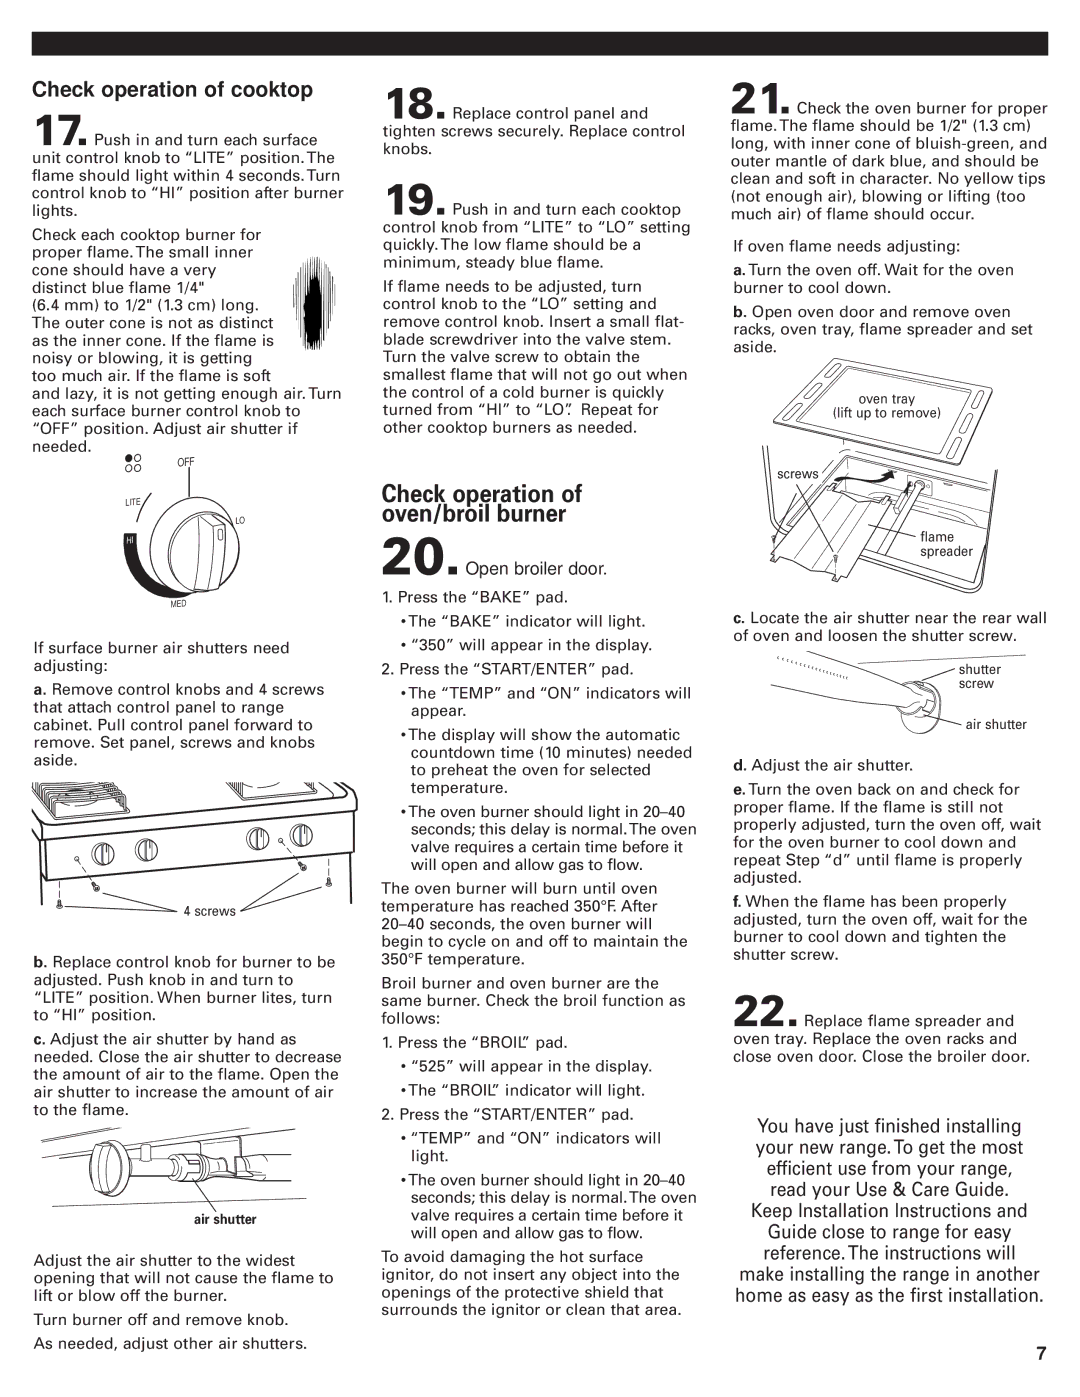
Check operation of oven/broil burner

20.Open broiler door.

1.Press the “BAKE” pad.

The “BAKE” indicator will light.

“350” will appear in the display.

2.Press the “START/ENTER” pad.

The “TEMP” and “ON” indicators will appear.

The display will show the automatic countdown time (10 minutes) needed to preheat the oven for selected temperature.

The oven burner should light in 20–40 seconds; this delay is normal.The oven valve requires a certain time before it will open and allow gas to flow.

The oven burner will burn until oven temperature has reached 350°F. After 20–40 seconds, the oven burner will begin to cycle on and off to maintain the 350°F temperature.

Broil burner and oven burner are the same burner. Check the broil function as follows:

1.Press the “BROIL” pad.

“525” will appear in the display.

The “BROIL” indicator will light.

2.Press the “START/ENTER” pad.

“TEMP” and “ON” indicators will light.

The oven burner should light in 20–40 seconds; this delay is normal.The oven valve requires a certain time before it will open and allow gas to flow.

To avoid damaging the hot surface ignitor, do not insert any object into the openings of the protective shield that surrounds the ignitor or clean that area.

21.Check the oven burner for proper flame. The flame should be 1/2" (1.3 cm) long, with inner cone of bluish-green, and outer mantle of dark blue, and should be clean and soft in character. No yellow tips (not enough air), blowing or lifting (too much air) of flame should occur.

If oven flame needs adjusting:

a. Turn the oven off. Wait for the oven burner to cool down.

b. Open oven door and remove oven racks, oven tray, flame spreader and set aside.

oven tray

(lift up to remove)

screws

flame spreader

c. Locate the air shutter near the rear wall of oven and loosen the shutter screw.

shutter screw

air shutter

d. Adjust the air shutter.

e. Turn the oven back on and check for proper flame. If the flame is still not properly adjusted, turn the oven off, wait for the oven burner to cool down and repeat Step “d” until flame is properly adjusted.

f. When the flame has been properly adjusted, turn the oven off, wait for the burner to cool down and tighten the shutter screw.

22.Replace flame spreader and oven tray. Replace the oven racks and close oven door. Close the broiler door.

You have just finished installing your new range. To get the most efficient use from your range, read your Use & Care Guide. Keep Installation Instructions and Guide close to range for easy reference. The instructions will make installing the range in another home as easy as the first installation.

7

Page 7
Image 7
Whirlpool 98015195 installation instructions Check operation of oven/broil burner

98015195 specifications

The Whirlpool 98015195 is a contemporary appliance designed to enhance the kitchen experience through its innovative features and advanced technologies. This versatile model serves various functions, making it an invaluable addition to any modern household.

One of the standout features of the Whirlpool 98015195 is its spacious design, which allows users to prepare larger meals with ease. The appliance boasts a generous capacity, enabling simultaneous cooking or reheating of multiple dishes. This feature is particularly advantageous for families or those who enjoy entertaining guests, as it reduces cooking time significantly.

In terms of technologies, the Whirlpool 98015195 incorporates advanced cooking modes that ensure precision and consistency. The appliance includes settings for baking, roasting, and broiling, allowing users to achieve optimal results regardless of the cooking task. The built-in sensor cooking technology intelligently adjusts cooking times and power levels based on the food’s moisture content and temperature, ensuring perfectly cooked meals every time.

Another remarkable characteristic of the Whirlpool 98015195 is its user-friendly interface. The appliance is equipped with a digital control panel that offers an intuitive layout, making it easy for users to navigate through various functions and settings. Additionally, the appliance features a bright LED display that provides clear visibility, allowing users to monitor cooking progress at a glance.

The design of the Whirlpool 98015195 also emphasizes energy efficiency. It operates with lower energy consumption compared to traditional cooking methods, promoting environmentally friendly practices while keeping utility costs down. This focus on sustainability aligns with the growing trend of eco-conscious living.

Easy maintenance is another boon of the Whirlpool 98015195. The appliance features a non-stick interior, which simplifies the cleaning process and minimizes the effort required to maintain its pristine condition. The removable components are dishwasher safe, adding to the convenience for busy families or individuals.

In summary, the Whirlpool 98015195 is a state-of-the-art kitchen appliance that combines functionality, efficiency, and user-friendly design. With its spacious capacity, advanced cooking technologies, and commitment to energy efficiency, it is well-suited for a variety of cooking needs in today’s fast-paced lifestyle. Whether you are a culinary enthusiast or simply looking for an efficient way to prepare meals, the Whirlpool 98015195 is a worthy investment for any kitchen.