GAS CONNECTION

WARNING

This operation must be performed by a qualified technician.


ADJUSTMENT TO DIFFERENT TYPES OF GAS

WARNING

This operation must be performed by a qualified technician.


The gas supply system must comply with local regulations.

You can find specific local regulations for some countries in the paragraph “Reference to Local Regulations”. If no information concerning your Country is given, please ask details to your Installer.

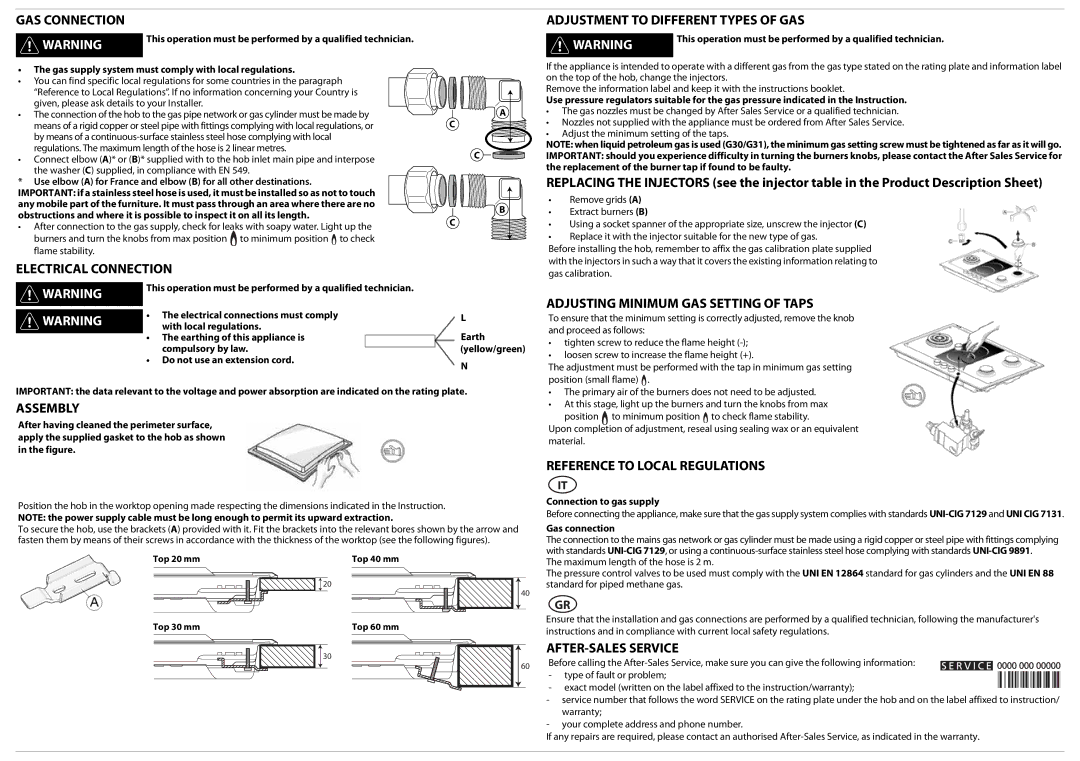
The connection of the hob to the gas pipe network or gas cylinder must be made by means of a rigid copper or steel pipe with fittings complying with local regulations, or by means of a continuous-surface stainless steel hose complying with local regulations. The maximum length of the hose is 2 linear metres.

Connect elbow (A)* or (B)* supplied with to the hob inlet main pipe and interpose the washer (C) supplied, in compliance with EN 549.

*Use elbow (A) for France and elbow (B) for all other destinations.

IMPORTANT: if a stainless steel hose is used, it must be installed so as not to touch any mobile part of the furniture. It must pass through an area where there are no obstructions and where it is possible to inspect it on all its length.

After connection to the gas supply, check for leaks with soapy water. Light up the burners and turn the knobs from max position to minimum position to check flame stability.

A

C

C

B

C

If the appliance is intended to operate with a different gas from the gas type stated on the rating plate and information label on the top of the hob, change the injectors.

Remove the information label and keep it with the instructions booklet.

Use pressure regulators suitable for the gas pressure indicated in the Instruction.

The gas nozzles must be changed by After Sales Service or a qualified technician.

Nozzles not supplied with the appliance must be ordered from After Sales Service.

Adjust the minimum setting of the taps.

NOTE: when liquid petroleum gas is used (G30/G31), the minimum gas setting screw must be tightened as far as it will go.

IMPORTANT: should you experience difficulty in turning the burners knobs, please contact the After Sales Service for the replacement of the burner tap if found to be faulty.

REPLACING THE INJECTORS (see the injector table in the Product Description Sheet)

Remove grids (A)

Extract burners (B)

Using a socket spanner of the appropriate size, unscrew the injector (C)

Replace it with the injector suitable for the new type of gas.

Before installing the hob, remember to affix the gas calibration plate supplied with the injectors in such a way that it covers the existing information relating to

ELECTRICAL CONNECTION

gas calibration.

WARNING

WARNING

This operation must be performed by a qualified technician.

The electrical connections must comply with local regulations.

The earthing of this appliance is compulsory by law.

Do not use an extension cord.

L

Earth (yellow/green)

N

ADJUSTING MINIMUM GAS SETTING OF TAPS

To ensure that the minimum setting is correctly adjusted, remove the knob and proceed as follows:

tighten screw to reduce the flame height (-);

loosen screw to increase the flame height (+).

The adjustment must be performed with the tap in minimum gas setting position (small flame) .

IMPORTANT: the data relevant to the voltage and power absorption are indicated on the rating plate.

ASSEMBLY

After having cleaned the perimeter surface, apply the supplied gasket to the hob as shown in the figure.

Position the hob in the worktop opening made respecting the dimensions indicated in the Instruction.

NOTE: the power supply cable must be long enough to permit its upward extraction.

The primary air of the burners does not need to be adjusted.

At this stage, light up the burners and turn the knobs from max

position to minimum position to check flame stability.

Upon completion of adjustment, reseal using sealing wax or an equivalent material.

REFERENCE TO LOCAL REGULATIONS

Connection to gas supply

Before connecting the appliance, make sure that the gas supply system complies with standards UNI-CIG 7129 and UNI CIG 7131.

To secure the hob, use the brackets (A) provided with it. Fit the brackets into the relevant bores shown by the arrow and


Gas connection

fasten them by means of their screws in accordance with the thickness of the worktop (see the following figures).


The connection to the mains gas network or gas cylinder must be made using a rigid copper or steel pipe with fittings complying

Top 20 mm


Top 40 mm


with standards UNI-CIG 7129, or using a continuous-surface stainless steel hose complying with standards UNI-CIG 9891.


The maximum length of the hose is 2 m.


The pressure control valves to be used must comply with the UNI EN 12864 standard for gas cylinders and the UNI EN 88


20


standard for piped methane gas.


40


GR


Top 30 mm


Top 60 mm


Ensure that the installation and gas connections are performed by a qualified technician, following the manufacturer's


instructions and in compliance with current local safety regulations.


AFTER-SALES SERVICE


30


60

Before calling the After-Sales Service, make sure you can give the following information:


- type of fault or problem;


- exact model (written on the label affixed to the instruction/warranty);


- service number that follows the word SERVICE on the rating plate under the hob and on the label affixed to instruction/


warranty;


- your complete address and phone number.


If any repairs are required, please contact an authorised After-Sales Service, as indicated in the warranty.


Page 2
Image 2
Whirlpool AKT 759 user manual GAS Connection, Adjustment to Different Types of GAS, Electrical Connection, Assembly

AKT 759 specifications

The Whirlpool AKT 759 is a standout built-in oven that combines sleek design with innovative technology, offering chefs and home cooks a remarkable cooking experience. This model is designed to seamlessly fit within kitchen cabinetry, ensuring that it not only operates effectively but also enhances the overall aesthetic of the kitchen.

One of the main features of the Whirlpool AKT 759 is its multifunctional cooking capabilities. It boasts multiple cooking modes, such as conventional baking, grilling, and fan-assisted cooking. This versatility allows users to prepare a wide range of dishes with ease, making it an ideal choice for families that enjoy a variety of cuisines. The appliance ensures even cooking results, thanks to its advanced heat distribution system, which maintains optimal temperatures across the oven cavity.

Another highlight of the AKT 759 is its intuitive control panel. The user-friendly interface allows for easy navigation through various settings and cooking functions. With a digital display, users can monitor cooking times and temperatures accurately, preventing overcooking and ensuring perfect results every time. Additionally, the model comes with programmable options, enabling users to set their preferred cooking times and automatically shut off when done, adding an extra layer of convenience.

For those concerned about energy efficiency, the Whirlpool AKT 759 is designed with eco-conscious consumers in mind. It features an impressive Energy Rating, which helps reduce electricity consumption without compromising on performance. This makes it not only a cost-effective option but also a responsible choice for the environment.

Cleaning the AKT 759 is a breeze, as it comes equipped with a self-cleaning feature that utilizes high temperatures to eliminate food residues and grease. This feature significantly reduces the time and effort required for maintenance, making the oven an attractive option for busy households.

In terms of build quality, the Whirlpool AKT 759 is constructed with durable materials that ensure longevity and reliability. Its sleek, modern appearance is complemented by easy-to-clean surfaces, making it a practical addition to any kitchen.

Overall, the Whirlpool AKT 759 is a feature-rich oven that merges functionality with aesthetic appeal. Boasting advanced cooking technologies, user-friendly controls, energy efficiency, and easy maintenance, it is an excellent choice for anyone looking to elevate their culinary creations. Whether it’s a simple family dinner or an elaborate holiday feast, the AKT 759 equips home cooks with the tools needed to succeed in the kitchen.