Removing Freezer Shelves...
l Lrft front slrghtly
l Lrft back off supports
l Replace In reverse order
Lift the Front ’
Then the Back
Removing the Crisper, Meat Pan
and Covers...
l | Slide | crisper | ard | meat | par straight out to stop | ||
l | Lift the | front |
|
|
|
| |
l Slide | the rest | of | the | way | out | ||
| Replace |
| ,, |
| order |
| |
l | in reverse |
| |||||
|
| 1 |
|
|
|
| |
| D |
|
|
|
|
| |
/
(4,.-
_, ._
Snap Back into Place.
l Covers are held IT) place by two pegs at the back and two notched tabs In front
-Press front tabs out of the way
-Lrft cover front
~Lrft back off the pegs
-Replace In reverse order
Changing light Bulbs...
Before removrng a lrght shreld for cleanrng or for
replacrng a bulb unplug the retrlgerator. Use op p/fame bulbs onfy
Pull Off the Dial,
Pull Out at the Botto
Light bulbs behind refrigeraior and freezer control consoles:
~Pull control knob straight off
~Pull bottom of control panel straight out ~~Lrft top of panel off supports
~Replace wrth a
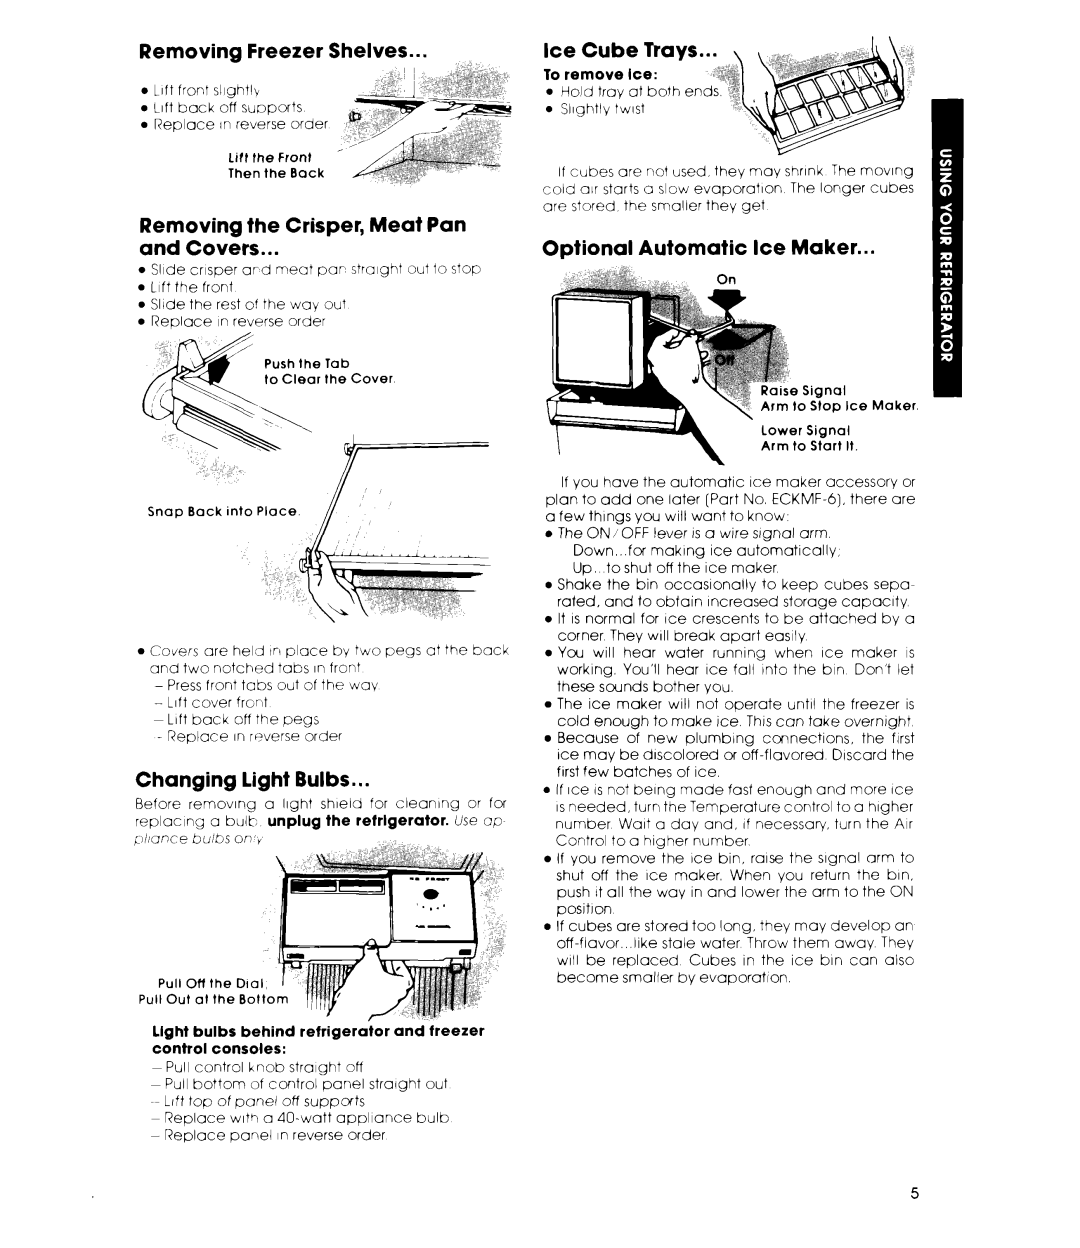
Ice Cube Trays...
To remove Ice:
l Hold tray at both ends.
. Slrghtly twrst
If cubes are not used, they may shrrnk The movrng
cold arr starts a slow evaporatron The longer cubes are stored the smaller they get
Optional Automatic Ice Maker.. .
|
|
|
|
|
|
|
|
|
|
|
|
|
|
|
| e | Signal |
|
|
| ||
|
|
|
|
|
|
|
|
|
|
|
|
|
|
|
| to | Stop | Ice | Maker. | |||
|
|
|
|
|
|
|
|
|
|
|
|
|
| Lower | Signal |
|
|
| ||||
|
|
|
|
|
|
|
|
|
|
|
|
|
| Arm to | Start | It. |
|
| ||||
| If you |
| have | the | automatic |
| Ice | maker |
| accessory | or | |||||||||||
plan | to | add | one | later [Part | No. |
| there | are | ||||||||||||||
a few things you will want to know, |
|
|
|
|
|
|
| |||||||||||||||
l | The | ON | i OFF | lever |
| IS a | wire |
| srgnal | arm. |
|
|
| |||||||||
| Down...for |
| making | ice | automatically, |
|
|
|
|
| ||||||||||||
| Up. to shut off the ice maker |
|
|
|
|
|
|
|
| |||||||||||||
l | Shake |
| the | bin | occasronally |
|
| to | keep |
| cubes | sepa- | ||||||||||
| rated, |
| and | to obtain | Increased |
| storage | capacrty |
| |||||||||||||
l | It IS normal | for | Ice |
| crescents |
| to | be |
| attached | by a | |||||||||||
| corner |
|
| They | WIII break | apart |
| easily |
|
|
|
|
|
| ||||||||
l | You |
| will | hear | water |
| running |
| when |
| Ice | maker | IS | |||||||||
| worktng. |
| You’ll | hear | Ice | fall | into | the |
| bin | Don’t | let | ||||||||||
| these | sounds | bother | you. |
|
|
|
|
|
|
|
|
|
|
| |||||||
l | The | ice |
| maker | will | not | operate |
| until |
| the | freezer | is | |||||||||
| cold |
| enough |
| to | make | ice. | Thus can | take | overnight |
| |||||||||||
l | Because |
| of | new | plumbing |
| connections, |
| the | frrst | ||||||||||||
| ice | may | be | dfscolored | or |
|
| Drscard | the | |||||||||||||
| first | few |
| batches | of | ice. |
|
|
|
|
|
|
|
|
|
|
|
| ||||
l | If Ice | IS not | berng |
| made |
| fast | enough |
| and | more | Ice | ||||||||||
| IS needed, | turn | the | Temperature |
| control | to a | hrgher | ||||||||||||||
| number |
| Wart | a | day | and, |
| If | necessary, | turn | the | Air | ||||||||||
| Control to a higher number |
|
|
|
|
|
|
|
|
|
| |||||||||||
l | If you | remove | the Ice bin, raise the srgnal arm to | |||||||||||||||||||
| shut |
| off |
| the |
| Ice | maker. |
| When you return the brn. | ||||||||||||
| push it all the way in and lower the arm to the ON | |||||||||||||||||||||
| positron |
|
|
|
|
|
|
|
|
|
|
|
|
|
|
|
|
|
|
| ||
l | If cubes |
| are |
| stored |
| too long, they may develop | an | ||||||||||||||
|
| stale | water |
| Throw | them | away | They | ||||||||||||||
| WIII | be |
| replaced |
| Cubes |
| in | the | ice |
| bin | can also | |||||||||
| become |
| smaller | by | evaporation. |
|
|
|
|
|
|
|
| |||||||||
5