Removing the ice maker storage bin
Remove, empty and clean the storage bin if:
l the ice dispenser has not, or will not, be used for a week or more.
l a power failure causes ice in the bin to meft and freeze together.
l the ice dispenser is not used regularly.
To remove ice bin:
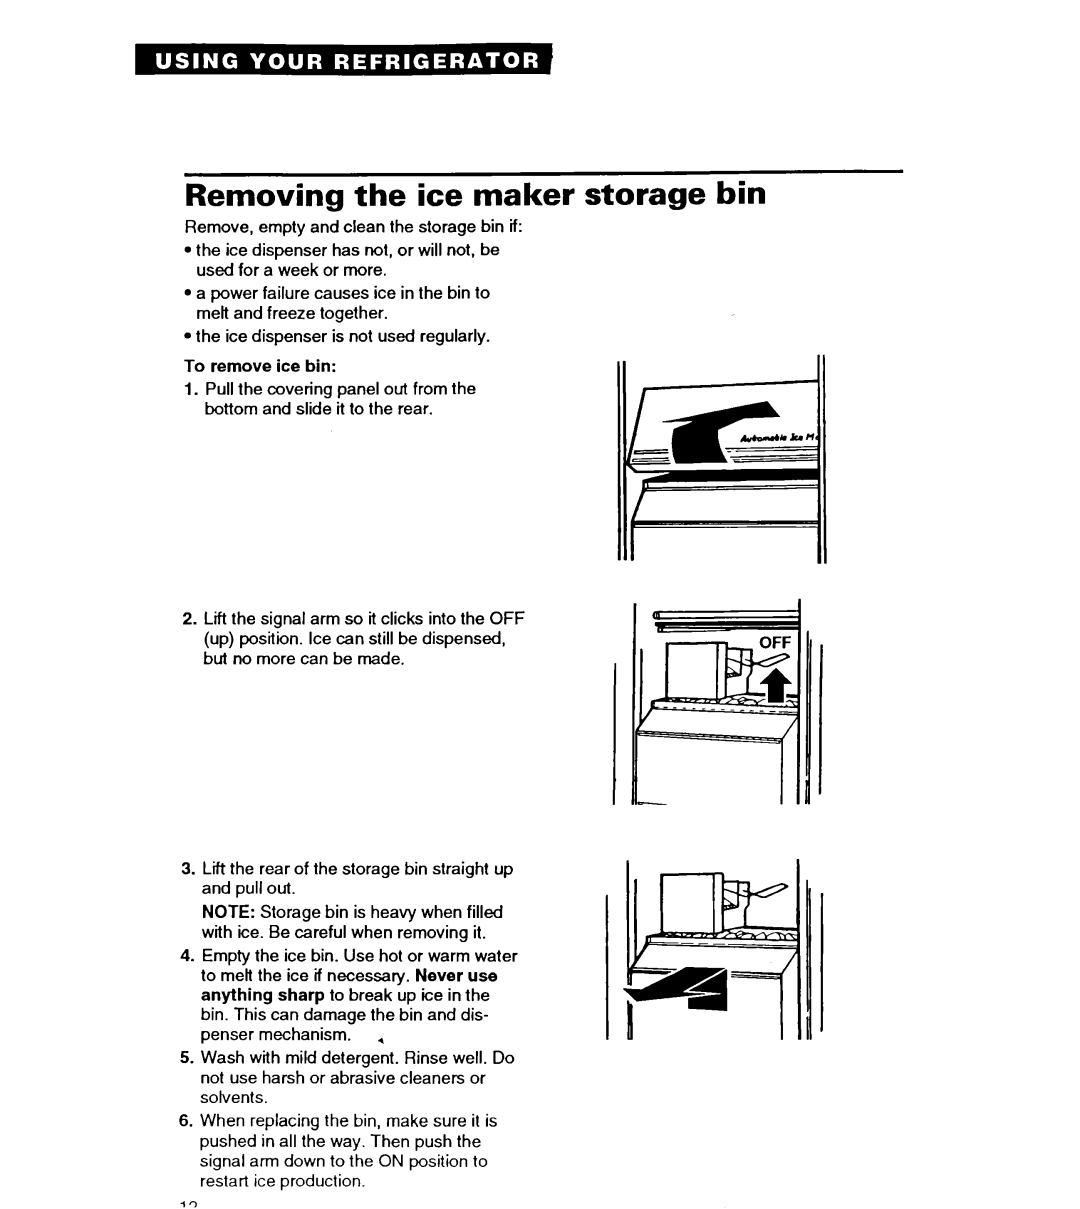
1.Pull the covering panel out from the bottom and slide it to the rear.
2.Lift the signal arm so it clicks into the OFF (up) position. Ice can still be dispensed, but no more can be made.
3.Lift the rear of the storage bin straight up and pull out.
NOTE: Storage bin is heavy when filled with ice. Be careful when removing it.
4.Empty the ice bin. Use hot or warm water to melt the ice if necessary. Never use anything sharp to break up ice in the bin. This can damage the bin and dis- penser mechanism.
5.Wash with mild detergeit. Rinse well. Do not use harsh or abrasive cleaners or solvents.
6.When replacing the bin, make sure it is pushed in all the way. Then push the signal arm down to the ON position to restart ice production.
,‘)