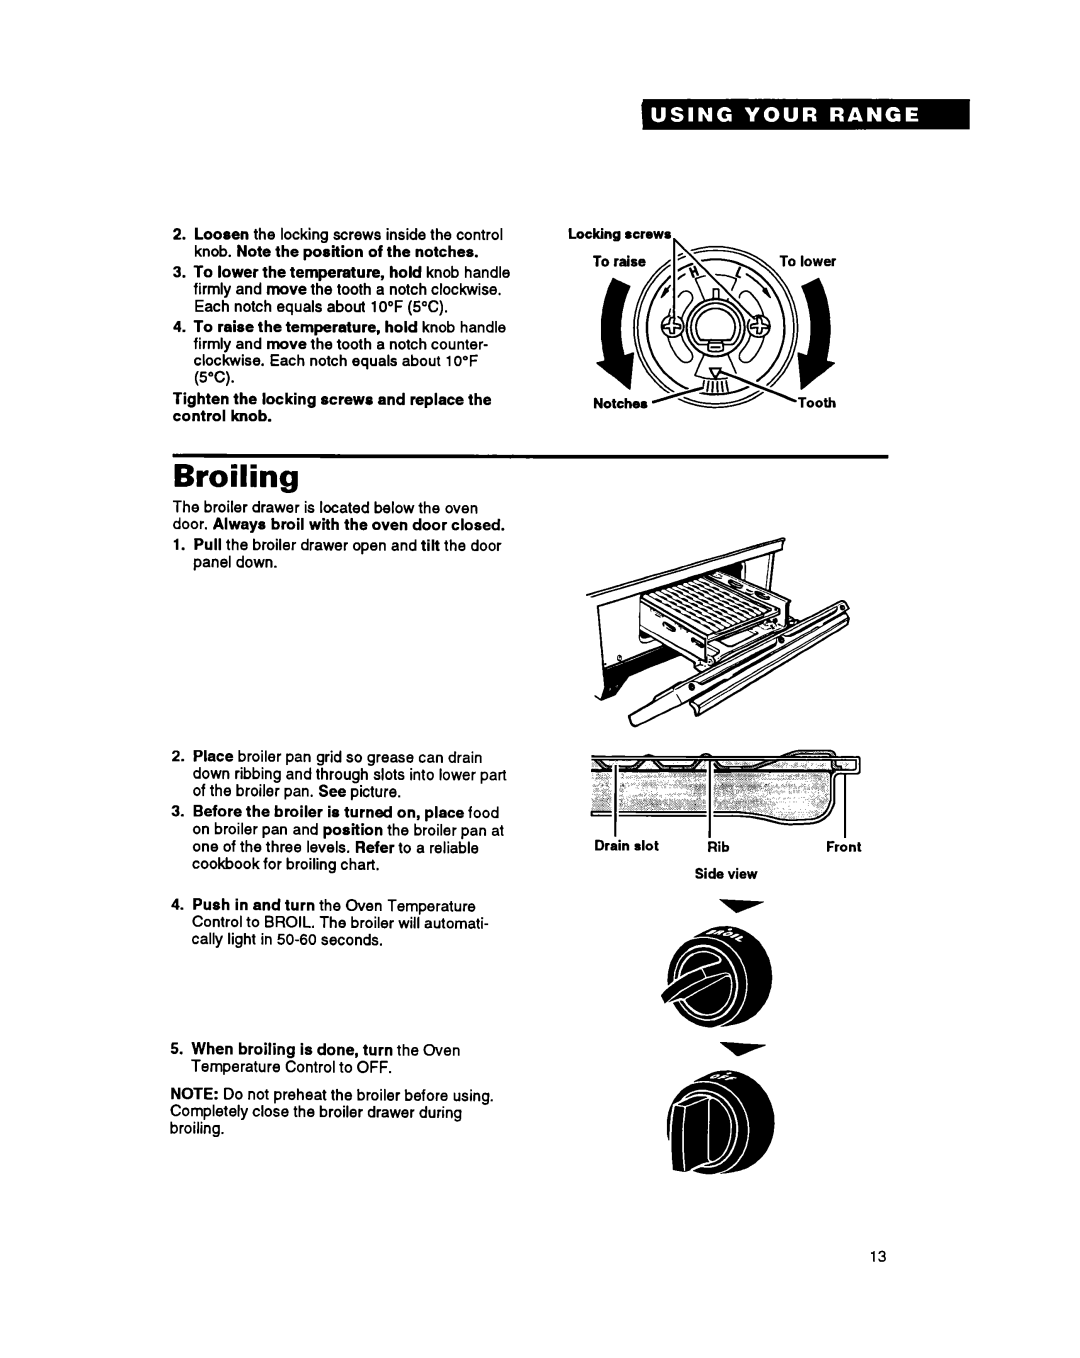
2.Loosen the locking screws inside the control knob. Note the position of the notches.
3.To lower the temperature, hold knob handle firmly and move the tooth a notch clockwise. Each notch equals about 10°F (5°C).
4.To raise the temperature, hold knob handle firmly and move the tooth a notch counter- clockwise. Each notch equals about 1O°F (5°C).
Tighten the locking screws and replace the control knob.
Broiling
The broiler drawer is located below the oven door. Always broil with the oven door closed.
1.Pull the broiler drawer open and tilt the door panel down.
2.Place broiler pan grid so grease can drain down ribbing and through slots into lower part of the broiler pan. See picture.
3.Before the broiler is turned on, place food on broiler pan and position the broiler pan at
one of the three levels. Refer to a reliable | Drain slot | kib | Frdnt |
cookbook for broiling chart. |
| Side | view |
|
|
4.Push in and turn the Oven Temperature Control to BROIL. The broiler will automati- cally light in
5.When broiling is done, turn the Oven Temperature Control to OFF.
NOTE: Do not preheat the broiler before using. Completely close the broiler drawer during broiling.
13