Setting the controls
1.Make sure the Clock is set to the right time of day. (See “Setting the clock” on page 5.)
2.Move the Lock Lever all the way to the right - the Clean position.
Push the Clean button. A
6.After the
When the oven reaches normal baking temperatures, the LOCK and CLEAN indicators go off. Move the Lock Lever back to the left. Do not force it. Wait until it moves easily.
After the oven is cool, wipe off any residue or ash with a damp cloth. If needed, touch up spots with a soapy steel wool pad.
Special tips
1 Keep the kitchen
n Clean the oven before it gets heavily soiled. Cleaning a very soiled oven takes longer and results in more smoke than usual.
1 If the
To stop the Self-Cleaning cycle at any time:
1.Press the CLEAN button and turn the Time/Temp Set Knob until “0:OO”shows m the large display.
2.When the LOCK and CLEAN indicators go off, move the Lock Lever back to the left. Do not force it. Wait until it moves easily.
ON indicators on the right side of the display will come on.
NOTE: If the Clean button is pushed when the door is not latched, “door” will appear in the large display. Move the Lock Lever all the way to the right to latch the door. If any other command button is pushed when the door is latched, the oven will not receive the command. Move the Lock Lever back to the left to unlatch the door after the LOCK indicator goes off.
(Option) Delayed clean: Push the Clean button. Immediately push the Stop Time button. Immediately turn the Time/Temp Set Knob to the new stop time. The TIME and STOP indicators will come on.
After the stop time has been set, the large display will go back to showing the current
After the
How it works
During the
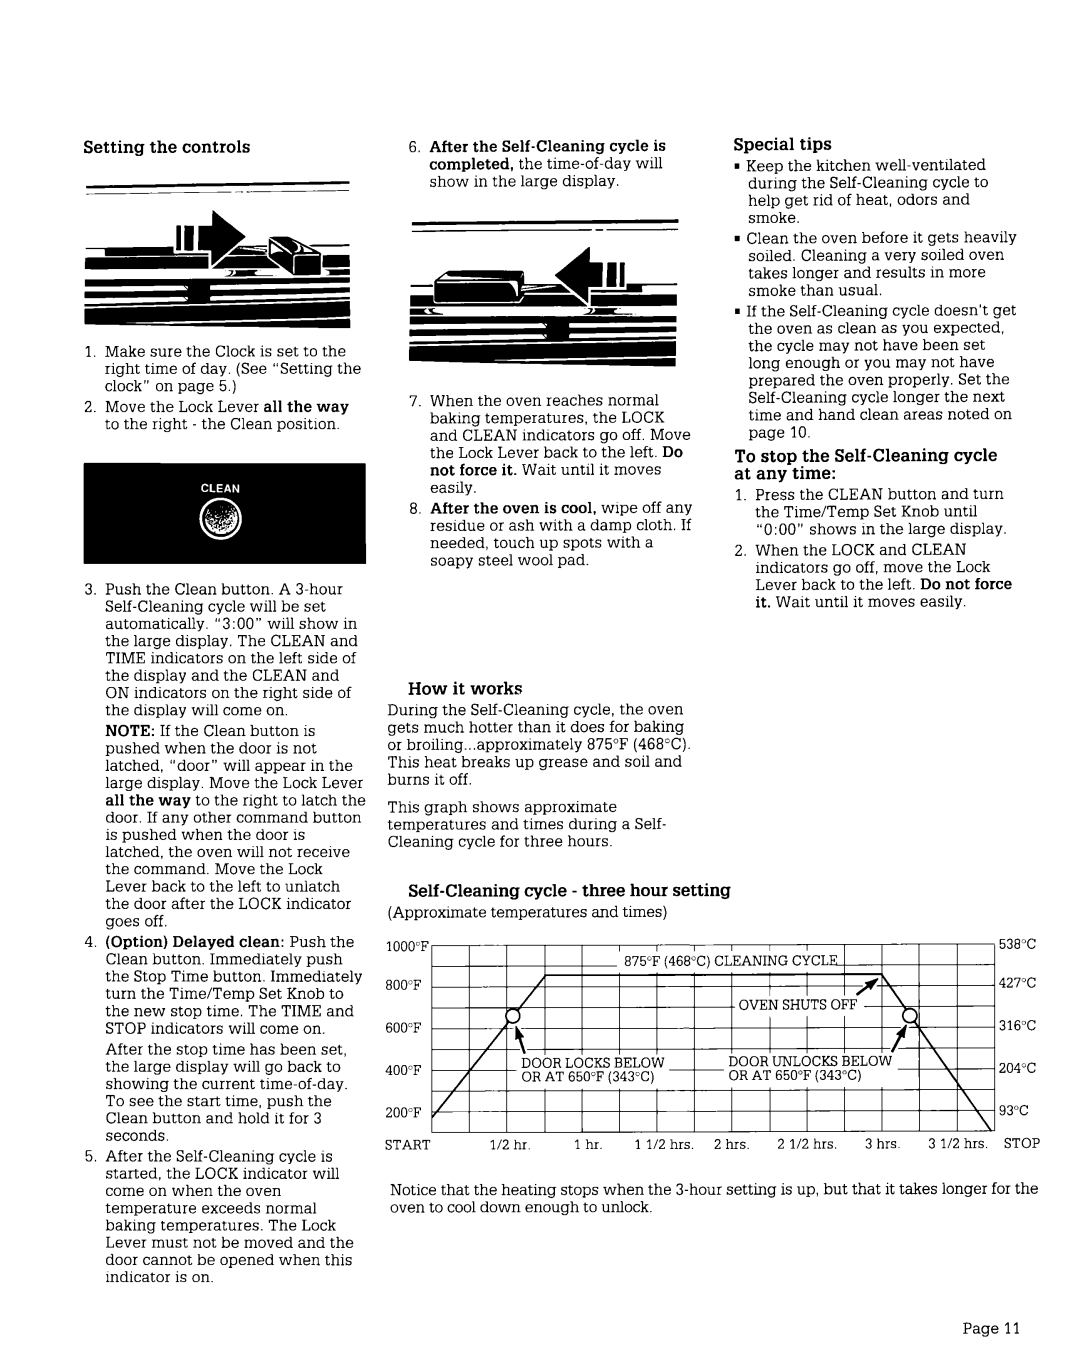
This graph shows approximate temperatures and times during a Self- Cleaning cycle for three hours.
Self-Cleaning cycle - three hour setting
(Approximate temperatures and times)
1000°F |
|
|
|
|
| 538°C |
800°F |
|
|
|
|
| 427°C |
600°F |
|
|
|
|
| 316°C |
400°F |
|
|
|
|
| 204°C |
200°F |
|
|
|
|
| 93°C |
START | l/2 hr. | 1 hr. | 1 l/2 hrs. 2 hrs. | 2 l/2 hrs. | 3 hrs. | 3 l/2 hrs. STOP |
Notice that the heating stops when the
Page 11