Door Reversal (optional)

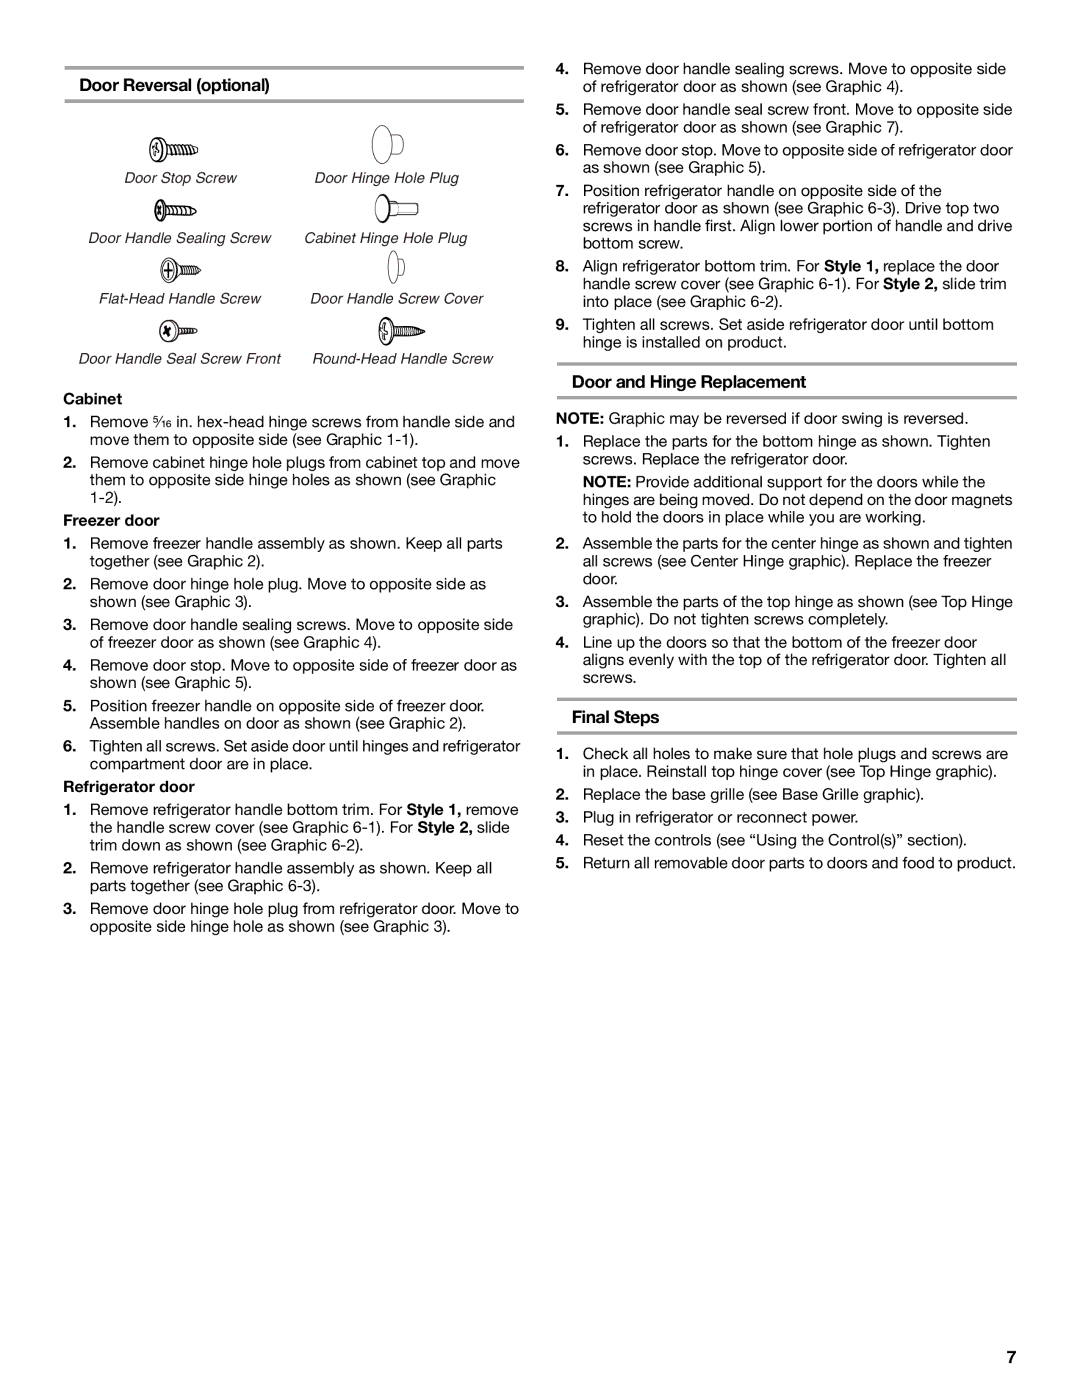
Door Stop Screw

Door Hinge Hole Plug

Door Handle Sealing Screw

Cabinet Hinge Hole Plug

Flat-Head Handle Screw

Door Handle Screw Cover

Door Handle Seal Screw Front

Round-Head Handle Screw

Cabinet

1.Remove ⁵⁄₁₆ in. hex-head hinge screws from handle side and move them to opposite side (see Graphic 1-1).

2.Remove cabinet hinge hole plugs from cabinet top and move them to opposite side hinge holes as shown (see Graphic 1-2).

Freezer door

1.Remove freezer handle assembly as shown. Keep all parts together (see Graphic 2).

2.Remove door hinge hole plug. Move to opposite side as shown (see Graphic 3).

3.Remove door handle sealing screws. Move to opposite side of freezer door as shown (see Graphic 4).

4.Remove door stop. Move to opposite side of freezer door as shown (see Graphic 5).

5.Position freezer handle on opposite side of freezer door. Assemble handles on door as shown (see Graphic 2).

6.Tighten all screws. Set aside door until hinges and refrigerator compartment door are in place.

Refrigerator door

1.Remove refrigerator handle bottom trim. For Style 1, remove the handle screw cover (see Graphic 6-1). For Style 2, slide trim down as shown (see Graphic 6-2).

2.Remove refrigerator handle assembly as shown. Keep all parts together (see Graphic 6-3).

3.Remove door hinge hole plug from refrigerator door. Move to opposite side hinge hole as shown (see Graphic 3).

4.Remove door handle sealing screws. Move to opposite side of refrigerator door as shown (see Graphic 4).

5.Remove door handle seal screw front. Move to opposite side of refrigerator door as shown (see Graphic 7).

6.Remove door stop. Move to opposite side of refrigerator door as shown (see Graphic 5).

7.Position refrigerator handle on opposite side of the refrigerator door as shown (see Graphic 6-3). Drive top two screws in handle first. Align lower portion of handle and drive bottom screw.

8.Align refrigerator bottom trim. For Style 1, replace the door handle screw cover (see Graphic 6-1). For Style 2, slide trim into place (see Graphic 6-2).

9.Tighten all screws. Set aside refrigerator door until bottom hinge is installed on product.

Door and Hinge Replacement

NOTE: Graphic may be reversed if door swing is reversed.

1.Replace the parts for the bottom hinge as shown. Tighten screws. Replace the refrigerator door.

NOTE: Provide additional support for the doors while the hinges are being moved. Do not depend on the door magnets to hold the doors in place while you are working.

2.Assemble the parts for the center hinge as shown and tighten all screws (see Center Hinge graphic). Replace the freezer door.

3.Assemble the parts of the top hinge as shown (see Top Hinge graphic). Do not tighten screws completely.

4.Line up the doors so that the bottom of the freezer door aligns evenly with the top of the refrigerator door. Tighten all screws.

Final Steps

1.Check all holes to make sure that hole plugs and screws are in place. Reinstall top hinge cover (see Top Hinge graphic).

2.Replace the base grille (see Base Grille graphic).

3.Plug in refrigerator or reconnect power.

4.Reset the controls (see “Using the Control(s)” section).

5.Return all removable door parts to doors and food to product.

7

Page 7
Image 7
Whirlpool RT21LMXKQ00 manual Door Reversal optional, Door and Hinge Replacement, Final Steps

RT21LMXKQ00 specifications

The Whirlpool RT21LMXKQ00 is a versatile and efficient refrigerator designed to meet the needs of modern households. With its sleek exterior and user-friendly features, this refrigerator stands out as a reliable kitchen appliance.

One of the most notable features of the Whirlpool RT21LMXKQ00 is its generous storage capacity. With 21 cubic feet of space, it offers ample room for groceries, beverages, and leftovers, making it ideal for families and individuals alike. The adjustable shelves allow users to customize their storage layout, accommodating items of various sizes while maximizing the available space.

The refrigerator is equipped with a frost-free defrost system, eliminating the need for manual defrosting and ensuring consistent temperature maintenance. This technology helps keep food fresh while reducing the risk of freezer burn, providing peace of mind for users.

Energy efficiency is another key aspect of the Whirlpool RT21LMXKQ00. It features an ENERGY STAR certification, meaning it meets stringent energy consumption standards. This not only helps save on electricity bills but also contributes to a more sustainable environment.

The interior is designed with convenience in mind. It includes spill-proof glass shelves that prevent messes from spreading and ensure easy cleanup. Additionally, the crisper bins are designed to keep fruits and vegetables fresh by controlling humidity levels, further enhancing food preservation.

Another significant characteristic of this refrigerator is its temperature management system. The interior temperature can be easily adjusted to suit various food storage needs, ensuring that everything from dairy products to meats is kept at the optimal temperature for freshness.

The Whirlpool RT21LMXKQ00 also features a sophisticated door seal system that helps maintain internal temperatures. The well-insulated design prevents cold air from escaping, which is essential for energy efficiency and food safety.

Overall, the Whirlpool RT21LMXKQ00 is a well-rounded refrigerator that combines modern design with practicality. Its spacious interior, energy-saving features, and advanced food preservation technologies make it a smart choice for any kitchen. Whether you are restocking groceries or organizing leftover meals, this refrigerator provides the flexibility and reliability that today’s consumers expect.