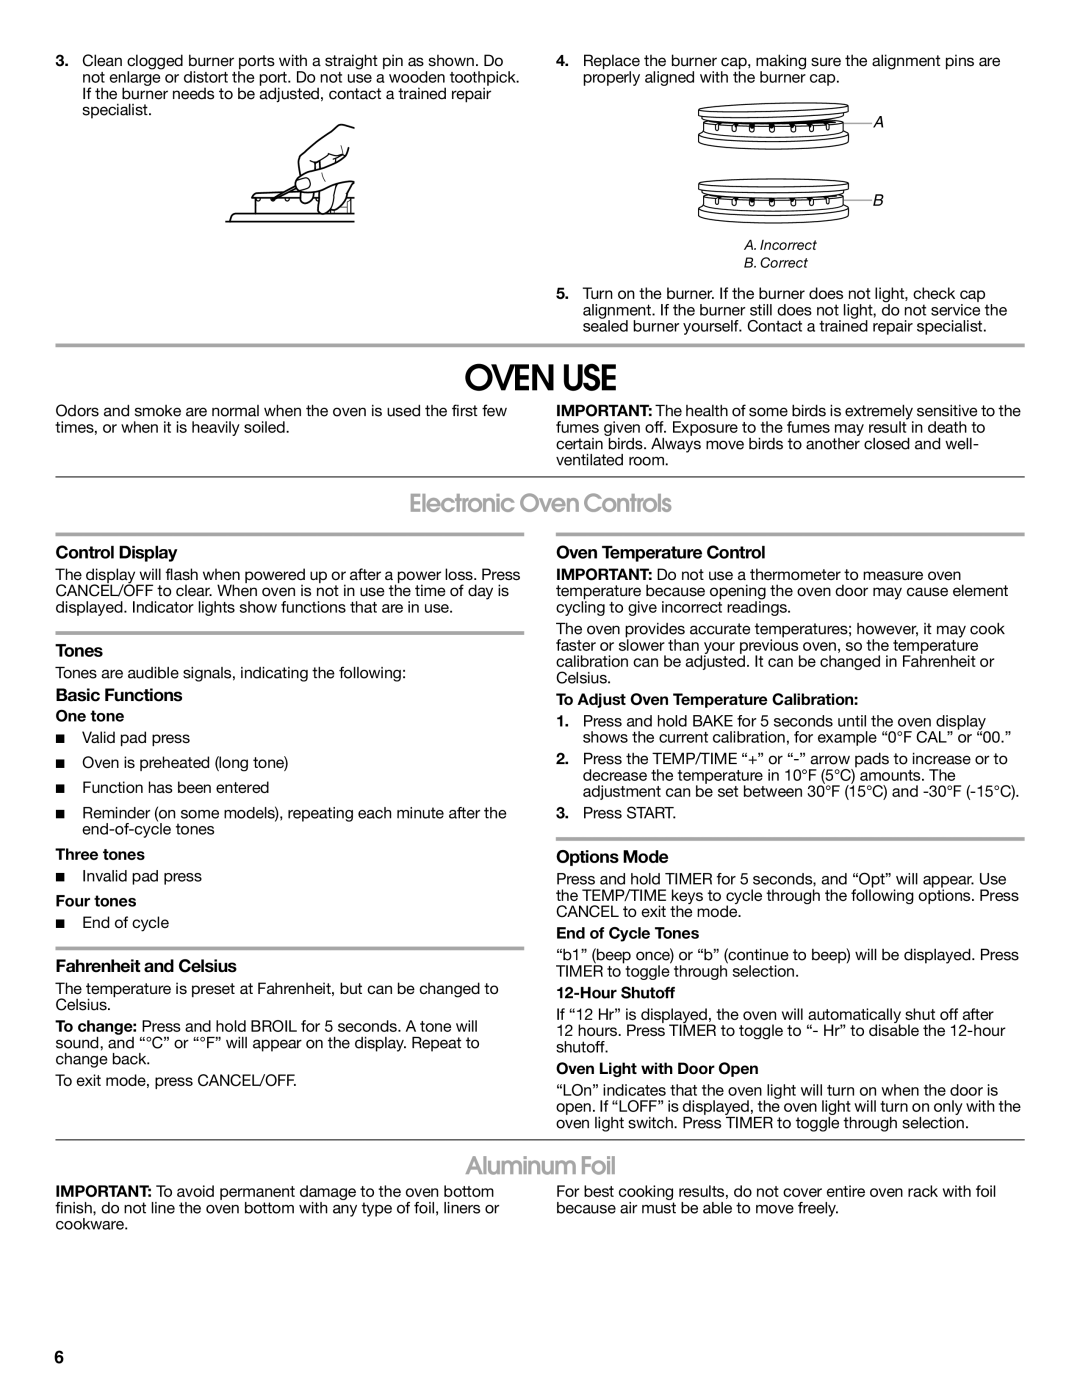
3.Clean clogged burner ports with a straight pin as shown. Do not enlarge or distort the port. Do not use a wooden toothpick. If the burner needs to be adjusted, contact a trained repair specialist.

4.Replace the burner cap, making sure the alignment pins are properly aligned with the burner cap.

A

B

A.Incorrect

B.Correct

5.Turn on the burner. If the burner does not light, check cap alignment. If the burner still does not light, do not service the sealed burner yourself. Contact a trained repair specialist.

OVEN USE

Odors and smoke are normal when the oven is used the first few times, or when it is heavily soiled.

IMPORTANT: The health of some birds is extremely sensitive to the fumes given off. Exposure to the fumes may result in death to certain birds. Always move birds to another closed and well- ventilated room.

Electronic Oven Controls

Control Display

The display will flash when powered up or after a power loss. Press CANCEL/OFF to clear. When oven is not in use the time of day is displayed. Indicator lights show functions that are in use.

Tones

Tones are audible signals, indicating the following:

Basic Functions

One tone

Valid pad press

Oven is preheated (long tone)

Function has been entered

Reminder (on some models), repeating each minute after the end-of-cycle tones

Three tones

Invalid pad press

Four tones

End of cycle

Fahrenheit and Celsius

The temperature is preset at Fahrenheit, but can be changed to Celsius.

To change: Press and hold BROIL for 5 seconds. A tone will sound, and “°C” or “°F” will appear on the display. Repeat to change back.

To exit mode, press CANCEL/OFF.

Oven Temperature Control

IMPORTANT: Do not use a thermometer to measure oven temperature because opening the oven door may cause element cycling to give incorrect readings.

The oven provides accurate temperatures; however, it may cook faster or slower than your previous oven, so the temperature calibration can be adjusted. It can be changed in Fahrenheit or Celsius.

To Adjust Oven Temperature Calibration:

1.Press and hold BAKE for 5 seconds until the oven display shows the current calibration, for example “0°F CAL” or “00.”

2.Press the TEMP/TIME “+” or “-” arrow pads to increase or to decrease the temperature in 10°F (5°C) amounts. The adjustment can be set between 30°F (15°C) and -30°F (-15°C).

3.Press START.

Options Mode

Press and hold TIMER for 5 seconds, and “Opt” will appear. Use the TEMP/TIME keys to cycle through the following options. Press CANCEL to exit the mode.

End of Cycle Tones

“b1” (beep once) or “b” (continue to beep) will be displayed. Press TIMER to toggle through selection.

12-Hour Shutoff

If “12 Hr” is displayed, the oven will automatically shut off after 12 hours. Press TIMER to toggle to “- Hr” to disable the 12-hour shutoff.

Oven Light with Door Open

“LOn” indicates that the oven light will turn on when the door is open. If “LOFF” is displayed, the oven light will turn on only with the oven light switch. Press TIMER to toggle through selection.

Aluminum Foil

IMPORTANT: To avoid permanent damage to the oven bottom finish, do not line the oven bottom with any type of foil, liners or cookware.

For best cooking results, do not cover entire oven rack with foil because air must be able to move freely.

6

Page 6
Image 6
Whirlpool W10204511A, W10204320B warranty Oven USE, Electronic Oven Controls, Aluminum Foil

W10204320B, W10204511A specifications

The Whirlpool W10204511A and W10204320B are essential components in the realm of home appliance maintenance, designed to enhance the performance and efficiency of various Whirlpool washing machines and dishwashers. These parts are not merely accessories; they are integral to the optimal functioning of these appliances, ensuring longevity and reliability.

The W10204511A model is primarily known for its role as a washer drain pump. This pump is responsible for removing water from the washing machine’s drum after the wash and rinse cycles. Its robust design allows for efficient water extraction, which is critical for preventing water buildup and ensuring that clothing is properly washed. This can lead to better cleaning results and can also protect the machine from potential water damage over time. The durability of the pump is a crucial characteristic, as it is subjected to the rigors of regular use, making it essential for users who rely on their washing machines for consistently clean laundry.

On the other hand, the W10204320B model serves as a vital component for various Whirlpool dishwashers. Specifically, it functions as a wash impeller, which is responsible for directing water throughout the dishwasher during the wash cycle. This part is critical in ensuring that water reaches all areas of the dishwasher, providing powerful and effective cleaning for dishes, pots, and pans. Its innovative design helps enhance cleaning performance, allowing users to enjoy sparkling clean dishes after every cycle.

Both models showcase Whirlpool’s commitment to quality and performance. They are built with high-quality materials that support long-term use, minimizing the chances of wear and tear. Furthermore, these components are designed for easy installation, allowing homeowners to carry out repairs without needing professional assistance. This user-friendliness is an important feature that reflects Whirlpool’s understanding of customer needs.

In summary, the Whirlpool W10204511A and W10204320B represent the brand's dedication to producing parts that enhance appliance functionality. Their main features include high durability, efficient operation, and ease of installation, making them ideal choices for anyone looking to maintain or improve their Whirlpool appliances. Whether it's the efficient drainage of the washer or the effective washing of dishes, these components play a vital role in everyday home maintenance.