Water Pressure

A cold water supply with water pressure of between 30 and 120 psi (207 and 827 kPa) is required to operate the water dispenser and ice maker. If you have questions about your water pressure, call a licensed, qualified plumber.

Reverse Osmosis Water Supply

IMPORTANT: The pressure of the water supply coming out of a reverse osmosis system going to the water inlet valve of the refrigerator needs to be between 30 and 120 psi (207 and

827 kPa).

If a reverse osmosis water filtration system is connected to your cold water supply, the water pressure to the reverse osmosis system needs to be a minimum of 40 to 60 psi (276 to 414 kPa).

If the water pressure to the reverse osmosis system is less than

40 to 60 psi (276 to 414 kPa):

Check to see whether the sediment filter in the reverse osmosis system is blocked. Replace the filter if necessary.

Allow the storage tank on the reverse osmosis system to refill after heavy usage.

If your refrigerator has a water filter, it may further reduce the water pressure when used in conjunction with a reverse osmosis system. Remove the water filter. See “Water Filtration System.”

If you have questions about your water pressure, call a licensed, qualified plumber.

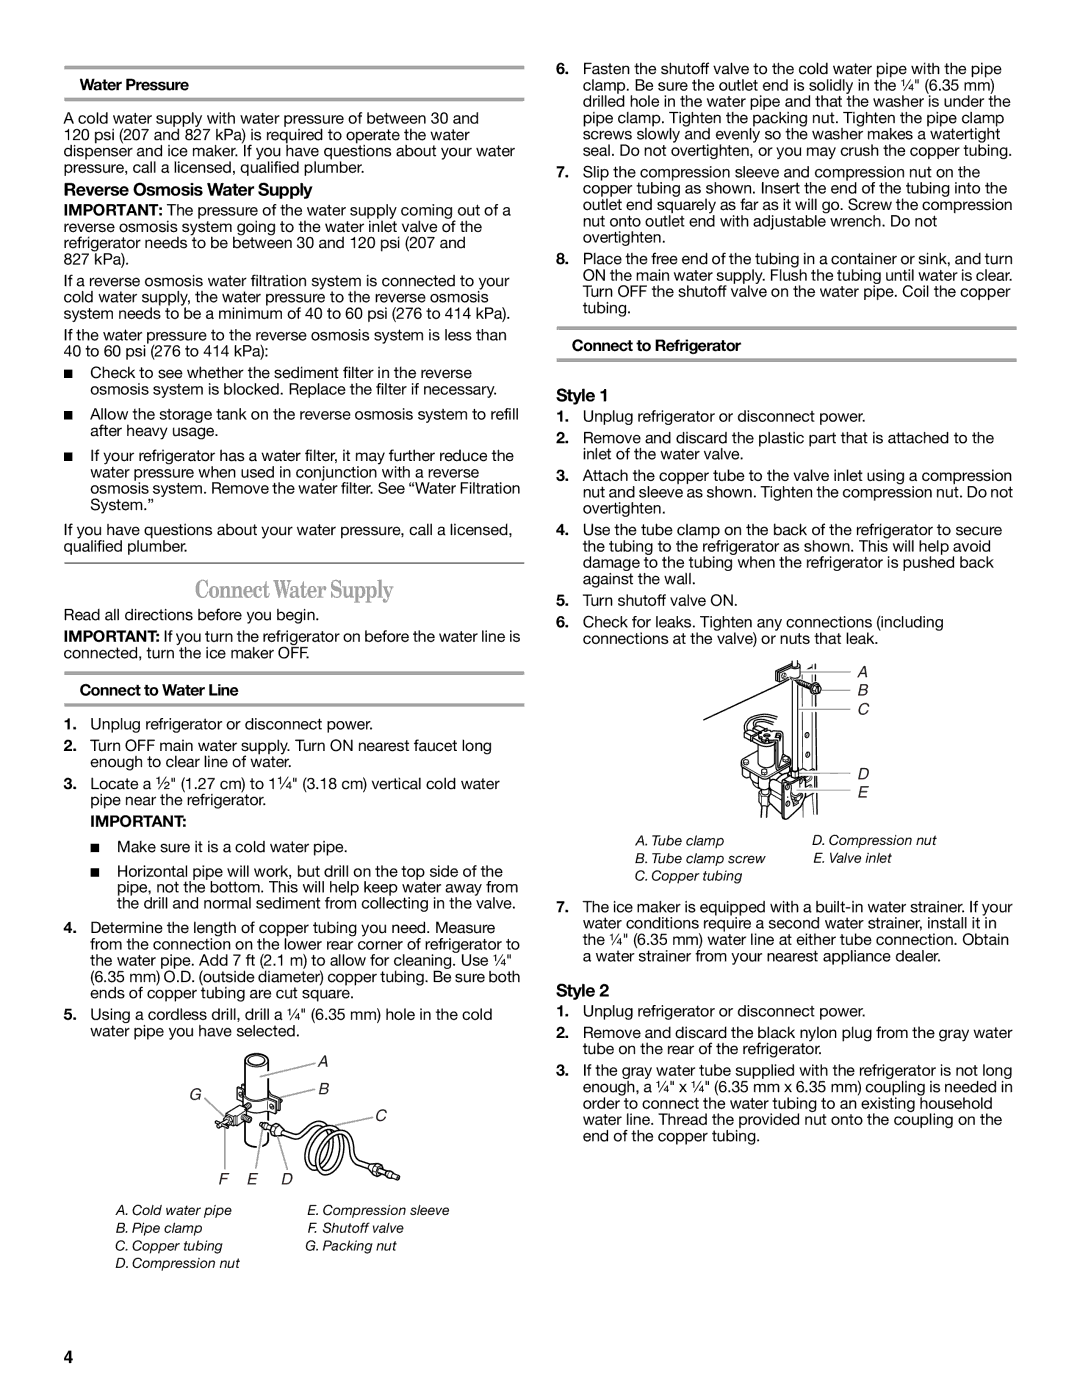
Connect Water Supply

Read all directions before you begin.

IMPORTANT: If you turn the refrigerator on before the water line is connected, turn the ice maker OFF.

Connect to Water Line

1.Unplug refrigerator or disconnect power.

2.Turn OFF main water supply. Turn ON nearest faucet long enough to clear line of water.

3.Locate a ¹⁄₂" (1.27 cm) to 1¹⁄₄" (3.18 cm) vertical cold water pipe near the refrigerator.

IMPORTANT:

Make sure it is a cold water pipe.

Horizontal pipe will work, but drill on the top side of the pipe, not the bottom. This will help keep water away from the drill and normal sediment from collecting in the valve.

4.Determine the length of copper tubing you need. Measure from the connection on the lower rear corner of refrigerator to the water pipe. Add 7 ft (2.1 m) to allow for cleaning. Use ¹⁄₄" (6.35 mm) O.D. (outside diameter) copper tubing. Be sure both ends of copper tubing are cut square.

5.Using a cordless drill, drill a ¹⁄₄" (6.35 mm) hole in the cold water pipe you have selected.


A

G

B


C

F E

D

A. Cold water pipe

E. Compression sleeve

B. Pipe clamp

F. Shutoff valve

C. Copper tubing

G. Packing nut

D. Compression nut


6.Fasten the shutoff valve to the cold water pipe with the pipe clamp. Be sure the outlet end is solidly in the ¹⁄₄" (6.35 mm) drilled hole in the water pipe and that the washer is under the pipe clamp. Tighten the packing nut. Tighten the pipe clamp screws slowly and evenly so the washer makes a watertight seal. Do not overtighten, or you may crush the copper tubing.

7.Slip the compression sleeve and compression nut on the copper tubing as shown. Insert the end of the tubing into the outlet end squarely as far as it will go. Screw the compression nut onto outlet end with adjustable wrench. Do not overtighten.

8.Place the free end of the tubing in a container or sink, and turn ON the main water supply. Flush the tubing until water is clear. Turn OFF the shutoff valve on the water pipe. Coil the copper tubing.

Connect to Refrigerator

Style 1

1.Unplug refrigerator or disconnect power.

2.Remove and discard the plastic part that is attached to the inlet of the water valve.

3.Attach the copper tube to the valve inlet using a compression nut and sleeve as shown. Tighten the compression nut. Do not overtighten.

4.Use the tube clamp on the back of the refrigerator to secure the tubing to the refrigerator as shown. This will help avoid damage to the tubing when the refrigerator is pushed back against the wall.

5.Turn shutoff valve ON.

6.Check for leaks. Tighten any connections (including connections at the valve) or nuts that leak.


A


B


C


D


E

A. Tube clamp

D. Compression nut

B. Tube clamp screw

E. Valve inlet

C. Copper tubing


7.The ice maker is equipped with a built-in water strainer. If your water conditions require a second water strainer, install it in the ¹⁄₄" (6.35 mm) water line at either tube connection. Obtain a water strainer from your nearest appliance dealer.

Style 2

1.Unplug refrigerator or disconnect power.

2.Remove and discard the black nylon plug from the gray water tube on the rear of the refrigerator.

3.If the gray water tube supplied with the refrigerator is not long enough, a ¹⁄₄" x ¹⁄₄" (6.35 mm x 6.35 mm) coupling is needed in order to connect the water tubing to an existing household water line. Thread the provided nut onto the coupling on the end of the copper tubing.

4

Page 4
Image 4
Whirlpool W10346247A installation instructions Connect Water Supply, Reverse Osmosis Water Supply, Style

W10346247A specifications

The Whirlpool W10346247A is a high-efficiency dishwasher designed to enhance the laundry experience while integrating seamlessly into contemporary kitchens. This model stands out due to its impressive blend of cutting-edge technologies and user-friendly features.

One of its key features is the Sensor Cycle, which automatically detects the soil level of the dishes and adjusts the wash cycle accordingly. This ensures optimal cleaning performance while conserving water and energy, making it an eco-friendly choice for households aiming to reduce their environmental footprint.

Another significant highlight is the SoilSensor technology. By using advanced sensors, the dishwasher can monitor the dirtiness of the water, adjusting wash times and cycles to ensure that even the toughest stains are effectively removed. This provides peace of mind, knowing that wash cycles are tailored to the amount of grime present on the dishes.

The W10346247A also boasts a stainless steel interior, which not only ensures durability and longevity but also helps with superior drying performance. The stainless steel material is resistant to staining and odors, contributing to an overall hygienic environment.

For those who value versatility, the dishwasher features adjustable upper racks, allowing users to customize the interior space to accommodate larger pots and pans. This flexibility ensures that no dish is left unwashed, catering to all dining needs, from casual meals to elaborate gatherings.

Additionally, this model is equipped with a Quiet Wash System, which operates at lower decibel levels. This means that dishes can be cleaned effectively without disturbing the home environment, making it suitable for open-concept living spaces.

The Whirlpool W10346247A also integrates a high-efficiency filtration system to ensure that food particles are effectively removed from the wash water, thus enhancing the cleaning efficacy and extending the machine's lifespan.

Overall, the Whirlpool W10346247A stands out as an efficient, versatile, and quiet dishwasher that incorporates innovative features to meet the demands of modern kitchens. With its advanced technologies and practical design, it successfully combines performance and convenience, making it a valuable addition to any household.