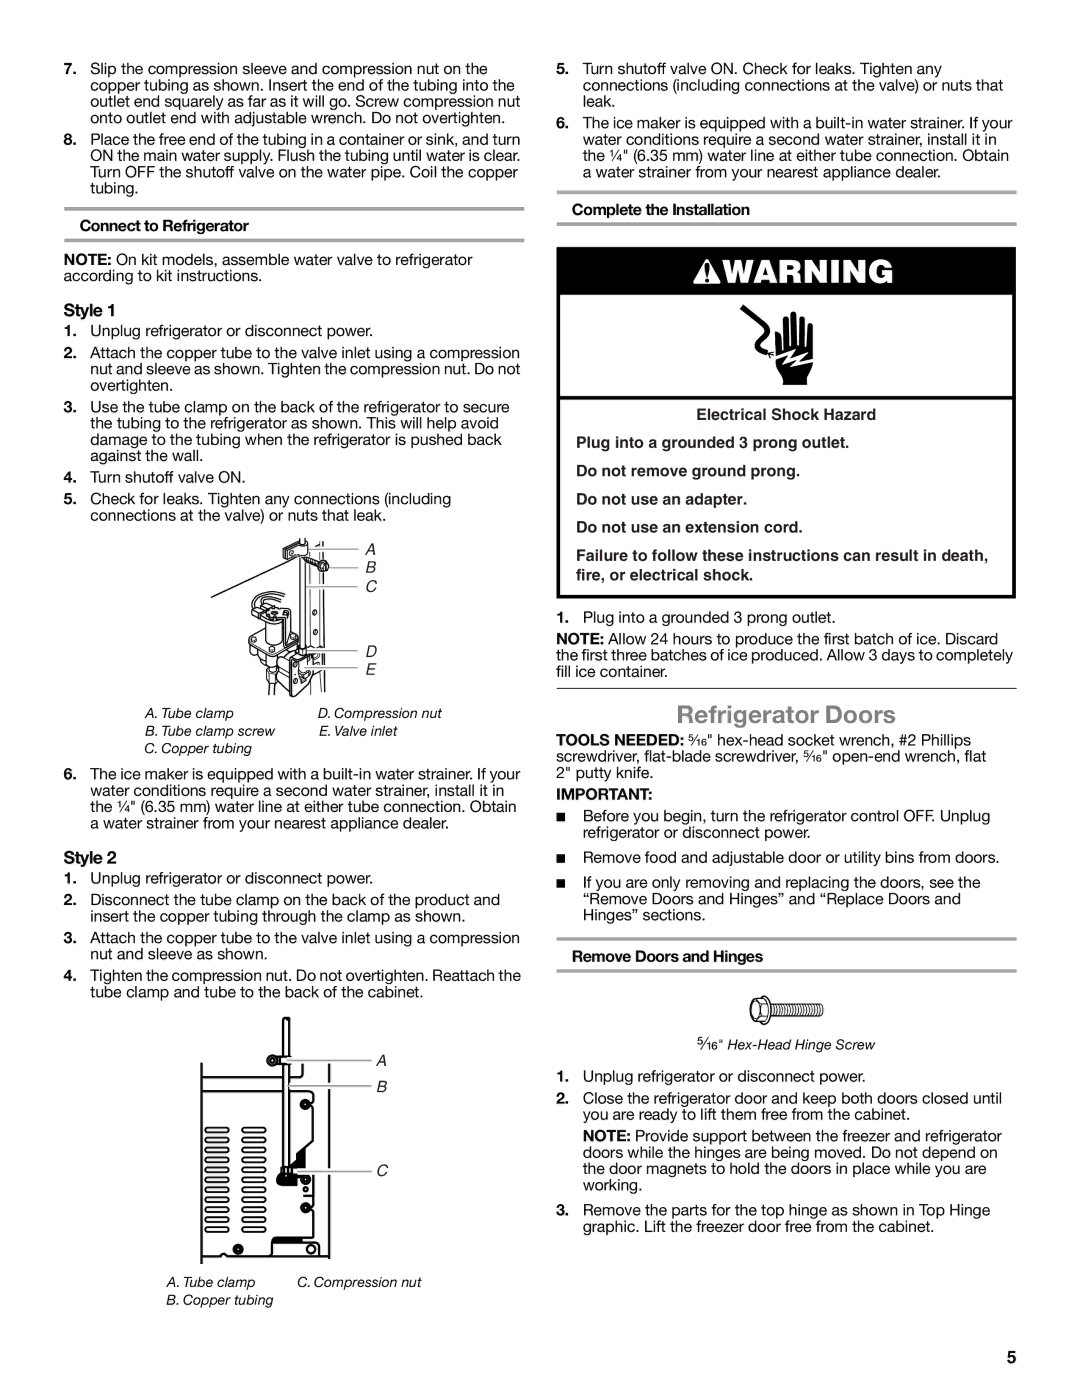
7.Slip the compression sleeve and compression nut on the copper tubing as shown. Insert the end of the tubing into the outlet end squarely as far as it will go. Screw compression nut onto outlet end with adjustable wrench. Do not overtighten.

8.Place the free end of the tubing in a container or sink, and turn ON the main water supply. Flush the tubing until water is clear. Turn OFF the shutoff valve on the water pipe. Coil the copper tubing.

Connect to Refrigerator

NOTE: On kit models, assemble water valve to refrigerator according to kit instructions.

Style 1

1.Unplug refrigerator or disconnect power.

2.Attach the copper tube to the valve inlet using a compression nut and sleeve as shown. Tighten the compression nut. Do not overtighten.

3.Use the tube clamp on the back of the refrigerator to secure the tubing to the refrigerator as shown. This will help avoid damage to the tubing when the refrigerator is pushed back against the wall.

4.Turn shutoff valve ON.

5.Check for leaks. Tighten any connections (including connections at the valve) or nuts that leak.


A


B


C


D


E

A. Tube clamp

D. Compression nut

B. Tube clamp screw

E. Valve inlet

C. Copper tubing


6.The ice maker is equipped with a built-in water strainer. If your water conditions require a second water strainer, install it in the ¹⁄₄" (6.35 mm) water line at either tube connection. Obtain a water strainer from your nearest appliance dealer.

Style 2

1.Unplug refrigerator or disconnect power.

2.Disconnect the tube clamp on the back of the product and insert the copper tubing through the clamp as shown.

3.Attach the copper tube to the valve inlet using a compression nut and sleeve as shown.

4.Tighten the compression nut. Do not overtighten. Reattach the tube clamp and tube to the back of the cabinet.

A

B

C

A. Tube clamp

C. Compression nut

B. Copper tubing


5.Turn shutoff valve ON. Check for leaks. Tighten any connections (including connections at the valve) or nuts that leak.

6.The ice maker is equipped with a built-in water strainer. If your water conditions require a second water strainer, install it in the ¹⁄₄" (6.35 mm) water line at either tube connection. Obtain a water strainer from your nearest appliance dealer.

Complete the Installation

WARNING

Electrical Shock Hazard

Plug into a grounded 3 prong outlet.

Do not remove ground prong.

Do not use an adapter.

Do not use an extension cord.

Failure to follow these instructions can result in death, fire, or electrical shock.

1.Plug into a grounded 3 prong outlet.

NOTE: Allow 24 hours to produce the first batch of ice. Discard the first three batches of ice produced. Allow 3 days to completely fill ice container.

Refrigerator Doors

TOOLS NEEDED: ⁵⁄₁₆" hex-head socket wrench, #2 Phillips screwdriver, flat-blade screwdriver, ⁵⁄₁₆" open-end wrench, flat 2" putty knife.

IMPORTANT:

Before you begin, turn the refrigerator control OFF. Unplug refrigerator or disconnect power.

Remove food and adjustable door or utility bins from doors.

If you are only removing and replacing the doors, see the “Remove Doors and Hinges” and “Replace Doors and Hinges” sections.

Remove Doors and Hinges

⁵⁄₁₆" Hex-Head Hinge Screw

1.Unplug refrigerator or disconnect power.

2.Close the refrigerator door and keep both doors closed until you are ready to lift them free from the cabinet.

NOTE: Provide support between the freezer and refrigerator doors while the hinges are being moved. Do not depend on the door magnets to hold the doors in place while you are working.

3.Remove the parts for the top hinge as shown in Top Hinge graphic. Lift the freezer door free from the cabinet.

5

Page 5
Image 5
Whirlpool W10475403A installation instructions Refrigerator Doors, Style, Connect to Refrigerator, Remove Doors and Hinges

W10475403A specifications

The Whirlpool W10475403A is a sophisticated microwave oven that combines modern technology with user-friendly features, designed to enhance culinary experiences in the kitchen. This appliance stands out not only for its sleek design but also for its impressive functionality that caters to various cooking needs.

One of the key features of the W10475403A is its unique sensor cooking technology. This innovative feature adjusts cooking times and power levels automatically based on the moisture released during cooking. By detecting when food is cooked to perfection, it ensures optimal results, preventing overcooking or undercooking, which is a common challenge with conventional microwaves.

The oven boasts multiple cooking presets that simplify meal preparation. These presets allow users to quickly reheat leftovers, defrost frozen foods, and even cook specific dishes with just a touch of a button. This programming capability saves time and provides convenience, making it an ideal choice for busy households.

In terms of capacity, the W10475403A offers ample interior space, allowing users to accommodate a variety of dishes, from large casseroles to popcorn bags. The turntable enhances even cooking by rotating food for consistent heat distribution, ensuring a thorough cooking process.

Cleaning is made easier with the appliance's stainless steel interior, which is not only stylish but also simplifies the wipe-down process. The design minimizes stains and food residue, promoting hygiene in the kitchen.

Noise reduction technology is an additional enhancement that sets this microwave apart. It operates more quietly than traditional models, creating a more pleasant cooking environment without disruptive sounds.

Moreover, the Whirlpool W10475403A is equipped with a child lock feature to ensure safety in homes with young children. This function restricts access to the microwave, preventing accidental operation and ensuring peace of mind for parents.

In summary, the Whirlpool W10475403A is a versatile microwave that includes advanced sensor cooking technology, user-friendly presets, a spacious interior, and easy cleaning features. Its combination of modern conveniences and safety measures makes it an excellent addition to any kitchen, catering to both novice and experienced cooks alike.