SecuretheDrainHose
1.Move the washer/dryer to its final location and remove any cardboard used to move the washer/dryer.
2.Locate the remaining piece of shipping strap. See “Remove Shipping Strap.”
Shipping strap
3.Wrap the drain hose to the laundry tub leg or standpipe with the shipping strap (A or B below). Push fastener into the nearest hole in the shipping strap (see illustration above).
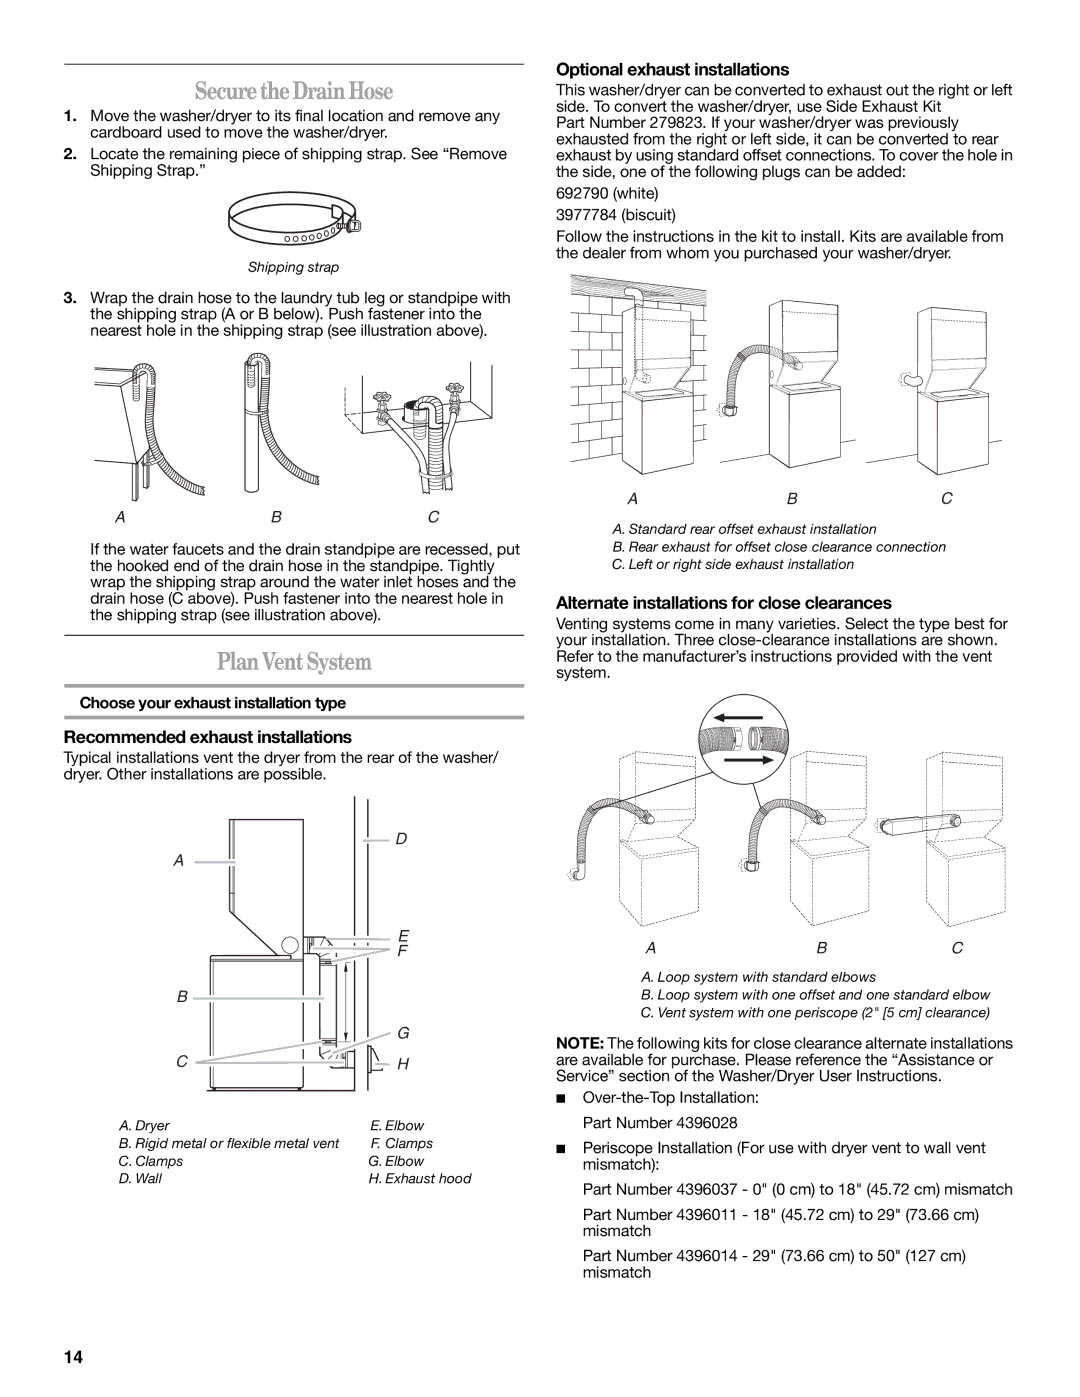
Optional exhaust installations
This washer/dryer can be converted to exhaust out the right or left side. To convert the washer/dryer, use Side Exhaust Kit
Part Number 279823. If your washer/dryer was previously exhausted from the right or left side, it can be converted to rear exhaust by using standard offset connections. To cover the hole in the side, one of the following plugs can be added:
692790 (white)
3977784 (biscuit)
Follow the instructions in the kit to install. Kits are available from the dealer from whom you purchased your washer/dryer.
ABC
If the water faucets and the drain standpipe are recessed, put the hooked end of the drain hose in the standpipe. Tightly wrap the shipping strap around the water inlet hoses and the drain hose (C above). Push fastener into the nearest hole in the shipping strap (see illustration above).
PlanVentSystem
Choose your exhaust installation type
Recommended exhaust installations
Typical installations vent the dryer from the rear of the washer/ dryer. Other installations are possible.
| D |
A |
|
| E |
| F |
B |
|
| G |
C | H |
A. Dryer | E. Elbow |
B. Rigid metal or flexible metal vent | F. Clamps |
C. Clamps | G. Elbow |
D. Wall | H. Exhaust hood |
ABC
A. Standard rear offset exhaust installation
B. Rear exhaust for offset close clearance connection
C. Left or right side exhaust installation
Alternate installations for close clearances
Venting systems come in many varieties. Select the type best for your installation. Three
ABC
A. Loop system with standard elbows
B. Loop system with one offset and one standard elbow C. Vent system with one periscope (2" [5 cm] clearance)
NOTE: The following kits for close clearance alternate installations are available for purchase. Please reference the “Assistance or Service” section of the Washer/Dryer User Instructions.
■
■Periscope Installation (For use with dryer vent to wall vent mismatch):
Part Number 4396037 - 0" (0 cm) to 18" (45.72 cm) mismatch
Part Number 4396011 - 18" (45.72 cm) to 29" (73.66 cm) mismatch
Part Number 4396014 - 29" (73.66 cm) to 50" (127 cm) mismatch
14