
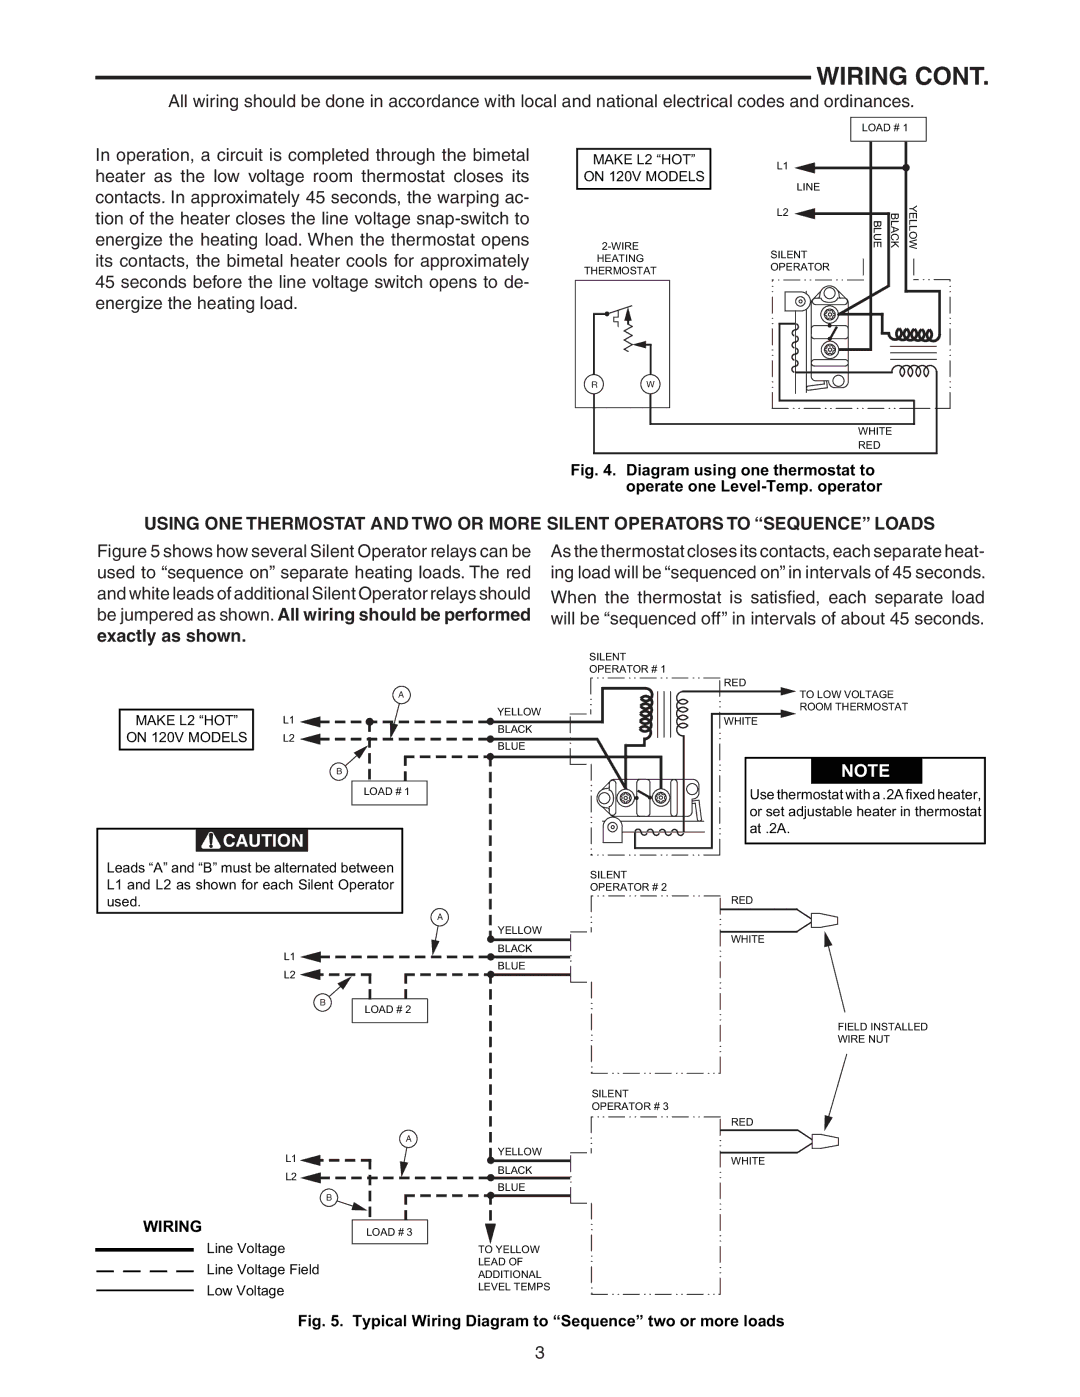
24A07A-1 specifications
The White Rodgers 24A07A-1 is a highly regarded thermostat that integrates advanced technologies to optimize heating and cooling systems in residential and light commercial spaces. This model exemplifies efficiency, user-friendliness, and versatility, making it a popular choice among homeowners and HVAC professionals alike.At the core of the White Rodgers 24A07A-1's appeal is its intuitive interface. The thermostat features a large, easy-to-read LCD display that clearly shows current temperature settings and system modes. Users can navigate settings effortlessly through clearly labeled buttons, allowing for quick adjustments to temperature and scheduling preferences.
One of the standout characteristics of this thermostat is its compatibility with a wide range of heating and cooling systems. It seamlessly works with single-stage heat pumps, central air conditioning, and gas or oil furnaces. This versatility makes it suitable for various home climates and configurations, enhancing its market appeal.
Energy efficiency is a primary focus of the White Rodgers 24A07A-1. The device includes programmable capabilities that allow users to set temperature schedules based on their daily routines. By automatically adjusting temperatures when homes are unoccupied or during nighttime hours, the thermostat helps in significant energy savings and reduces utility costs.
The 24A07A-1 also features advanced temperature sensing technology. Its internal sensor is designed to provide accurate temperature readings, ensuring that the indoor environment remains comfortable and stable. Moreover, this model includes features like a low battery indicator and a simple installation process, easing the burden of setup for users.
A notable aspect of this thermostat is its ability to maintain precise control over indoor humidity levels when connected to compatible systems. By managing humidity, the thermostat not only enhances comfort but also contributes to the overall health of indoor air quality.
In summary, the White Rodgers 24A07A-1 is a sophisticated thermostat that combines user-friendly features with advanced technological innovations. Its compatibility with various HVAC systems, programmable scheduling capabilities, energy efficiency, and precise temperature control make it an excellent choice for anyone looking to enhance their home's climate control system. As homeowners increasingly seek smart solutions for their energy needs, the 24A07A-1 stands out as a reliable and effective option.