FI N D O U T M O R E O N T H E W E B.
W I L B U R C U R TIS . C O M
MODELS INCLUDED
•CAFE 1DB
•CAFE 2DB
•CAFE 3DB
•CAFE AP
•CAFE 2DBS
•CAFE 0PP
CAUTION: Please use this setup
procedure before attempting to use this brewer. Failure to follow the instructions can result in injury or the voiding of the warranty.
WARNING: To avoid scalding, allow brewcone to drain before removing.
WILBUR CURTIS COMPANY, INC.
SERVICE MANUAL - CAFE POUROVER
SETUP STEPS
CAUTION - This brewer is shipped with the thermostat turned ON. DO NOT plug in the power cord until the heating tank has filled with water (see step 4, below); damage to the heating element or thermostatwillresult.
1. Placement of brewer should be on a solid, level counter top, near a 120 VAC outlet
rated at 20 amps.
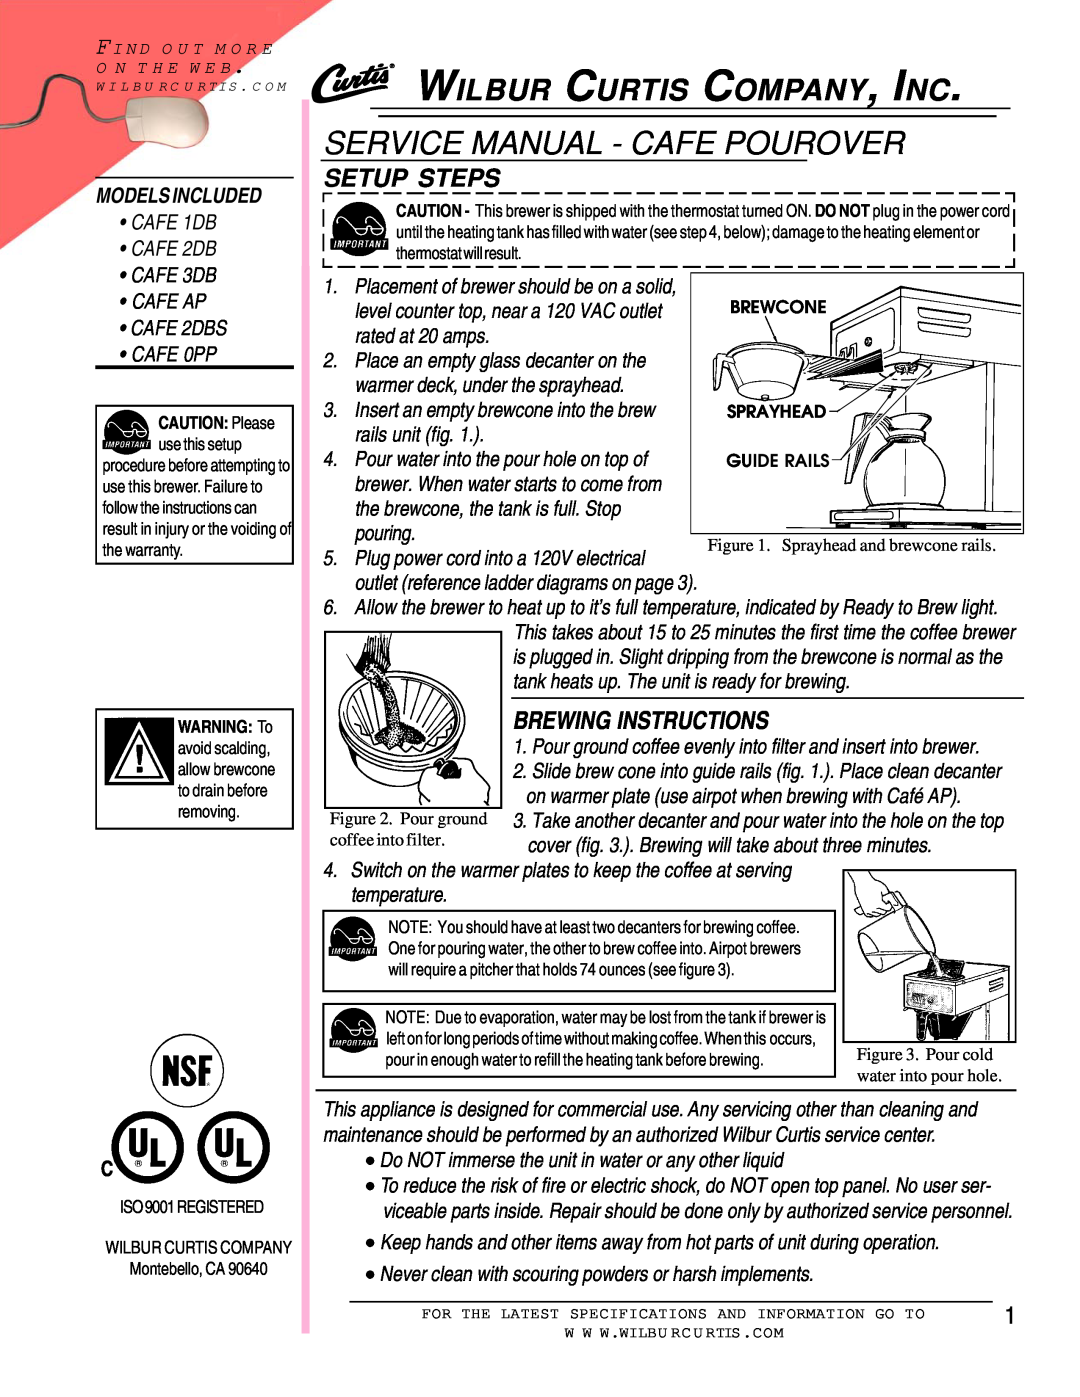
2. Place an empty glass decanter on the warmer deck, under the sprayhead.
3. Insert an empty brewcone into the brew rails unit (fig. 1.).
4. Pour water into the pour hole on top of brewer. When water starts to come from the brewcone, the tank is full. Stop pouring.
5. Plug power cord into a 120V electrical outlet (reference ladder diagrams on page 3).
6. Allow the brewer to heat up to it’s full temperature, indicated by Ready to Brew light. This takes about 15 to 25 minutes the first time the coffee brewer is plugged in. Slight dripping from the brewcone is normal as the tank heats up. The unit is ready for brewing.
BREWING INSTRUCTIONS
1.Pour ground coffee evenly into filter and insert into brewer.
2.Slide brew cone into guide rails (fig. 1.). Place clean decanter on warmer plate (use airpot when brewing with Café AP).
3. Take another decanter and pour water into the hole on the top cover (fig. 3.). Brewing will take about three minutes.
4.Switch on the warmer plates to keep the coffee at serving temperature.
NOTE: You should have at least two decanters for brewing coffee. One for pouring water, the other to brew coffee into. Airpot brewers will require a pitcher that holds 74 ounces (see figure 3).
NOTE: Due to evaporation, water may be lost from the tank if brewer is left on for long periods of time without making coffee. When this occurs, pour in enough water to refill the heating tank before brewing.
Figure 3. Pour cold water into pour hole.
C
ISO9001REGISTERED
WILBUR CURTIS COMPANY
Montebello, CA 90640
This appliance is designed for commercial use. Any servicing other than cleaning and maintenance should be performed by an authorized Wilbur Curtis service center.
•Do NOT immerse the unit in water or any other liquid
•To reduce the risk of fire or electric shock, do NOT open top panel. No user ser- viceable parts inside. Repair should be done only by authorized service personnel.
•Keep hands and other items away from hot parts of unit during operation.
•Never clean with scouring powders or harsh implements.
FOR THE LATEST SPECIFICATIONS AND INFORMATION GO TO | 1 |
W W W.WILBU RC U RTIS .COM |
|