Maintenance

This section provides procedures required to main- tain the belt/disc sander. The numbers in parenthe- ses throughout the manual correspond with reference numbers for parts shown in the exploded views in the Replacement Parts section.

Lubrication

The bearings used in the sanding machine are sealed, pre-lubricated bearing. The bearings do not require periodic lubrication.

Cleaning

Periodically use a vacuum cleaner to remove sanding debris from the machine. In hard to reach areas, brush the debris loose while vacuuming.

Replacing the Sanding Belt

WARNING: DISCONNECT ELECTRICAL POWER TO THE MACHINE BEFORE PERFORMING ANY MAINTENANCE.

1.Disconnect electrical power.

2.Position sanding belt platen (4) in the vertical position. Remove eight screws (97) and guard (96).

3.Remove screw (76) and guard (75).

4.Move tensioning lever (50) downward to slacken sanding belt (79).

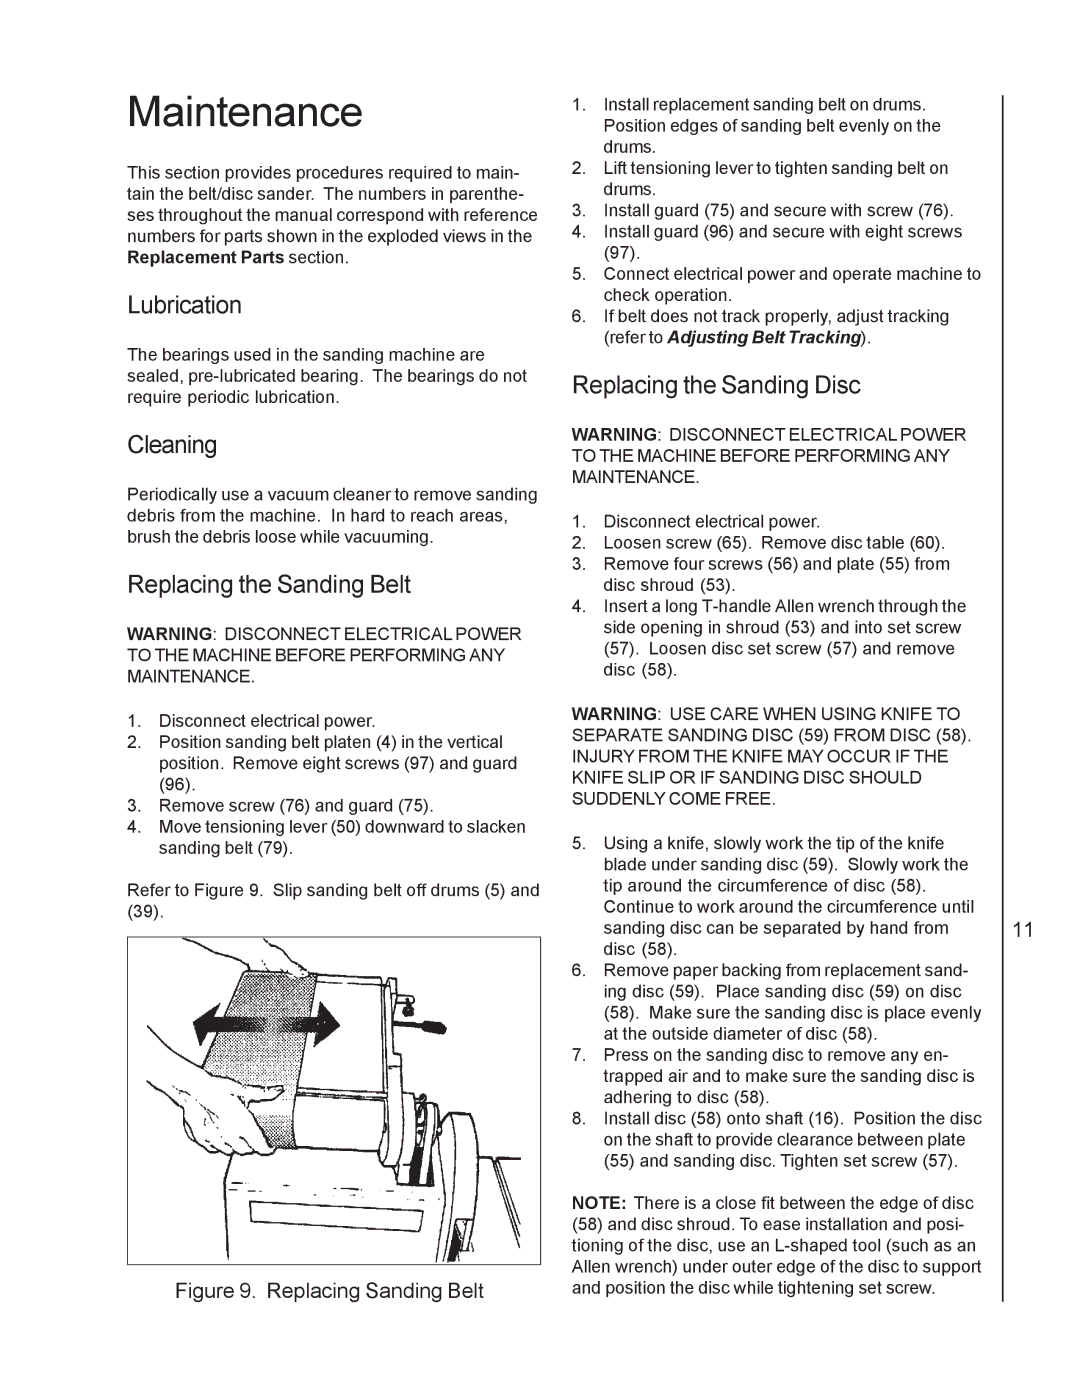
Refer to Figure 9. Slip sanding belt off drums (5) and (39).

Figure 9. Replacing Sanding Belt

1.Install replacement sanding belt on drums. Position edges of sanding belt evenly on the drums.

2.Lift tensioning lever to tighten sanding belt on drums.

3.Install guard (75) and secure with screw (76).

4.Install guard (96) and secure with eight screws (97).

5.Connect electrical power and operate machine to check operation.

6.If belt does not track properly, adjust tracking (refer to Adjusting Belt Tracking).

Replacing the Sanding Disc

WARNING: DISCONNECT ELECTRICAL POWER TO THE MACHINE BEFORE PERFORMING ANY MAINTENANCE.

1.Disconnect electrical power.

2.Loosen screw (65). Remove disc table (60).

3.Remove four screws (56) and plate (55) from disc shroud (53).

4.Insert a long T-handle Allen wrench through the side opening in shroud (53) and into set screw (57). Loosen disc set screw (57) and remove disc (58).

WARNING: USE CARE WHEN USING KNIFE TO SEPARATE SANDING DISC (59) FROM DISC (58).

INJURY FROM THE KNIFE MAY OCCUR IF THE KNIFE SLIP OR IF SANDING DISC SHOULD SUDDENLY COME FREE.

5.Using a knife, slowly work the tip of the knife blade under sanding disc (59). Slowly work the tip around the circumference of disc (58). Continue to work around the circumference until sanding disc can be separated by hand from disc (58).

6.Remove paper backing from replacement sand- ing disc (59). Place sanding disc (59) on disc

(58).Make sure the sanding disc is place evenly at the outside diameter of disc (58).

7.Press on the sanding disc to remove any en- trapped air and to make sure the sanding disc is adhering to disc (58).

8.Install disc (58) onto shaft (16). Position the disc on the shaft to provide clearance between plate

(55)and sanding disc. Tighten set screw (57).

NOTE: There is a close fit between the edge of disc

(58)and disc shroud. To ease installation and posi- tioning of the disc, use an L-shaped tool (such as an Allen wrench) under outer edge of the disc to support and position the disc while tightening set screw.

11

Page 11
Image 11
Wilton 4210 manual Maintenance, Lubrication, Cleaning, Replacing the Sanding Belt, Replacing the Sanding Disc

4210 specifications

The Wilton 4210 is a versatile and robust bench vise designed for a range of clamping and holding applications in workshops, garages, and professional environments. This vise is known for its exceptional strength and durability, making it a trusted tool among hobbyists and professionals alike.

One of the standout features of the Wilton 4210 is its construction. Made from high-quality ductile iron, this vise ensures a strong, resilient body that can withstand heavy use without bending or breaking. The vise's design also includes a precision-ground, hardened steel jaw, which provides superior grip and minimizes wear over time. The jaw opening can accommodate a wide variety of workpieces, up to 10 inches, making it suitable for numerous tasks, whether fitting, shaping, or securing materials.

In terms of technology, the Wilton 4210 incorporates a unique rapid-action feature that allows for quick adjustments. This technology enables users to easily switch between clamping and releasing positions, improving efficiency during work. The vise is equipped with a powerful screw mechanism that facilitates smooth operation, providing a stable and secure hold on items, even under heavy pressure.

Another characteristic that sets the Wilton 4210 apart is its swivel base. The base can rotate a full 360 degrees, allowing users to position their workpiece at any angle for optimal accessibility and convenience. This feature is particularly beneficial for more intricate or precise tasks, as it eliminates the need for constant repositioning of the workpiece.

Additionally, the Wilton 4210's ergonomic design enhances user comfort. The carefully crafted handle provides a secure grip, minimizing hand fatigue during extended use. Its heavy-duty construction also means that it is engineered to resist the wear and tear associated with regular use, promising a long lifespan.

In summary, the Wilton 4210 bench vise is an excellent choice for those seeking reliability and versatility in their tools. With its durable construction, advanced technologies, and user-friendly features, it continues to be a staple in both amateur and professional workshops. Whether tackling metalworking, woodworking, or various DIY tasks, the Wilton 4210 delivers unmatched performance and dependability.